Building a Backyard Greenhouse
I’ve wanted a greenhouse / seedhouse for a long time and a recent move provided the perfect opportunity for me to build one.
I began looking forward to a warm retreat to help ease the late winter doldrums, grow my own flowers and vegetables from seeds, and maybe even have a go at growing my own citrus and mango trees in our cold Utah climate!
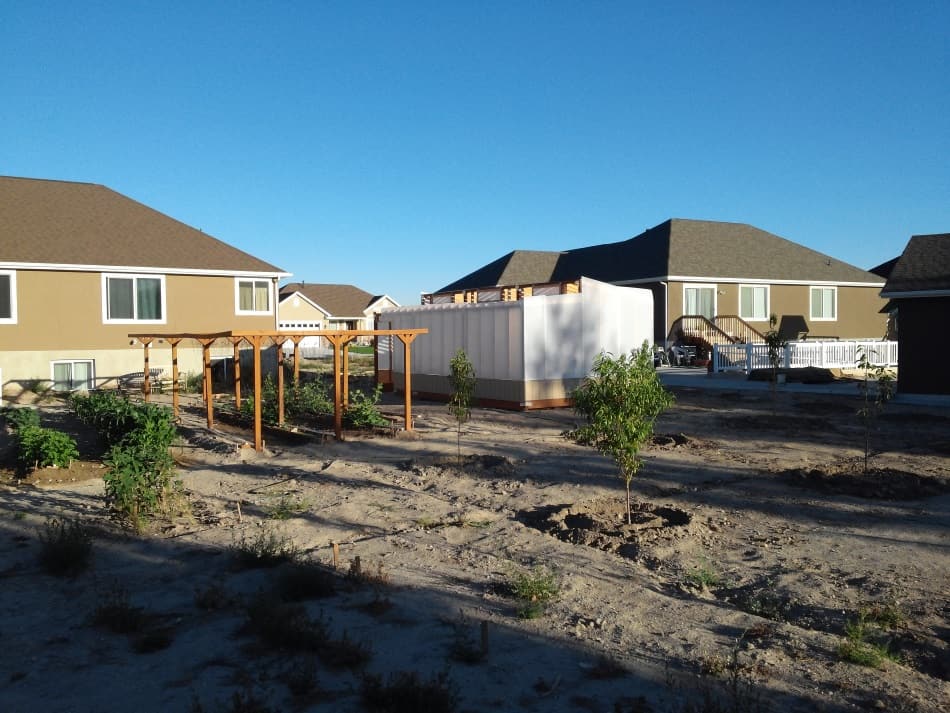
Having a new construction lot gave us a blank slate to work with and allowed us to locate the greenhouse so it
- is feasible to install utilities
- doesn’t shade the vegetable garden
- doesn’t impede traffic flow around the yard and
- is easily accessible year round
– all important points to consider as you evaluate the best location on your property for your own greenhouse.
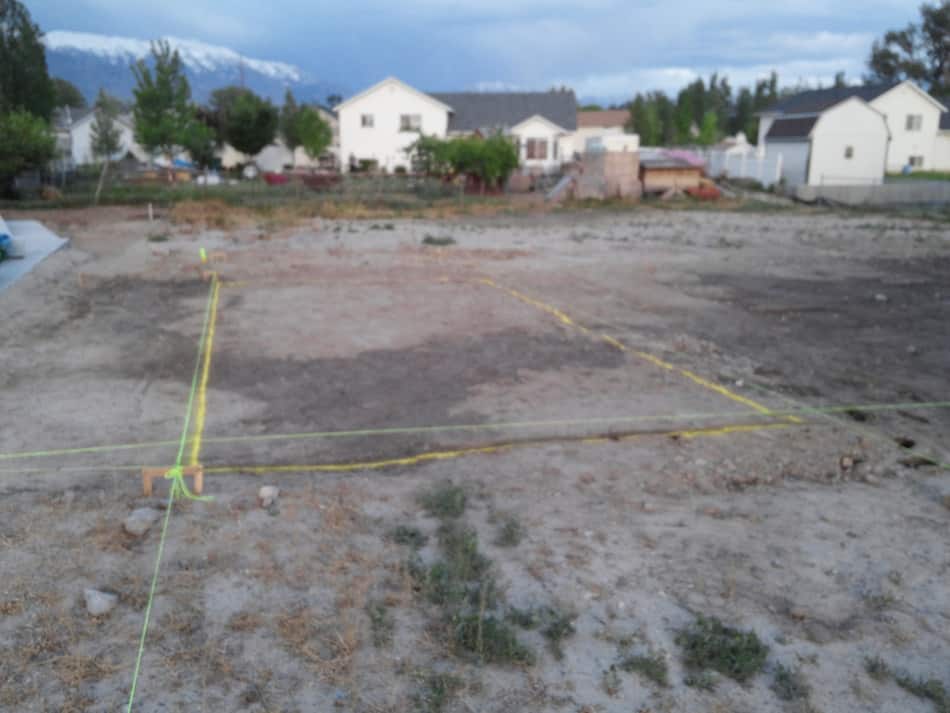
Following the instructions found in the Mittleider garden coursebook we drew up some plans and began working with the city to get the necessary permits for where we live.
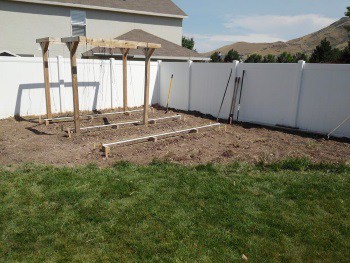
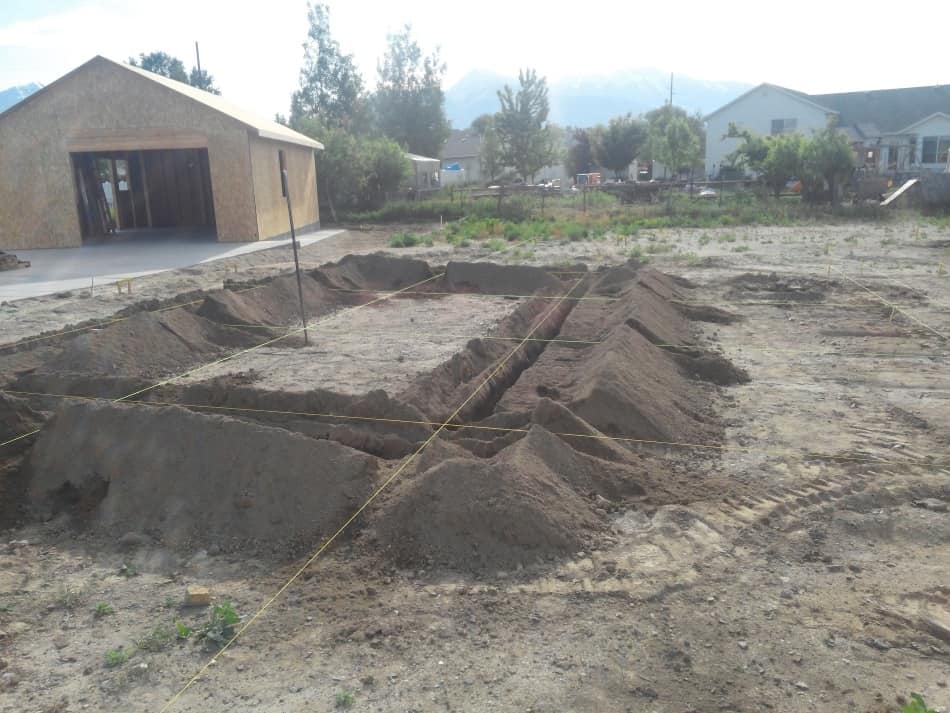
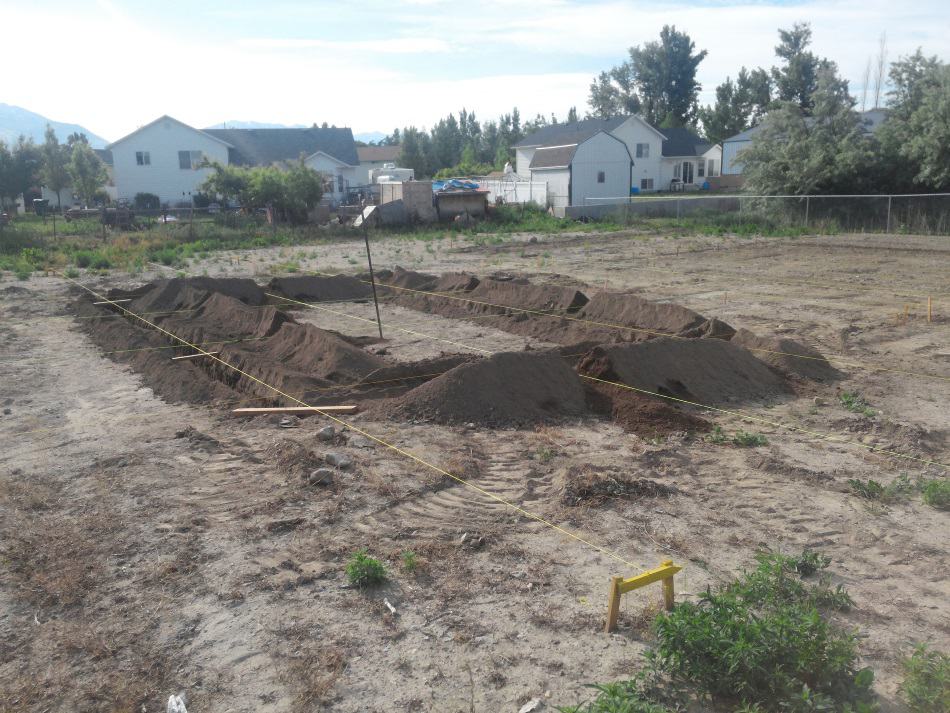
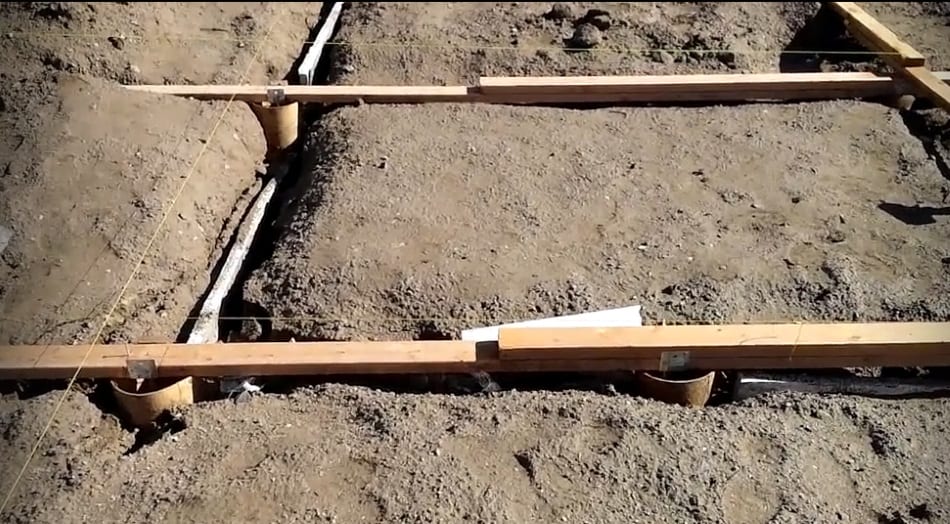
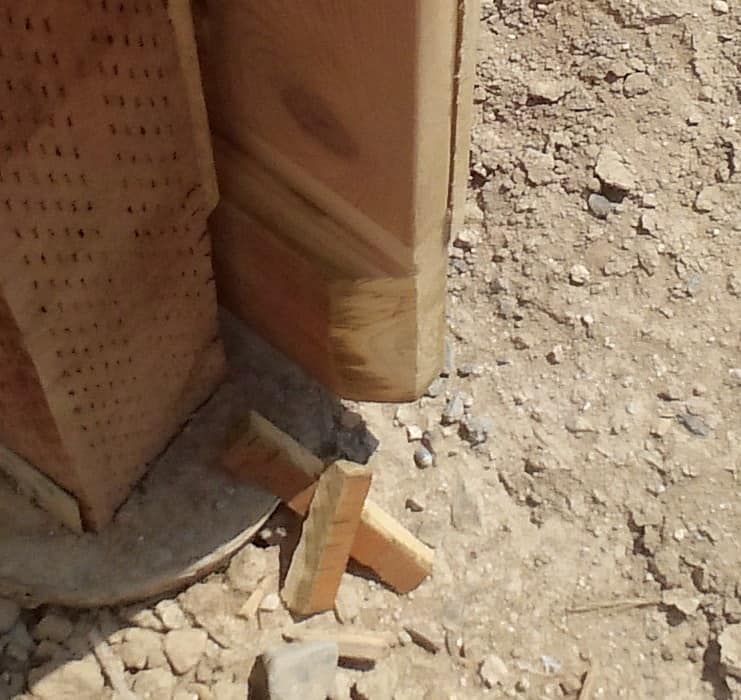
Laying out the greenhouse footings
First the layout – I swear I used Pythagorean’s theorem 100 times in order to get the “foundation” parallel and perpendicular to the house (o.c.d. kicking in).
We trenched the whole perimeter to 3 feet. Our frost line is 30″. I dropped styrofoam insulation into the trench to help keep the thermal mass warm inside.
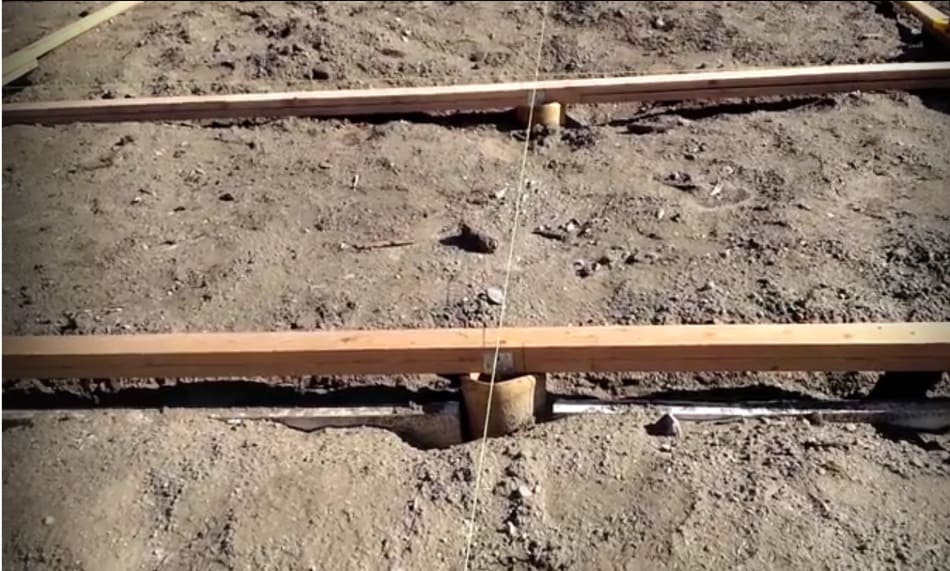
Then I used concrete tubes to pour footers to anchor the posts to. I really took my time with the cement footers to get them all level and in line so as to make building the greenhouse easier!
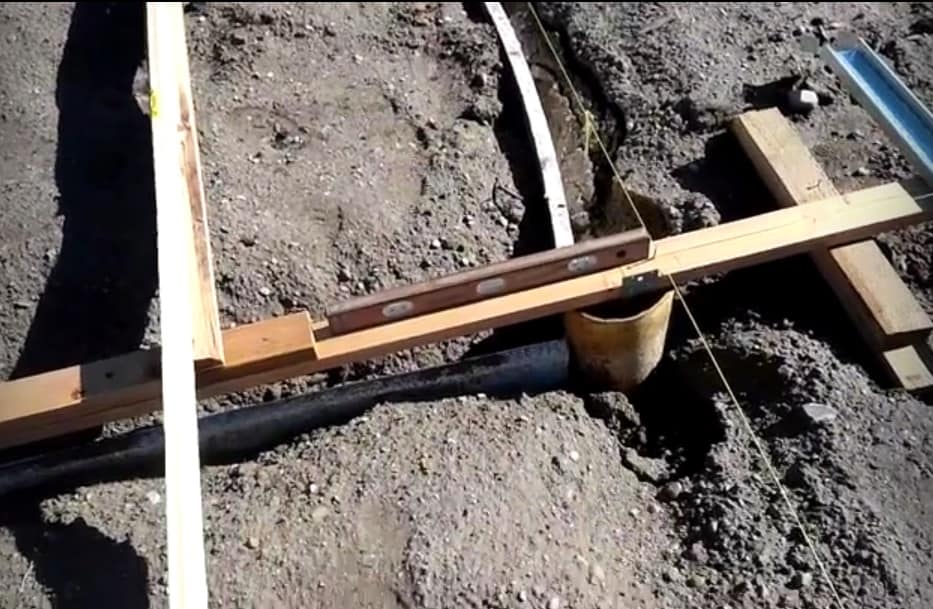
Before I poured the cement, I laid 2×4 lumber across the tops of the tubes, hanging the post anchors from the 2×4 into the center of the tubes – making sure everything was level and in line – worked like a charm!
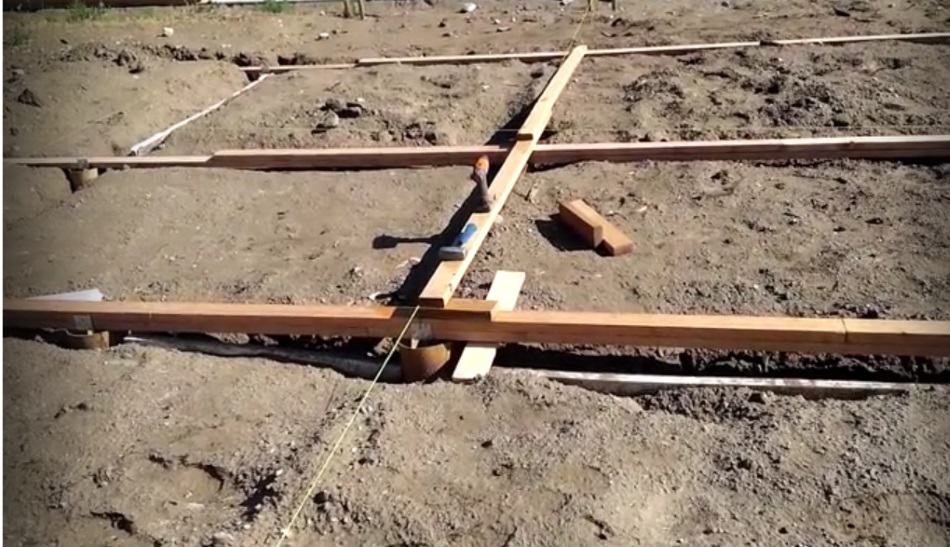
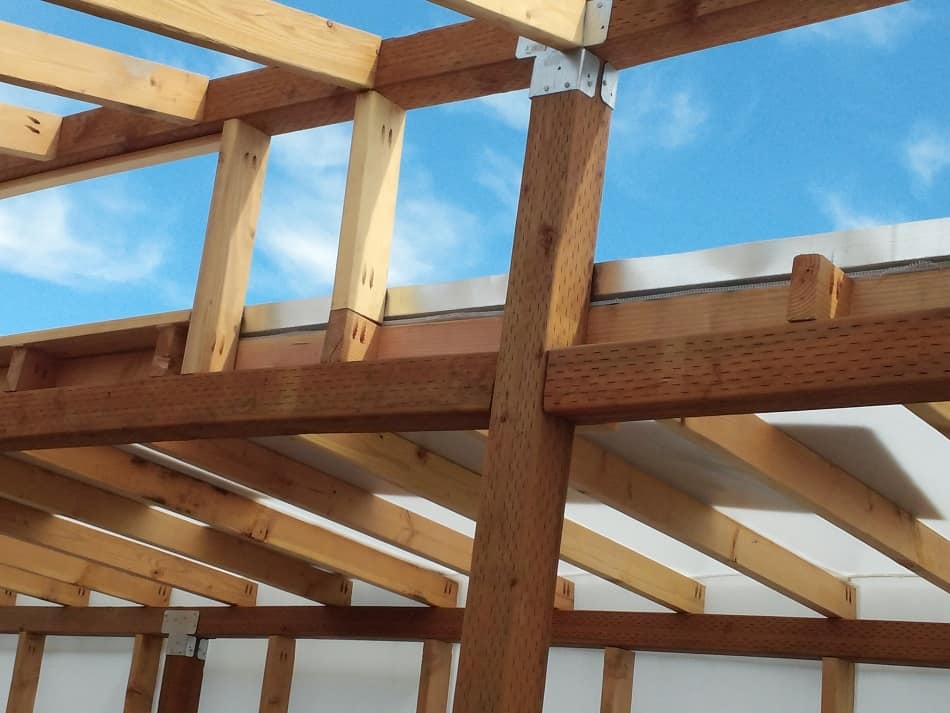
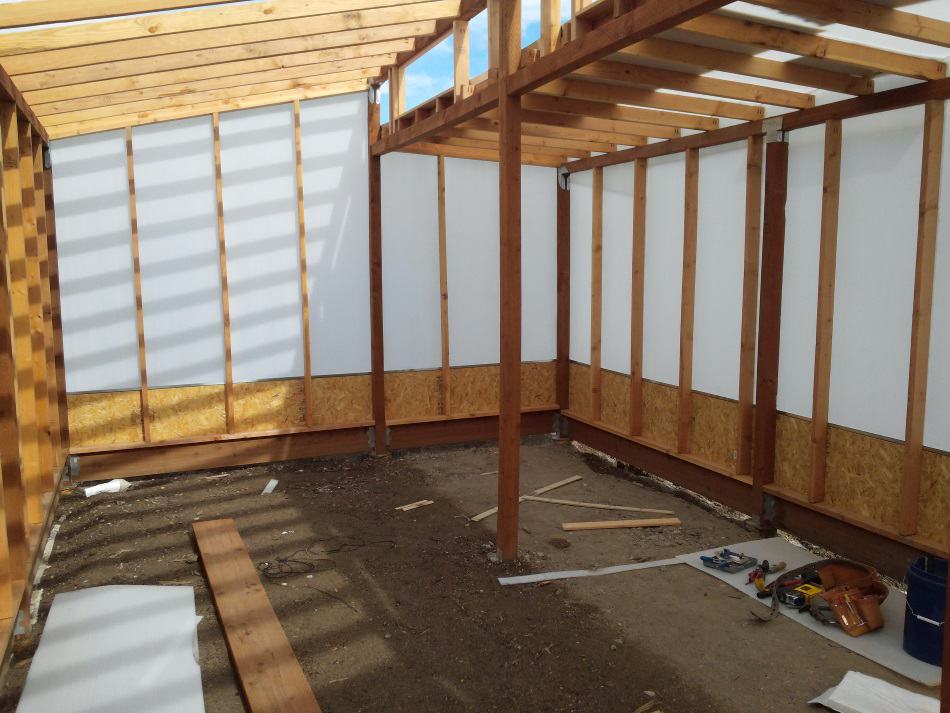
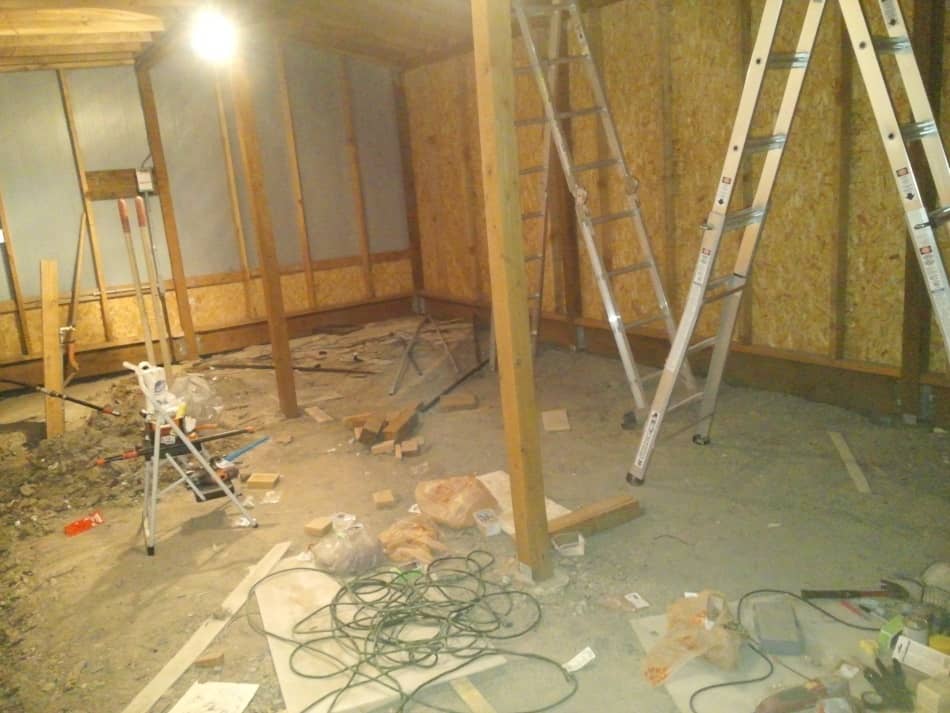
Next step – framing.
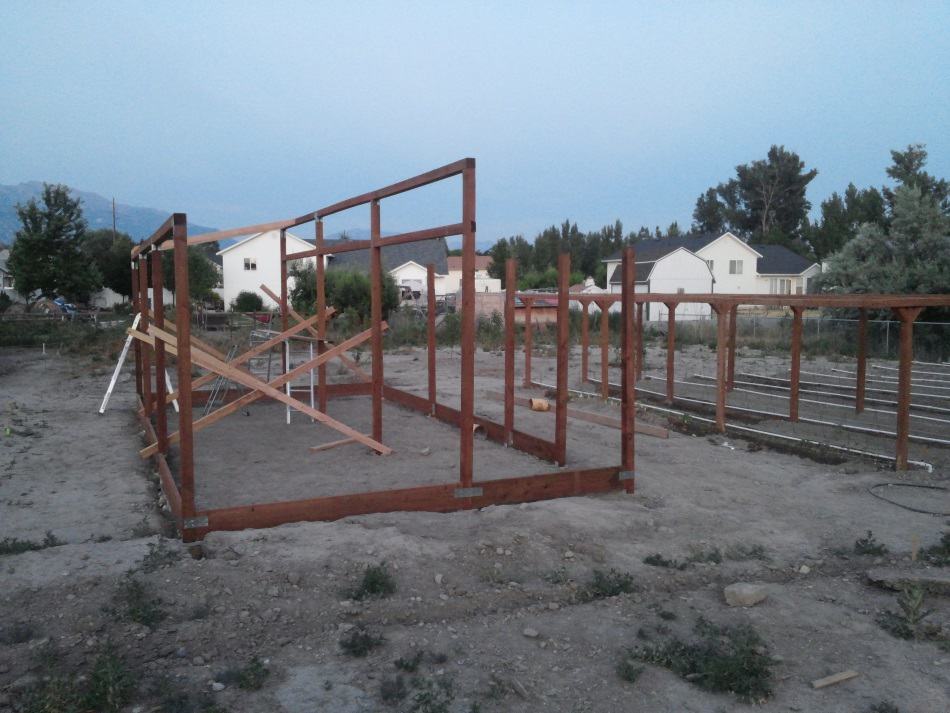
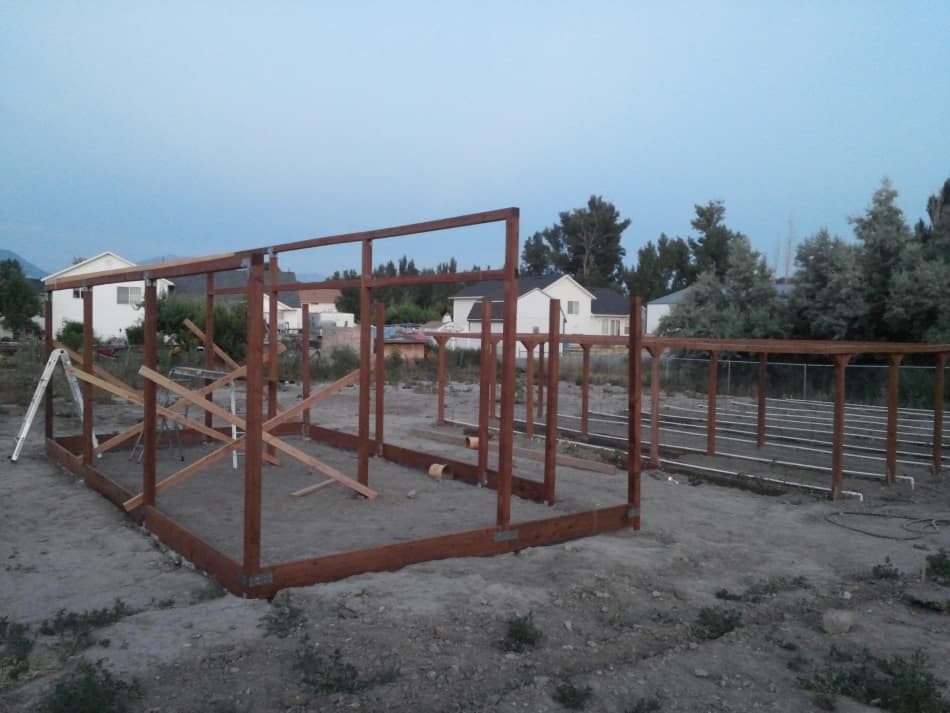
Channel-locks and temporary wood cleats helped a bunch with the framing.
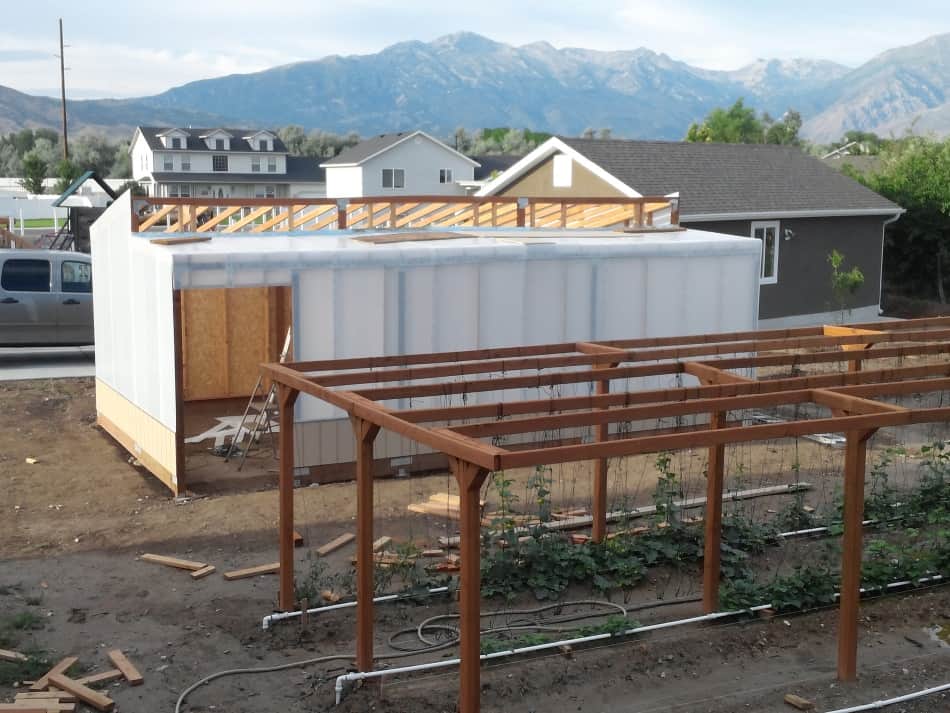
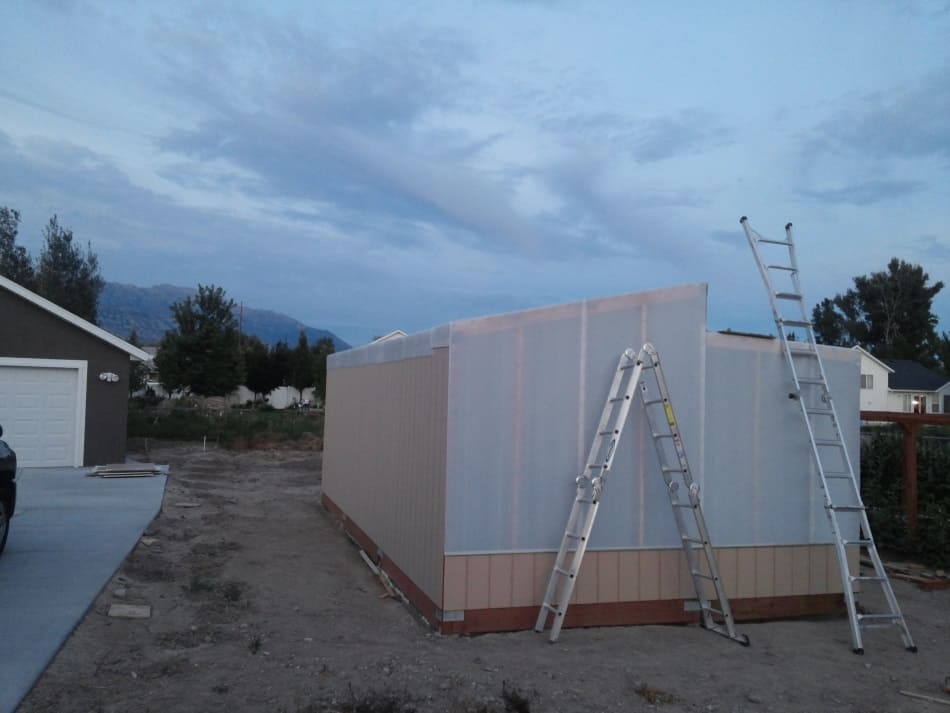
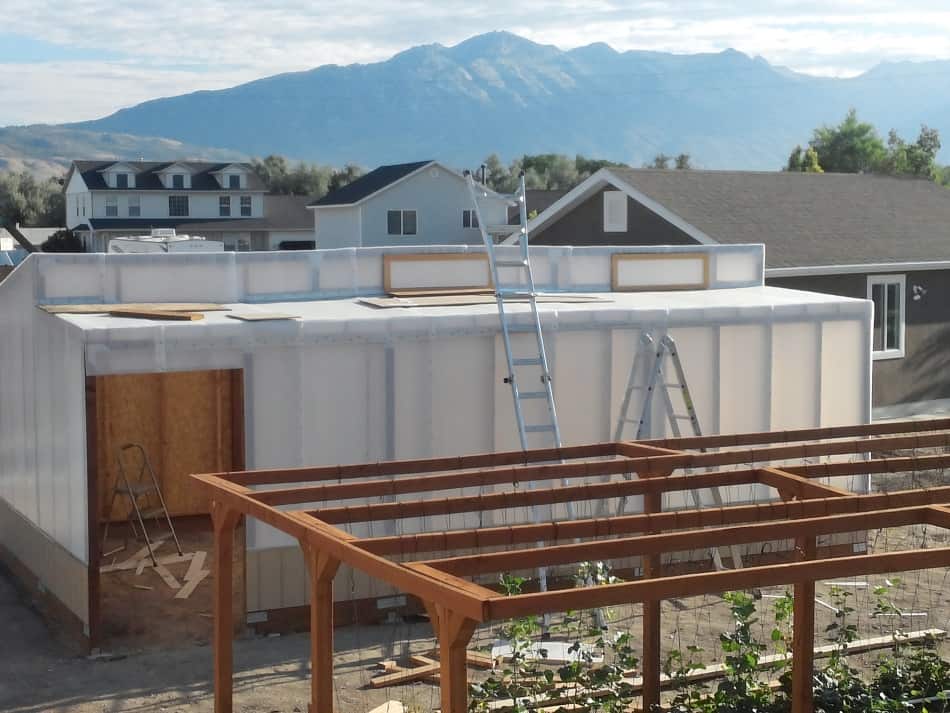
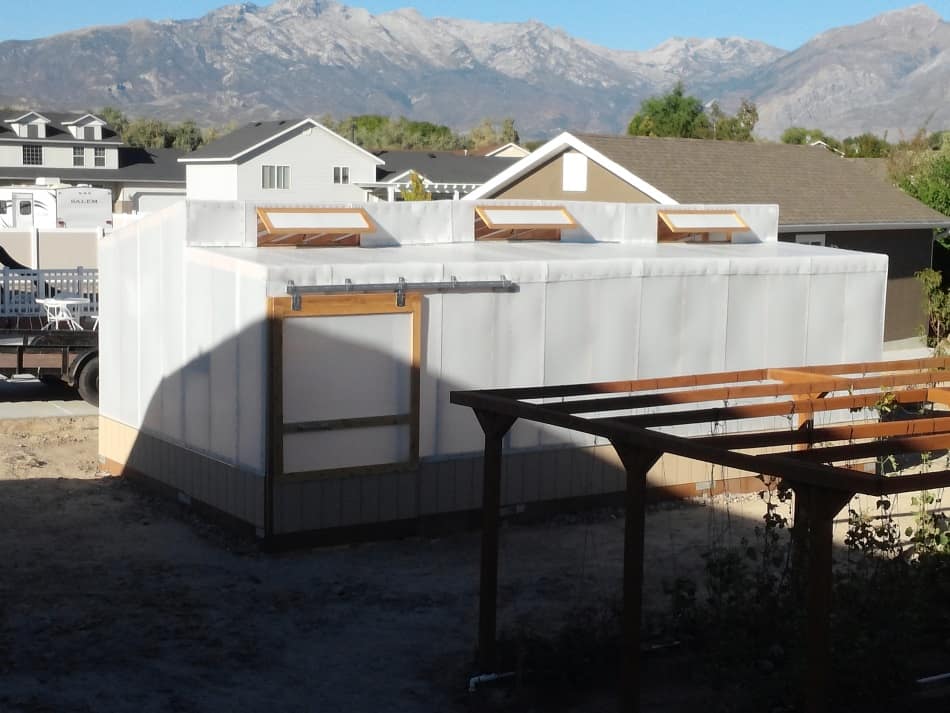
Installing the greenhouse covering
Dr. Mittleider suggests covering the seedhouse with greenhouse plastic – it’s relatively inexpensive and readily available.

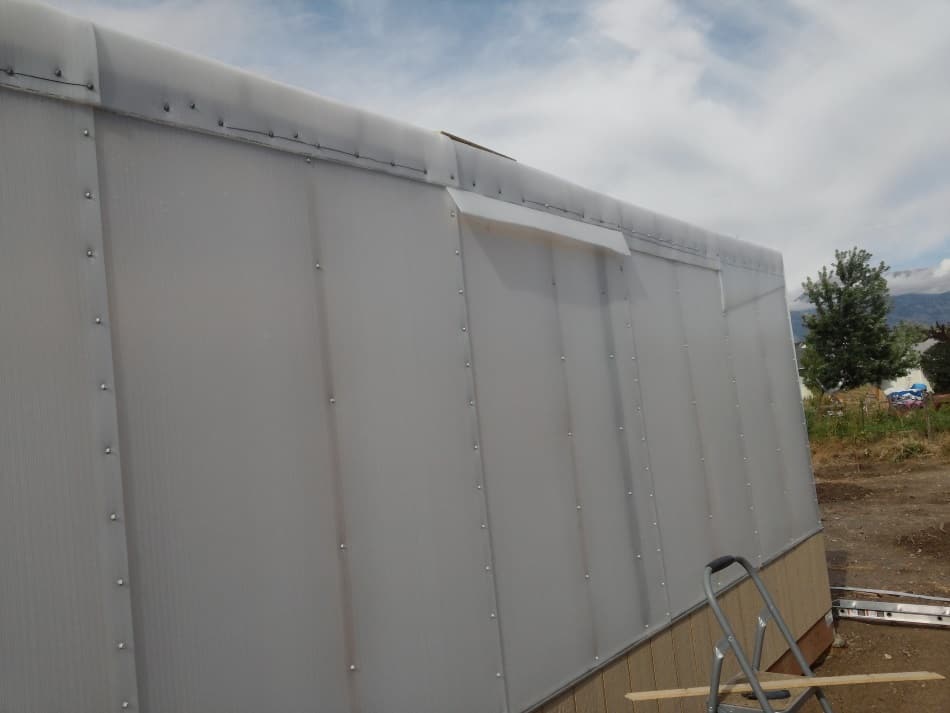
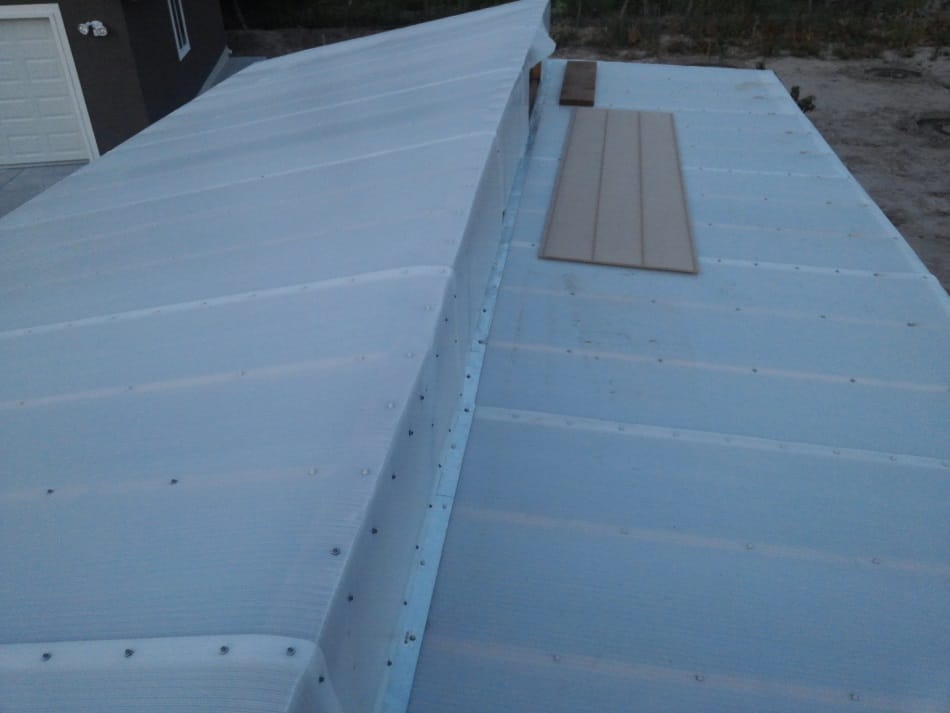
I’m going with a more durable 10-year product called Solexx (click to see price on Amazon). It holds up to hail, snow, baseballs, rocks, meteorites (just kidding) etc. It’s pretty easy to attach directly to the framing with roofing screws (those with neoprene washers).
But comes at a price.
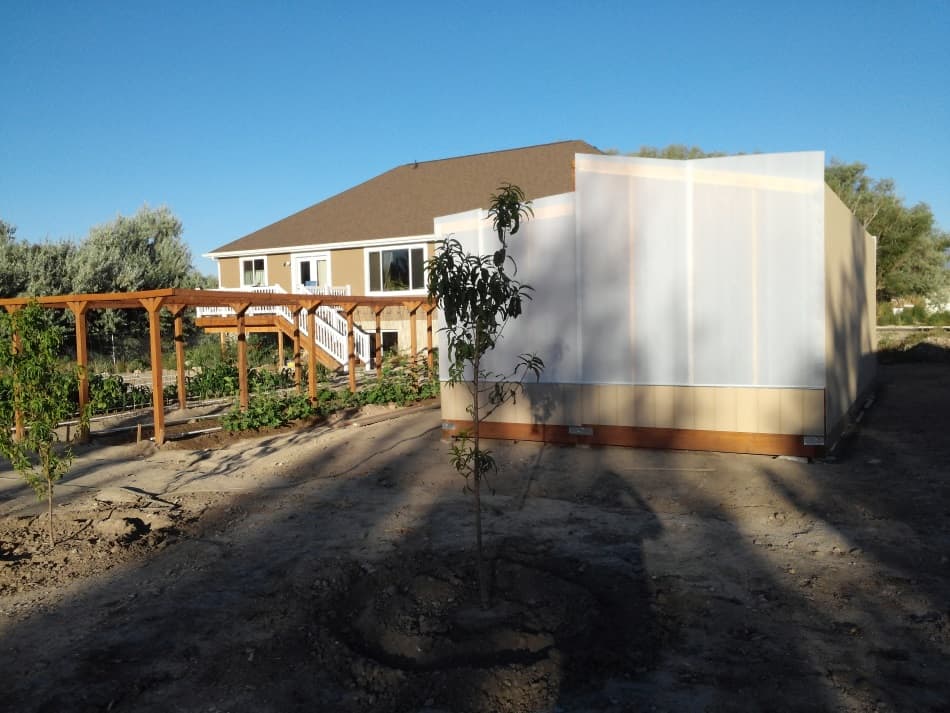

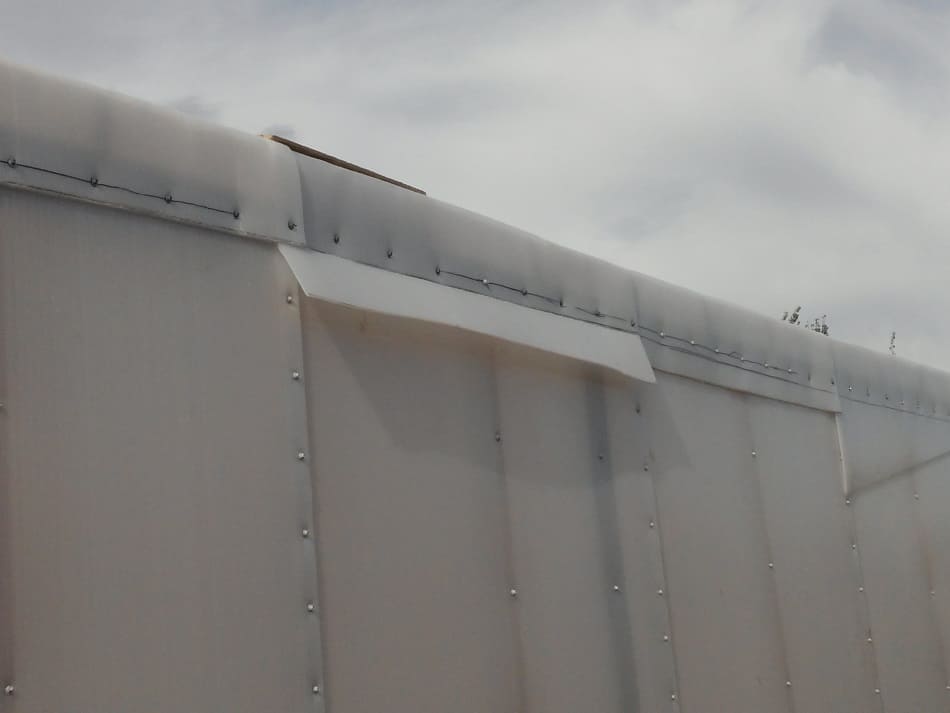
Mittleider Seedhouse – West and South Face
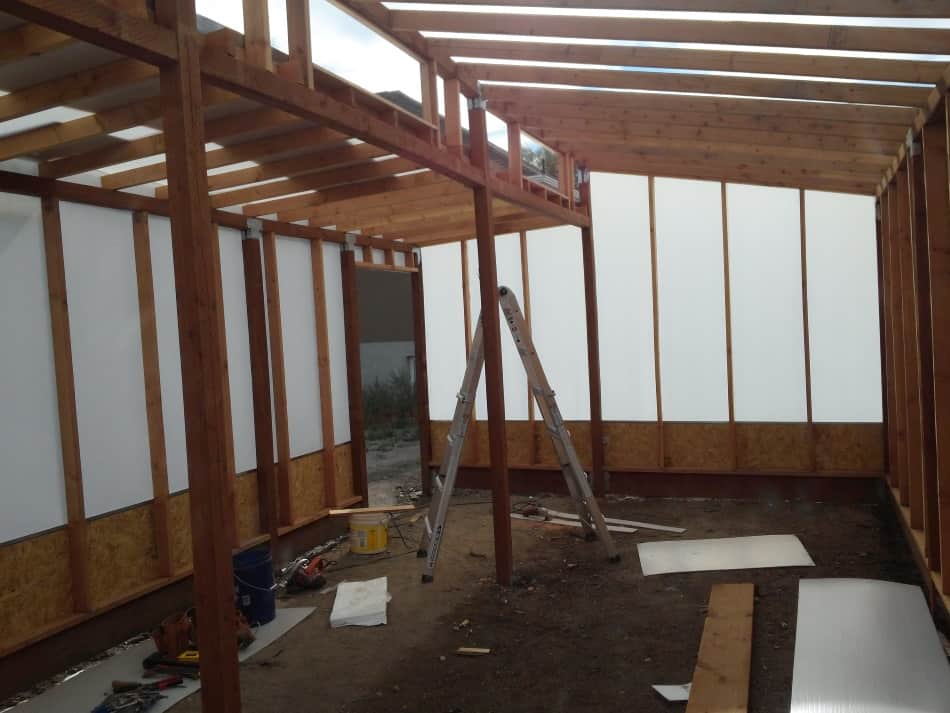
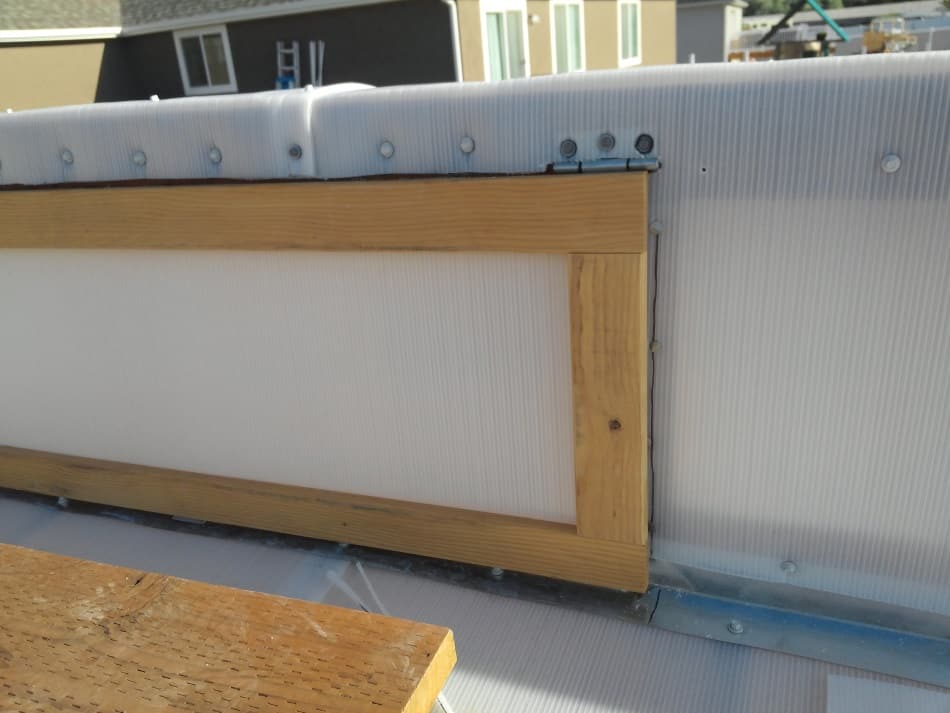
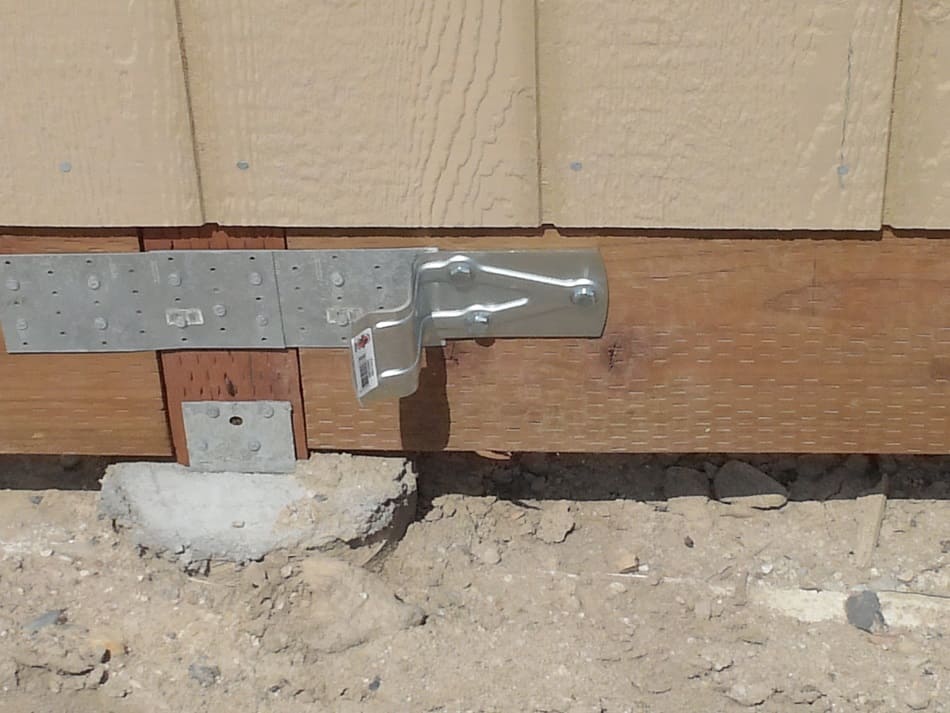
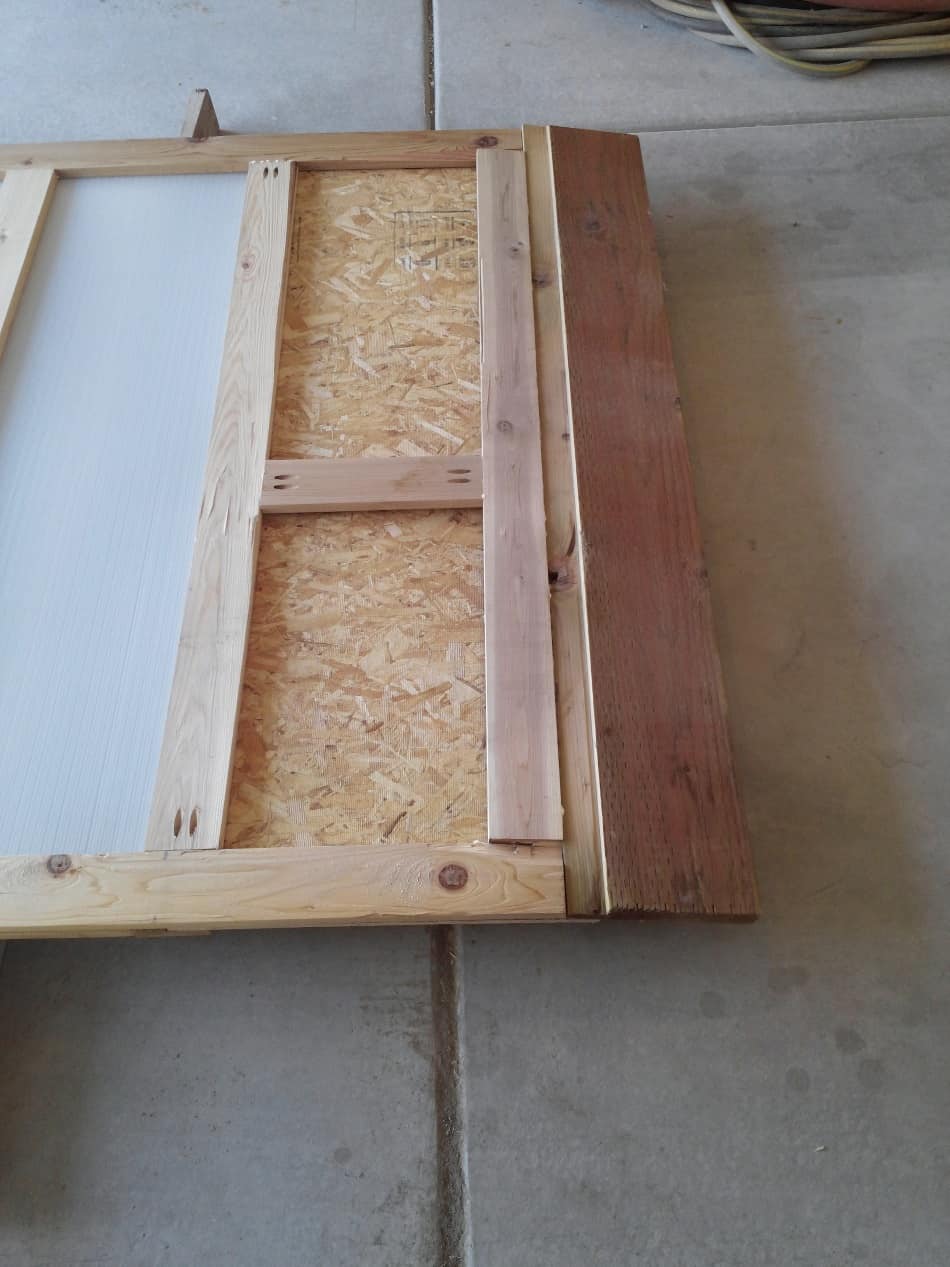
It’s pretty pricey and not as easy to install as regular greenhouse plastic. Plus I had to make some modifications to Dr. Mittleider’s seedhouse plans.
For instance, I had to add some additional blocking at the ends of the panels to keep it from sagging underneath the flashing (also additional).
Cutting it has also proved to be a little challenging – it’s TOUGH. I found the best way was to score it first with a laminate/backer board scoring cutter along a strait-edge (I used a scrap piece of wood) and fold it at the crease.
It’s then pretty easy to cut cleanly with an oscillating saw using a wood/plastic blade.
It feels roomy enough now. Might be crowded by next spring – fingers crossed!
One other modification I’m needing to make has to do with the ventilation. In the Mittleider Method Coursebook, Dr. Mittleider has the plastic on the inside of the greenhouse along the vent ridge (the upper South facing section) tied to ropes and pulleys in order to help control the temperature.
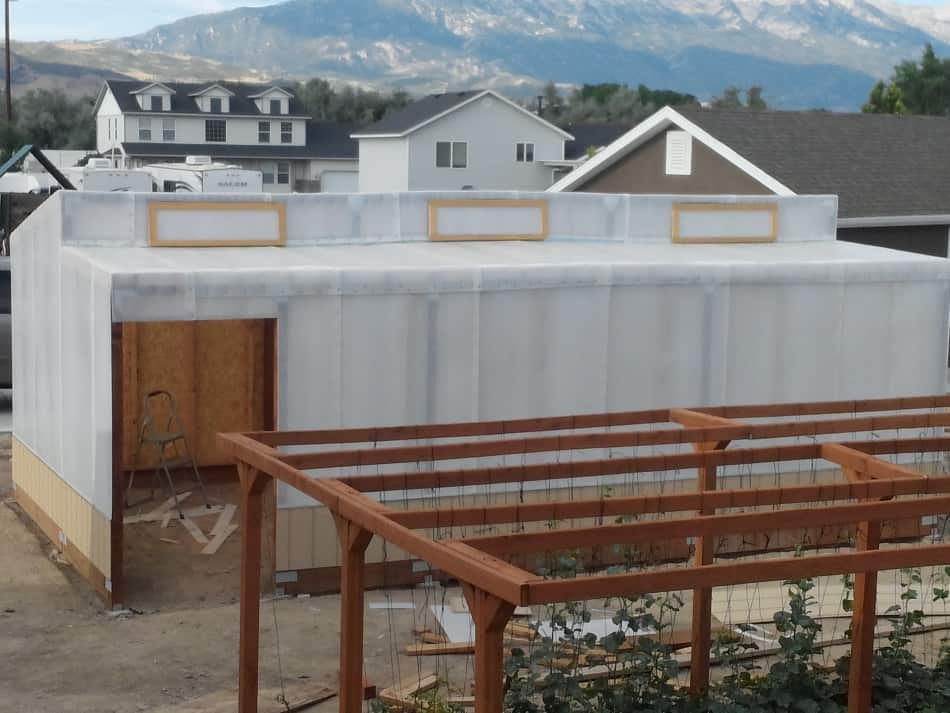
Because it’s rigid, the Solexx doesn’t just roll up 🙂 – so I’ve made three hinged “windows” that I’ll control with automatic vent openers attached to the inside.

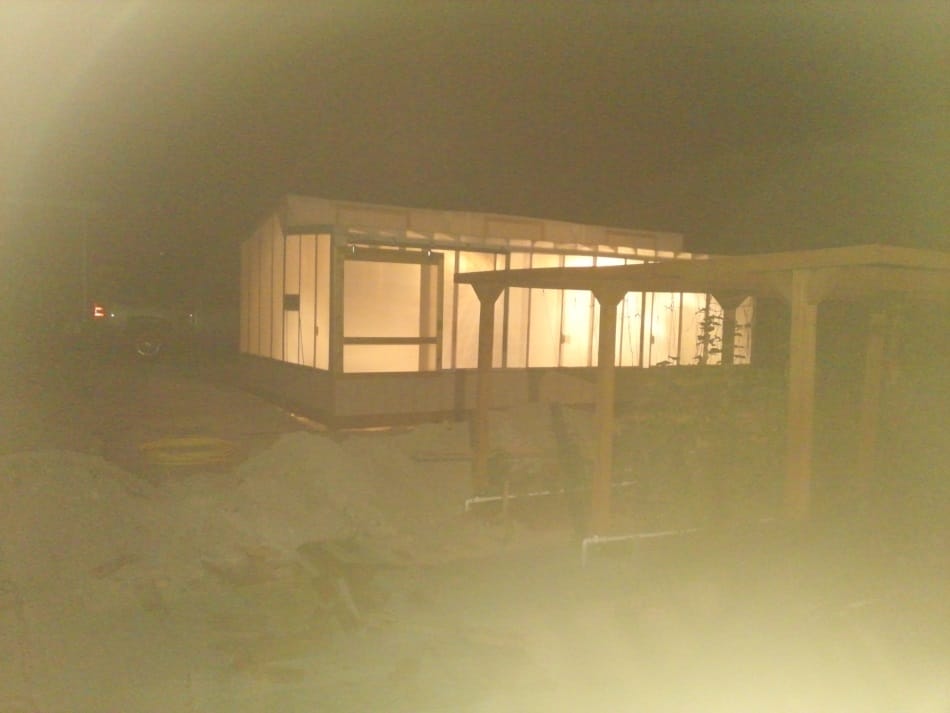
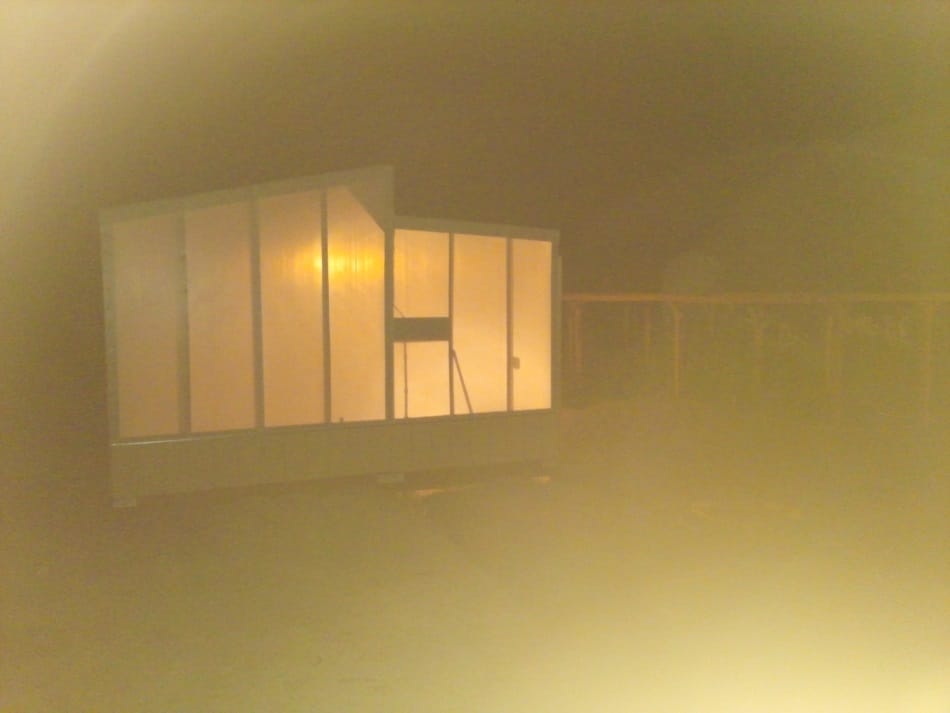
After we finished laying the last piece of Solexx down on the roof, the whole greenhouse is covered …
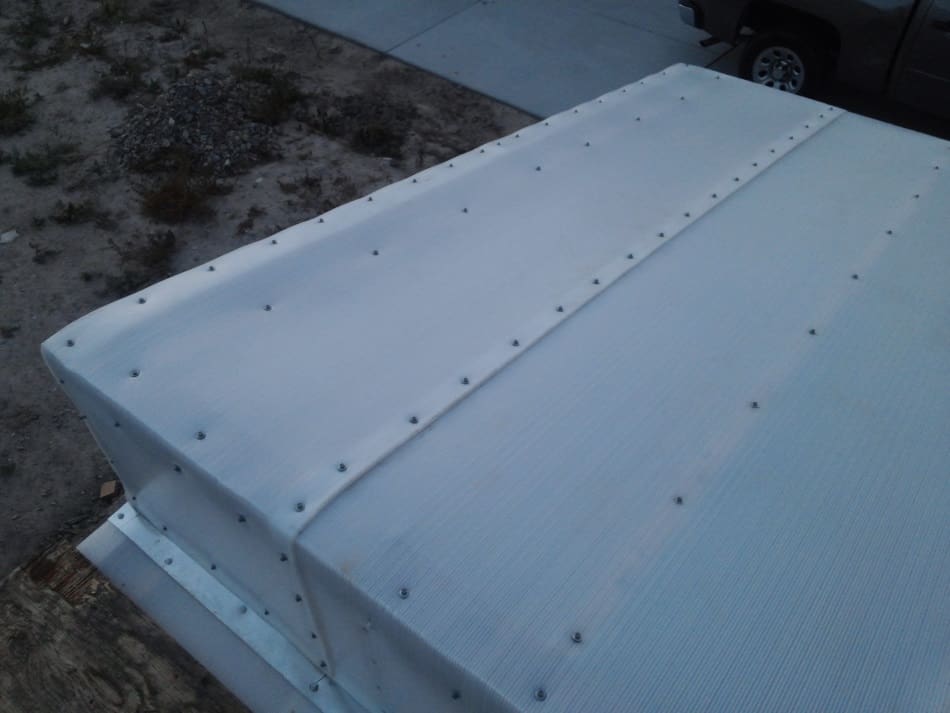
– next step trimming around the windows.
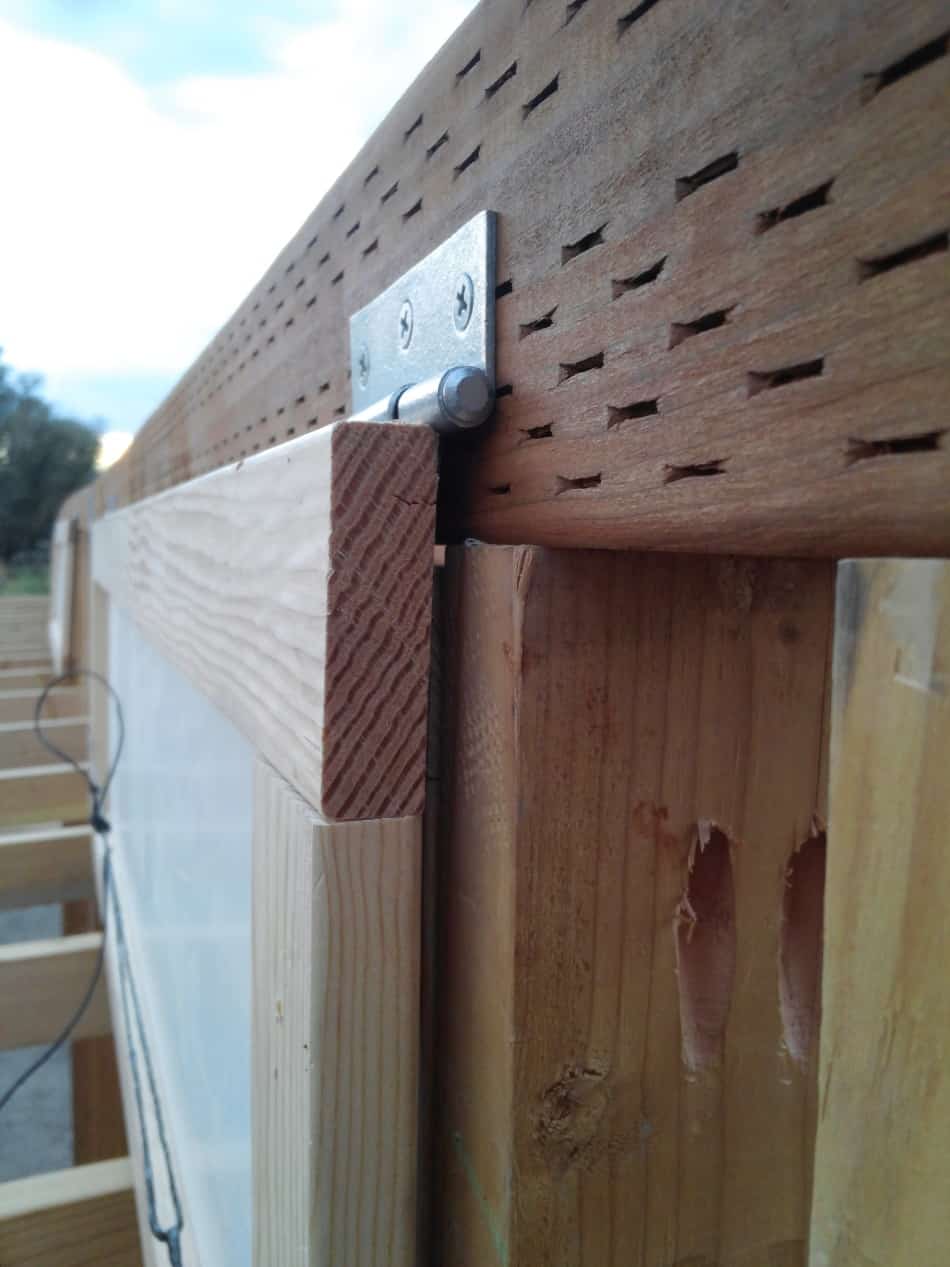
Adding a Sliding Barn Door to the Greenhouse
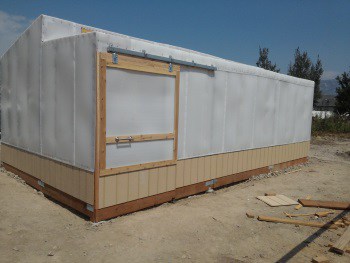
I was able to add all the additional blocking necessary and attached the Solexx with screws every 6 inches all along the bottom during the week. This last weekend’s goal for the greenhouse was to build and hang a sliding barn door.
Some of the benefits and why I chose a barn door
- Stays propped as far open or closed as desired when venting or pushing the wheelbarrow through / carrying plants and materials in and out of the building
- Won’t have to move snow out of the way to open it in the winter
- Takes up less space into the walkway
- Aesthetics – it looks fantastic!
I have to admit, it was more difficult than I thought it would be. It took me all day Saturday to build the door which consists two pieces of Solexx (top and bottom) sandwiched between two frames (front and back rails / styles), and the sheathing and pressure treated skirt/kickplate for the bottom. I had to add an extra piece of wood across the top (front and back) to attach the hanging brackets to. You want to account for the width of the door, the doorway and the range of travel you want the door to move when deciding where to place the hangers on the door.
The door hangs from an 8 foot long trolley track.

I beveled the edge of the kickplate with a Roto-Zip to help it close smoothly.
The bumper is placed at the end of the desired travel distance. It helps hold the door close to the building when in the open position and helps prevent the door from banging against and eventually knocking out the rail end caps.
And an adjustable stay roller is positioned to guide the door while it slides back and forth.
Here’s the bumper and stay roller working together when the door is fully open.
After a few hours of hanging and adjusting the hardware on Sunday, the door is now hung.

Overall I am really pleased with how well it turned out. It functions perfectly, blends in well as part of the whole and was just what was needed to give the greenhouse a finished look.
Making Improvements to the Greenhouse Barn Door

The sliding barn door I put on my greenhouse took a beating during the last couple of storms we had that produced real high winds.
I wanted to feel more secure going into the winter by making it a little stronger so I don’t have to do any emergency maintenance in the snow and cold.
I first added an extra rail on the outside bottom edge to better sandwich the bottom panel.
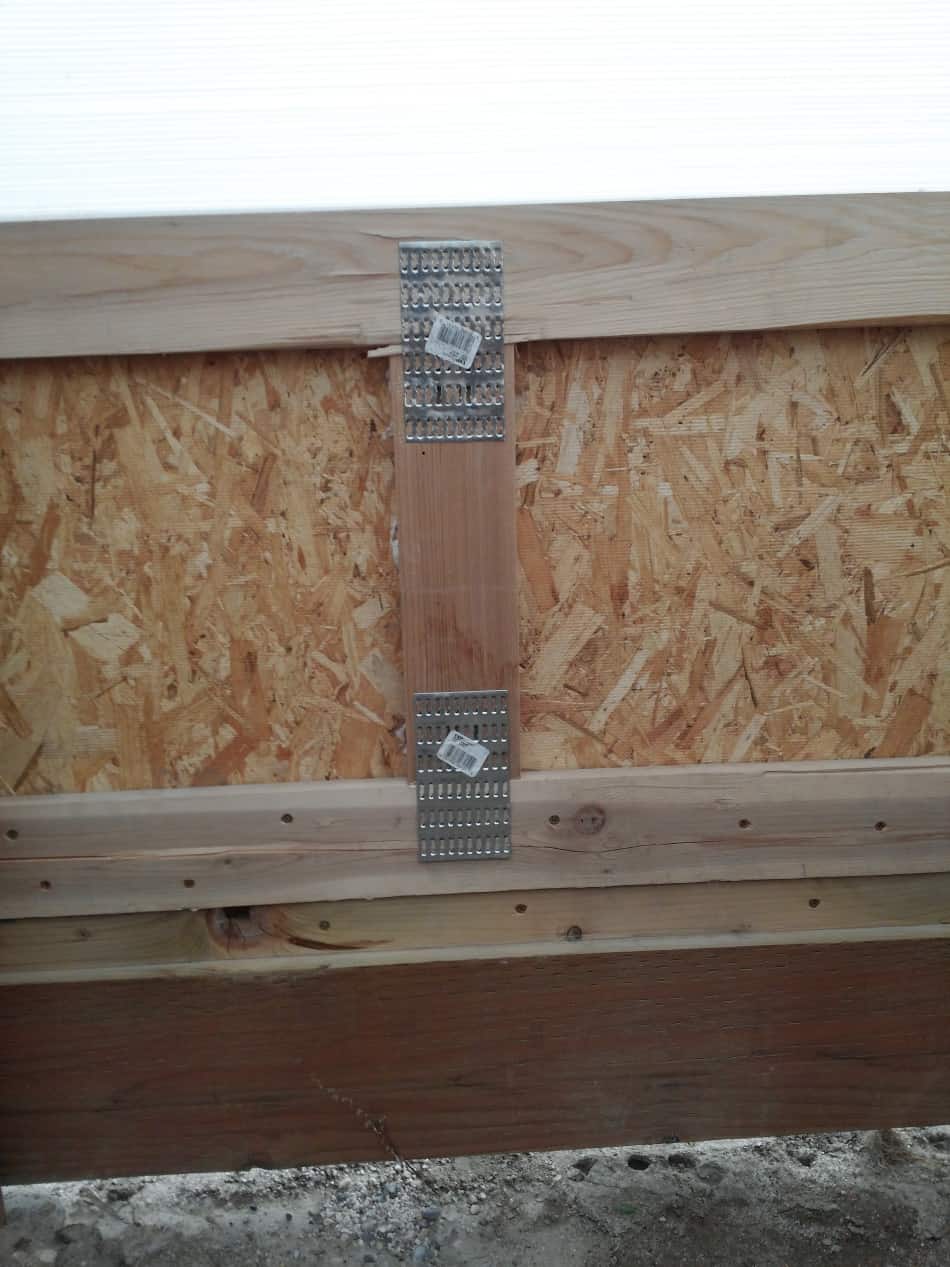
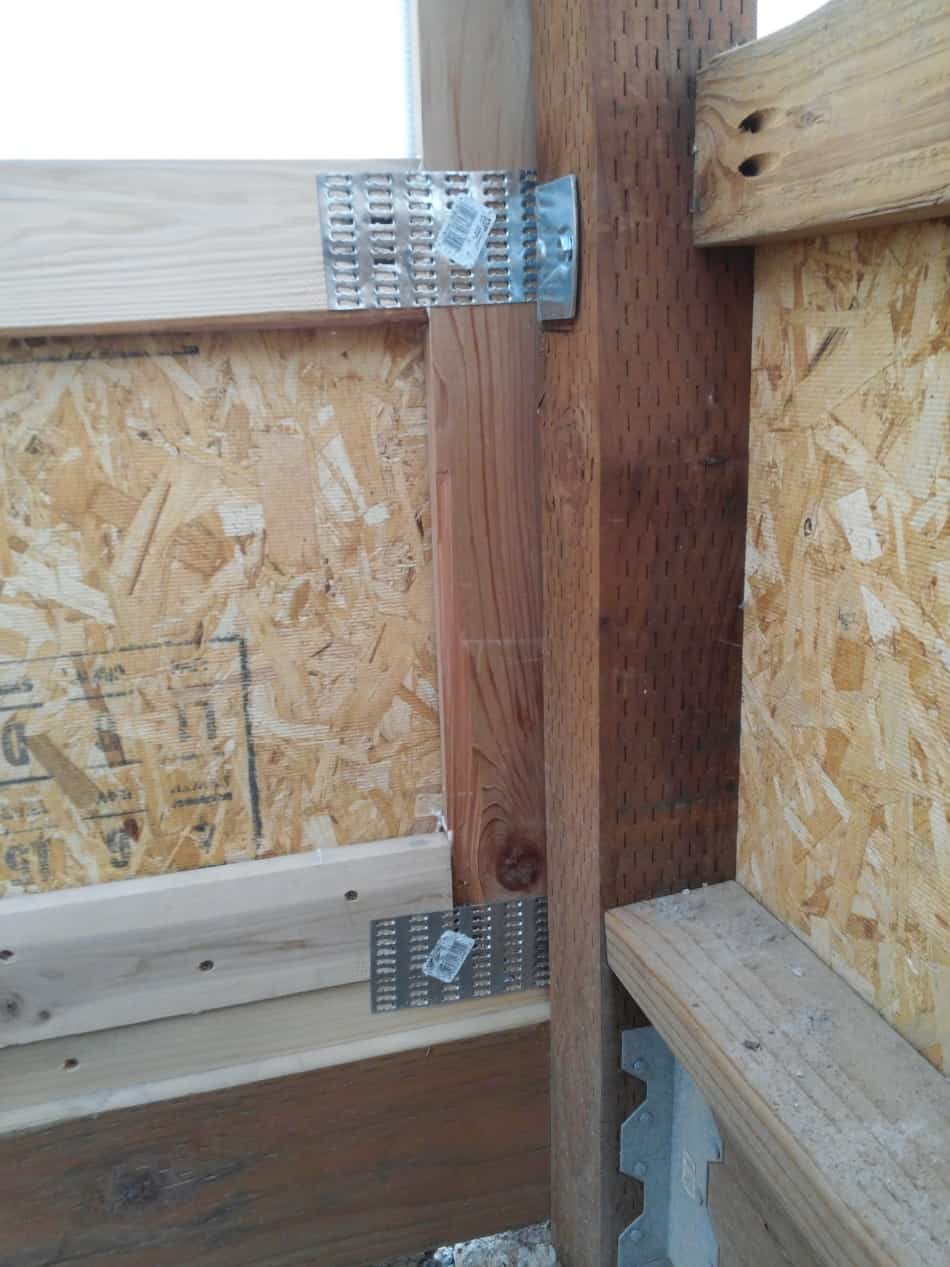
I took it down and took apart some of the paneling along the bottom. I glued it up really good and added some tie plates at the joints.


Lastly, I installed another door bumper to keep it closed tightly. I had to use a vise, 5 lb. sledge, and a cold chisel to bend and shape an existing bumper in order to attach it where I needed it to be.
Overall, I think it turned out great and I’m feeling really confident heading into winter with how durable it is now.
Hardware I used for the Barn Door
- National Hardware N105-726 5116 Plain Box Rail in Galvanized, 8′
- Stanley National N131-490 Galvanized Heavy-Duty Stay Roller
- National Hardware N112-102 5005 Box Rail Hangers in Zinc
- National Hardware N100-834 Stanley Hardware 100834 Door Bumper Holder & Stopper, No Size, Silver
On to the next step:
Providing Electricity to the Greenhouse
Installing the electrical wiring for a shed or outbuilding is pretty straightforward. Be sure to talk to your local building inspector to make sure you’re doing everything to code (mine is through the city).
In my circumstance, the code reads that there should be some sort of cut-off ability within a “reasonable” distance of the structure. Having the breaker at the tie-in panel is good enough for code, but I opted at the inspector’s suggestion to add a cut-off right at the building.
The inspector recommended pulling 10 AWG for the run to supply the greenhouse and I used an online wire size calculator out of curiosity which confirmed his suggestion. I used 12 AWG inside making sure everything was rated 20 amps.
I placed all the utility/handy boxes where I wanted them first. Then just connected the dots with the wire. Even though it’s inside a building, being in a greenhouse which lets full light in with the potential for moisture, etc. I went with direct-burial Romex which is more resistant to water contact and sunlight.
Wiring inside the building was secured using regular cable staples. To help keep your fingers out of the way, I recommend holding the staple with needle-nose pliers when hammering them in. Again, just make sure you’re following your local building codes.
Greenhouse Water Supply
For the water supply, I chose to go with potable tied into the house. We have secondary available, but I didn’t want to depend on its seasonality.
I also didn’t want to have to dig a trench any further than I had to – and tying into the house was a lot closer!
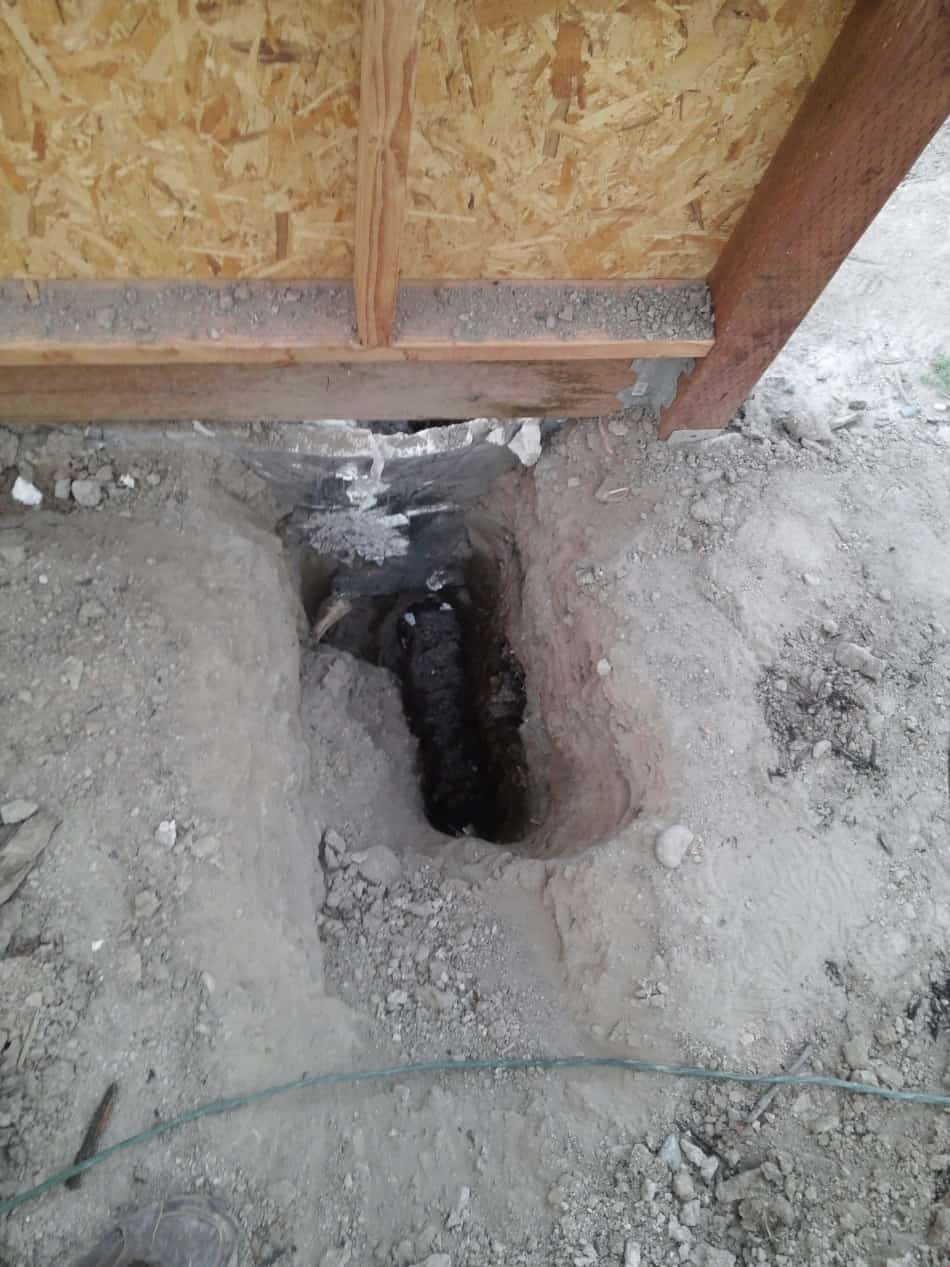
So I dug a 3′ deep trench from the house to the greenhouse and laid water supply tubing from the local plumbing supply in it.
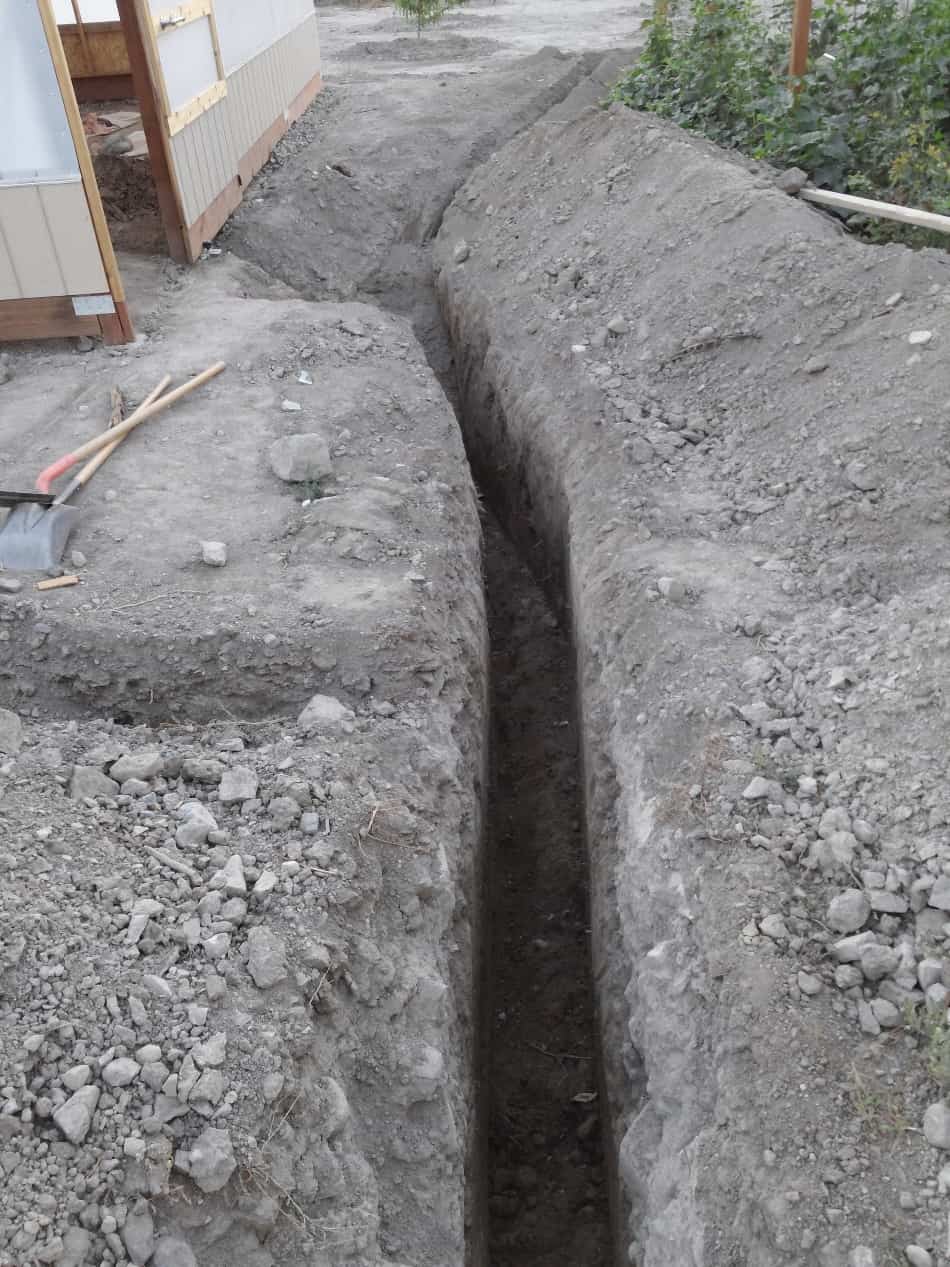
The three foot depth is a requirement for the water supply lines in my area.
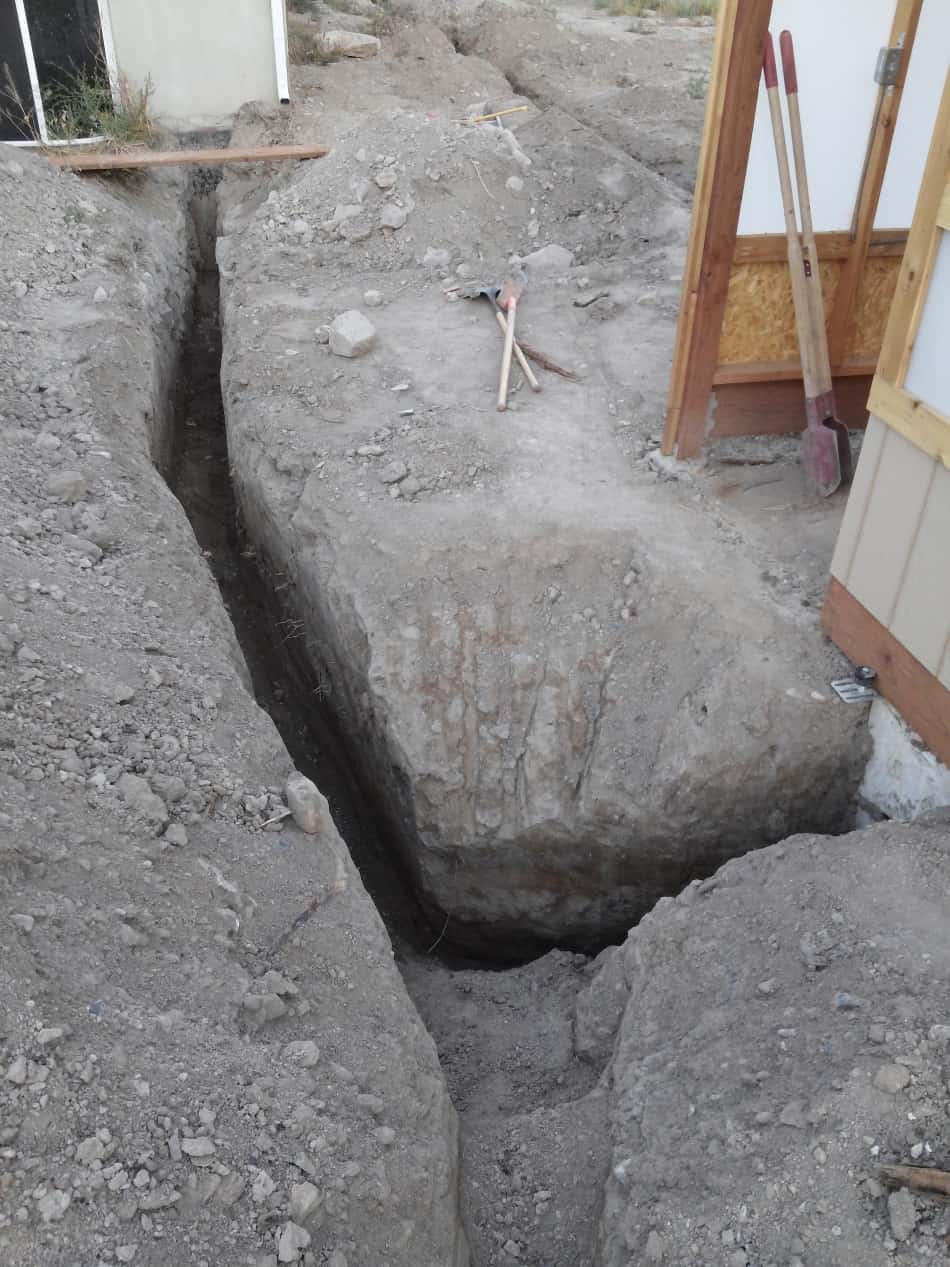
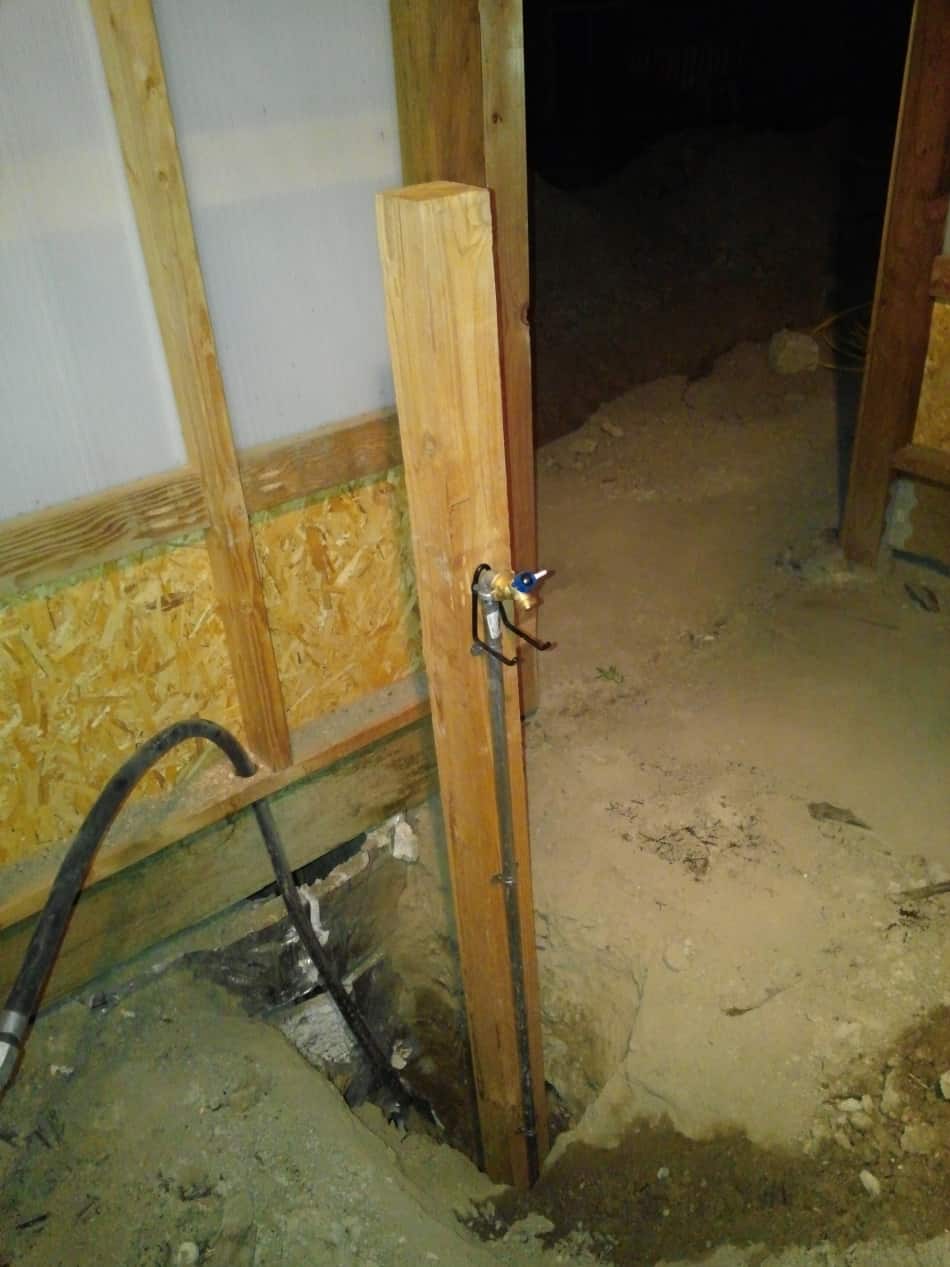
I extended the trench under the greenhouse foundation, creating a deep hole/drain for the spigot.

The tie in service is in my basement. I added a back-flow preventer and cut-off valve for maintenance and emergencies.

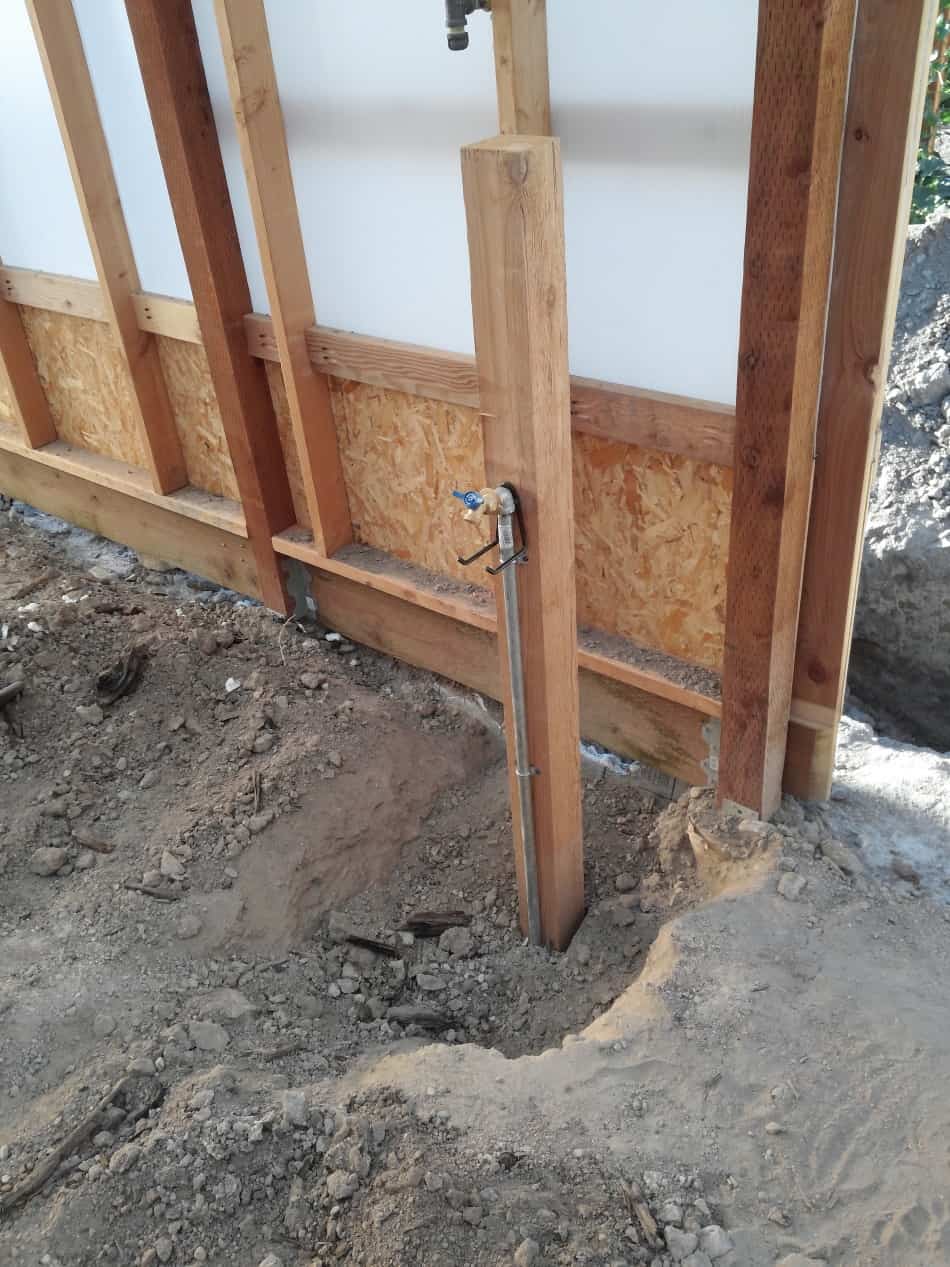
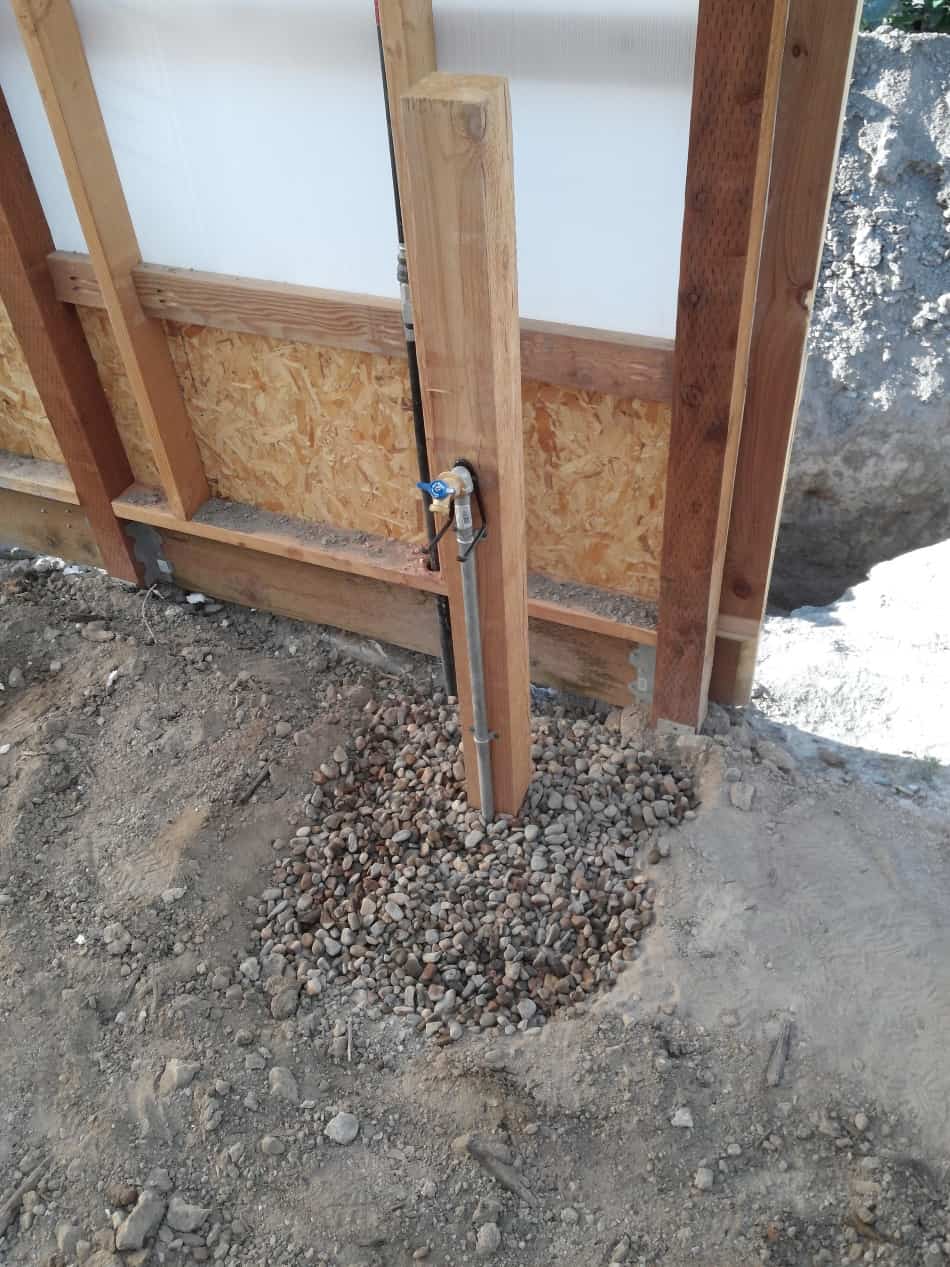
I made the spigot out of some galvanized pipe and a 4×4 post.
I attached a drain at the bottom that allows the pipe to drain when the service/supply valve is turned off.

I planted the post and back-filled it leaving about a foot to add some gravel for drainage.
Heating the Greenhouse with Natural Gas (without electricity)

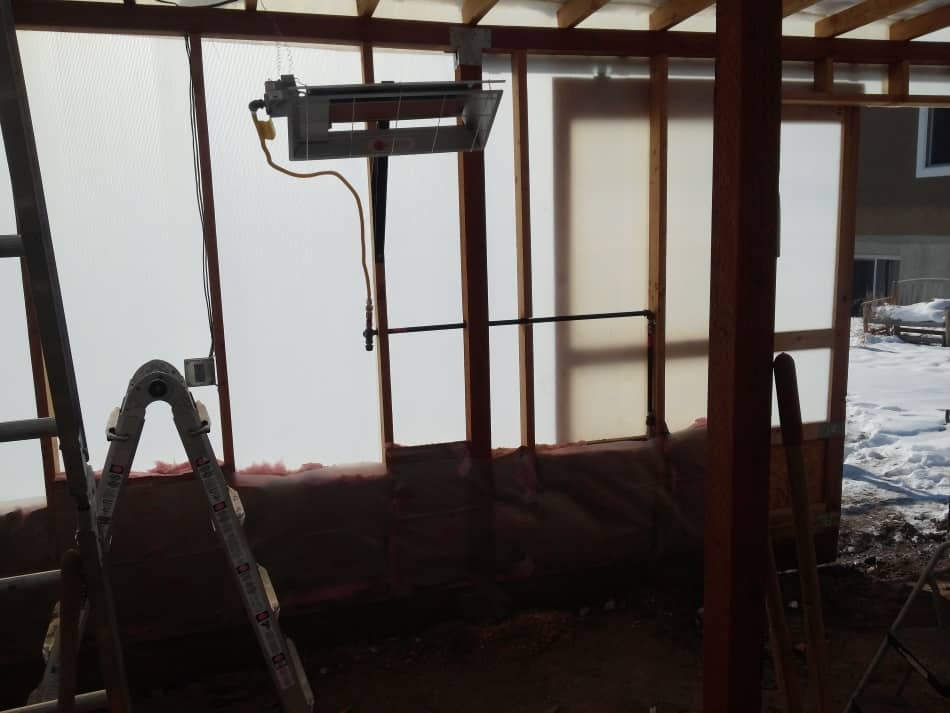
I’d like to be able to grow citrus trees successfully in my greenhouse. The plan is to espalier a couple of tangerines, a lemon and a mango. I wanted to be able to ensure it could maintain enough heat before I invested in planting the trees, so I wanted to get the gas heater installed and working this winter while temps are at their coldest to test it before buying my trees in the spring.
I was able to install my infrared garage heater yesterday and so far it’s working great! It got down to -2°F last night in my yard (Jan 1-2, 2016) and the lowest it got in the greenhouse was 44°F!
I laid polyethylene gas tubing from a local plumbing supply in the same trench as the water supply (to save having to dig more trenches than necessary). Make sure to follow your municipality’s codes and requirements.
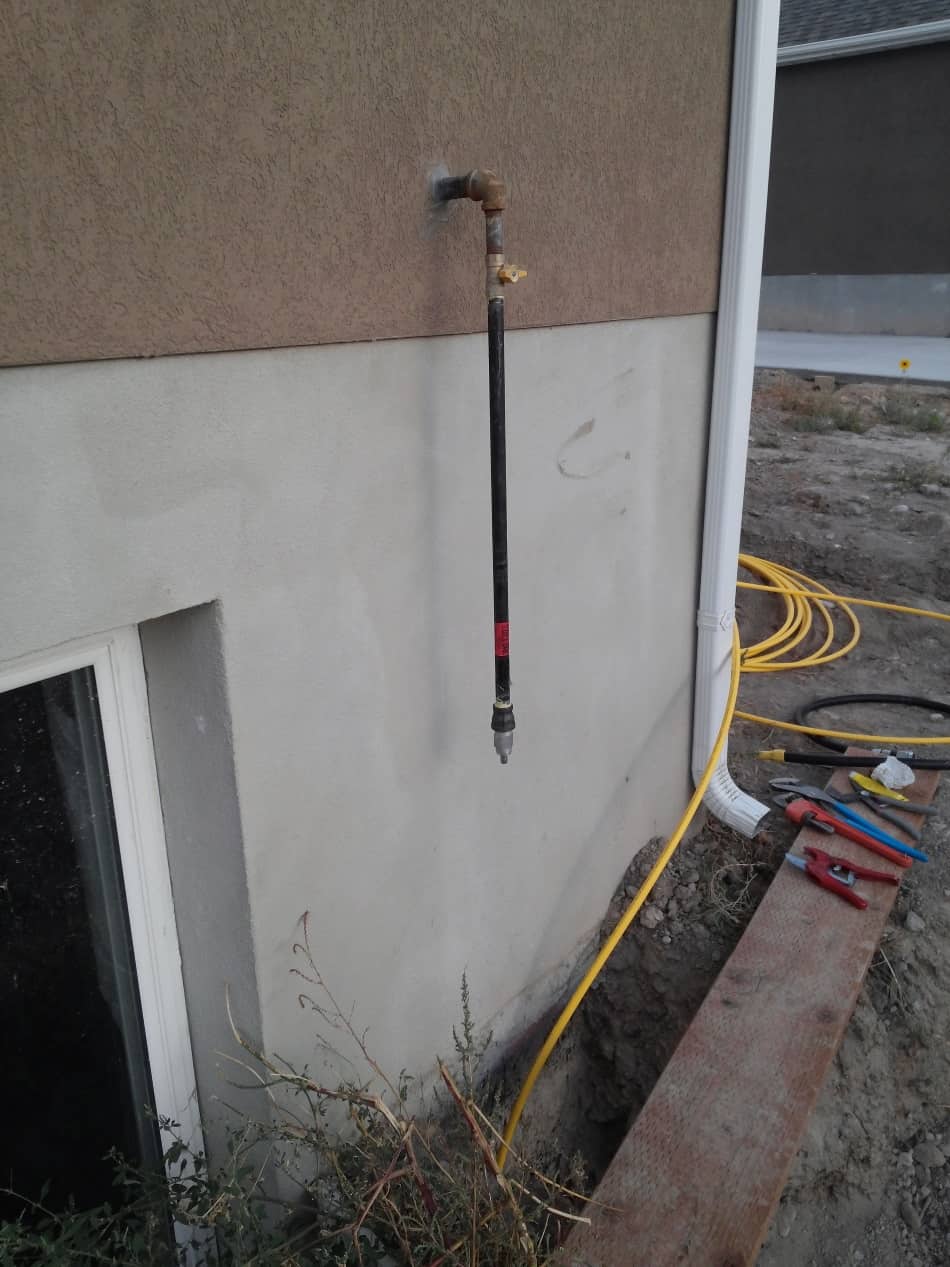

This is the gas line I’m tying into. I paid my builder to run the stub out of the house while they were doing some work on my basement. I extended the black pipe down before attaching a riser.

To attach the gas riser to the i.p., you simply feed the line through riser, push slide up the end adapter and tighten it. The gas line I’m using is polyethylene gas tubing I purchased from a local plumbing supply.
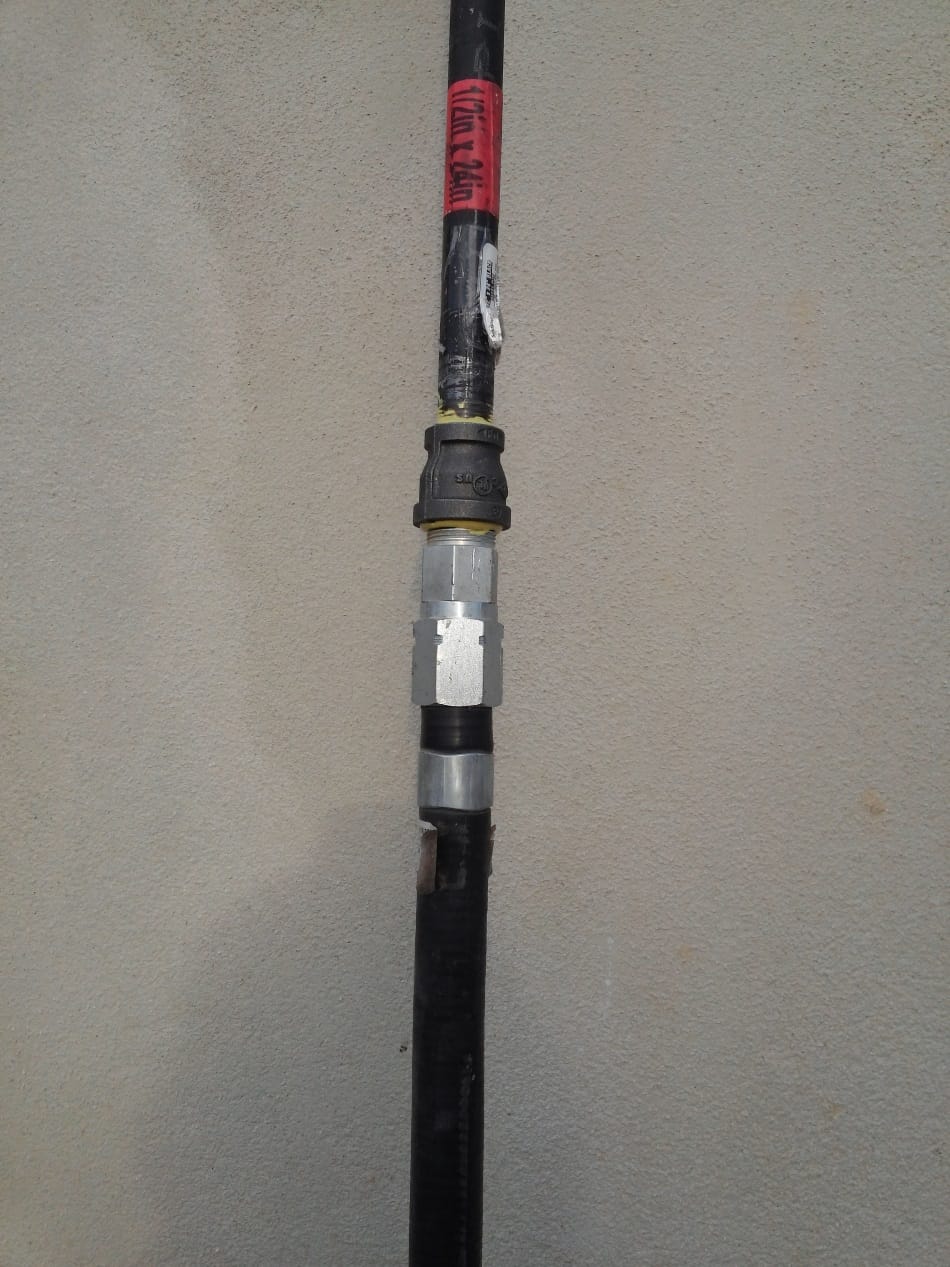
Here’s how it looks with the riser attached
Rinse and repeat for the riser inside the greenhouse from the trench. After it’s all hooked up – including a trap and valve, I installed a pressure tester for the inspection before burying the line.

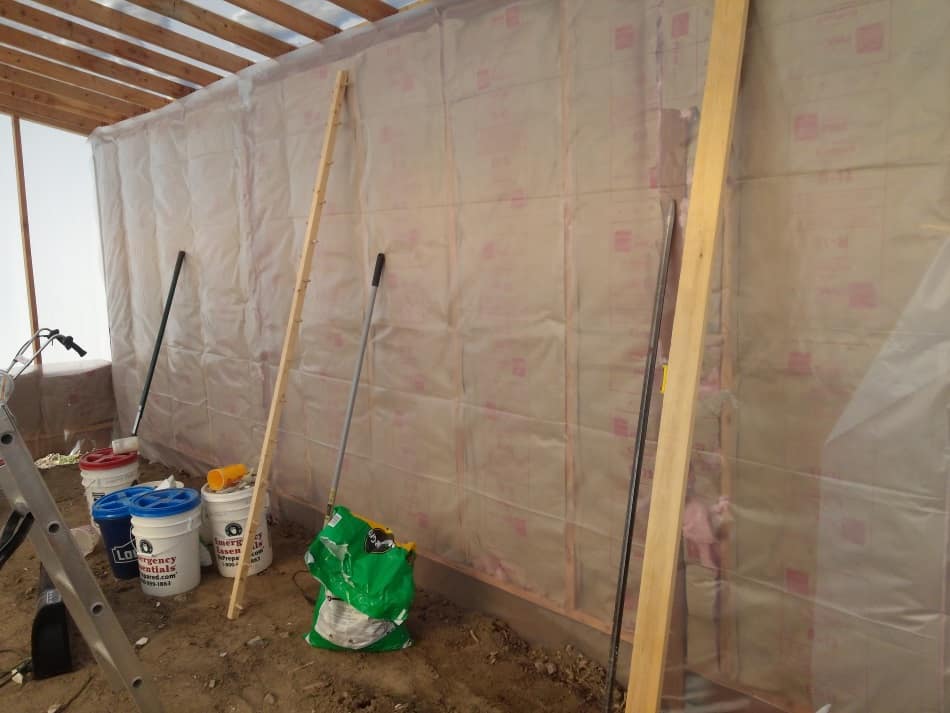
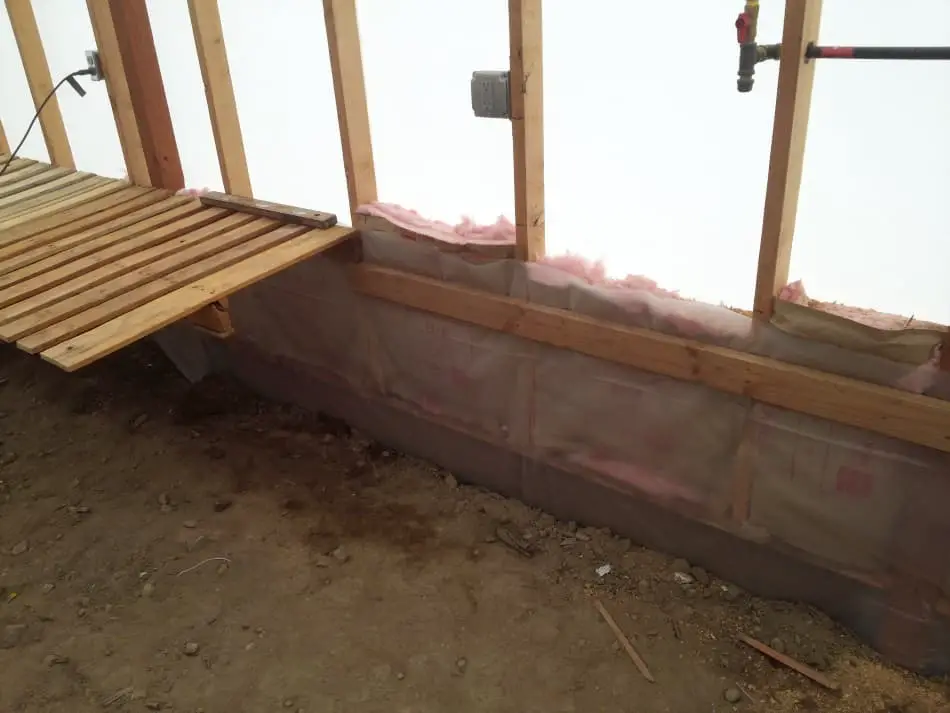
After the gas line, I installed insulation on the parts of the greenhouse that are covered by sheathing. That’s the whole north wall and 18″ high the rest of the way around.

Of course, you don’t want to block any light coming in from the glazing. I added 6mil plastic and buried it a foot deep overlapping the insulation I put in the ground before building the greenhouse.
With the greenhouse insulated, it’s time to install a heater. There are plenty of greenhouse heaters in the market out there. Some of them can be quite pricey. After a little bit of research, I decided to purchase the Enerco Heatstar 25000 btu garage heater from Amazon. I liked it for its simple installation. It doesn’t require a direct vent or electricity and for the heat output was a pretty good value. I installed it following the instructions, respecting the recommended clearances.

The greenhouse heater I purchased comes with a standard milliamp thermostat but no gas connector or any piping adapters. So after hanging it, I added a 1/2″ elbow/nipple adapter to the heater and then a gas connector to that.
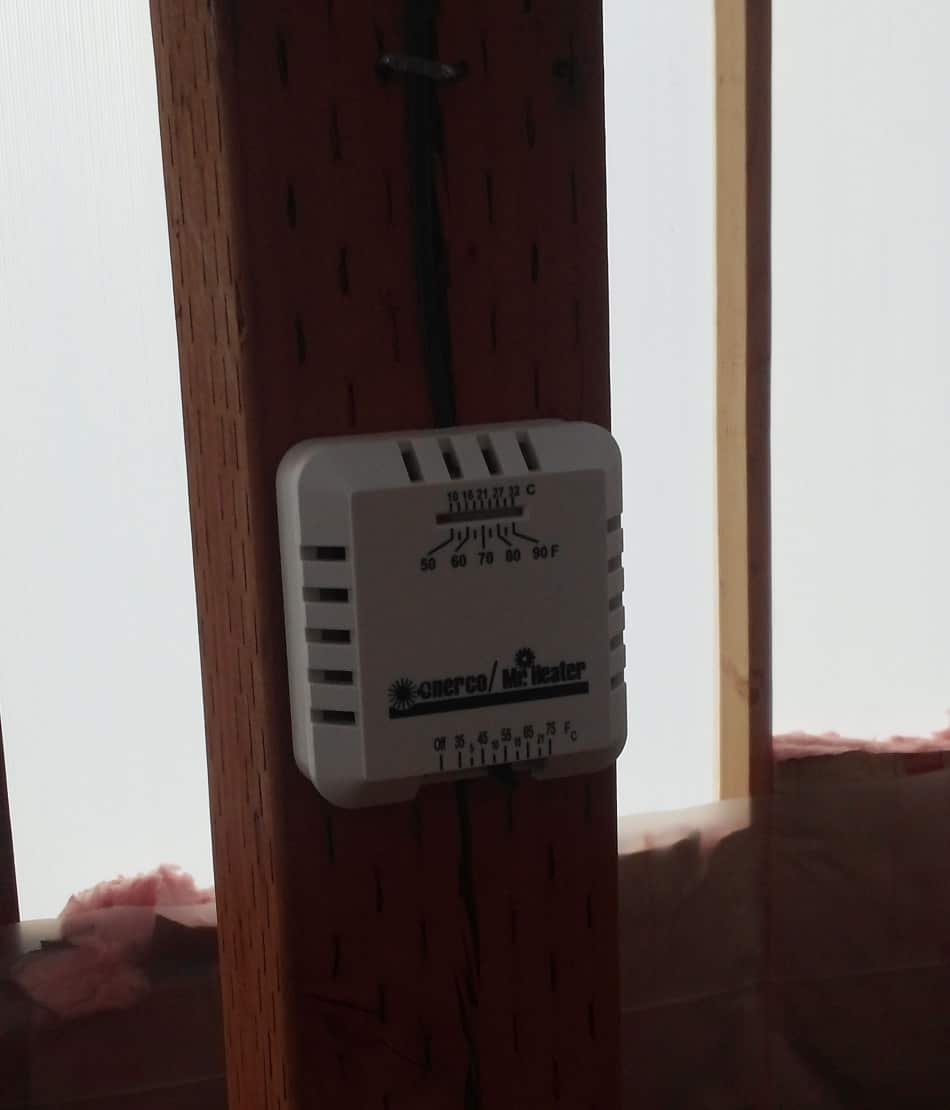
I then followed the recommendations for thermostat placement and wired it in.
The thermostat’s actually pretty nice for a standard milliamp. It includes a temp gauge and can be controlled down to 35°F.
I’ll be adding a potting / seedling bench next. I’ve already ordered my seeds – hopefully, I can have everything ready to start growing for the upcoming season!
Greenhouse Potting Bench from Re-purposed Pallets
Now that the heater is installed and running, it’s time to get started on building a potting bench for my Mittleider seedhouse. I started to feel a little sticker shock as I began pricing lumber.
I made several trips to different stores with the intent of purchasing, but after wandering around a bit, nothing really spoke to me as being the right investment. After shopping around, I finally figured out that I’d be able to save a ton of money by just using some salvaged pallets for the materials.
I just happened to be at Lowe’s when I decided to use pallets and they sold some to me for $3.00 each. I’m sure you could find some for free with a little digging.
I cut the length of the pallets to 36 inches and removed the bottom boards (which I’ll be saving to make seedling trays). I then attached a 2×4 ledger to the wall, rested the pallets on the ledger and attached them to the wall.
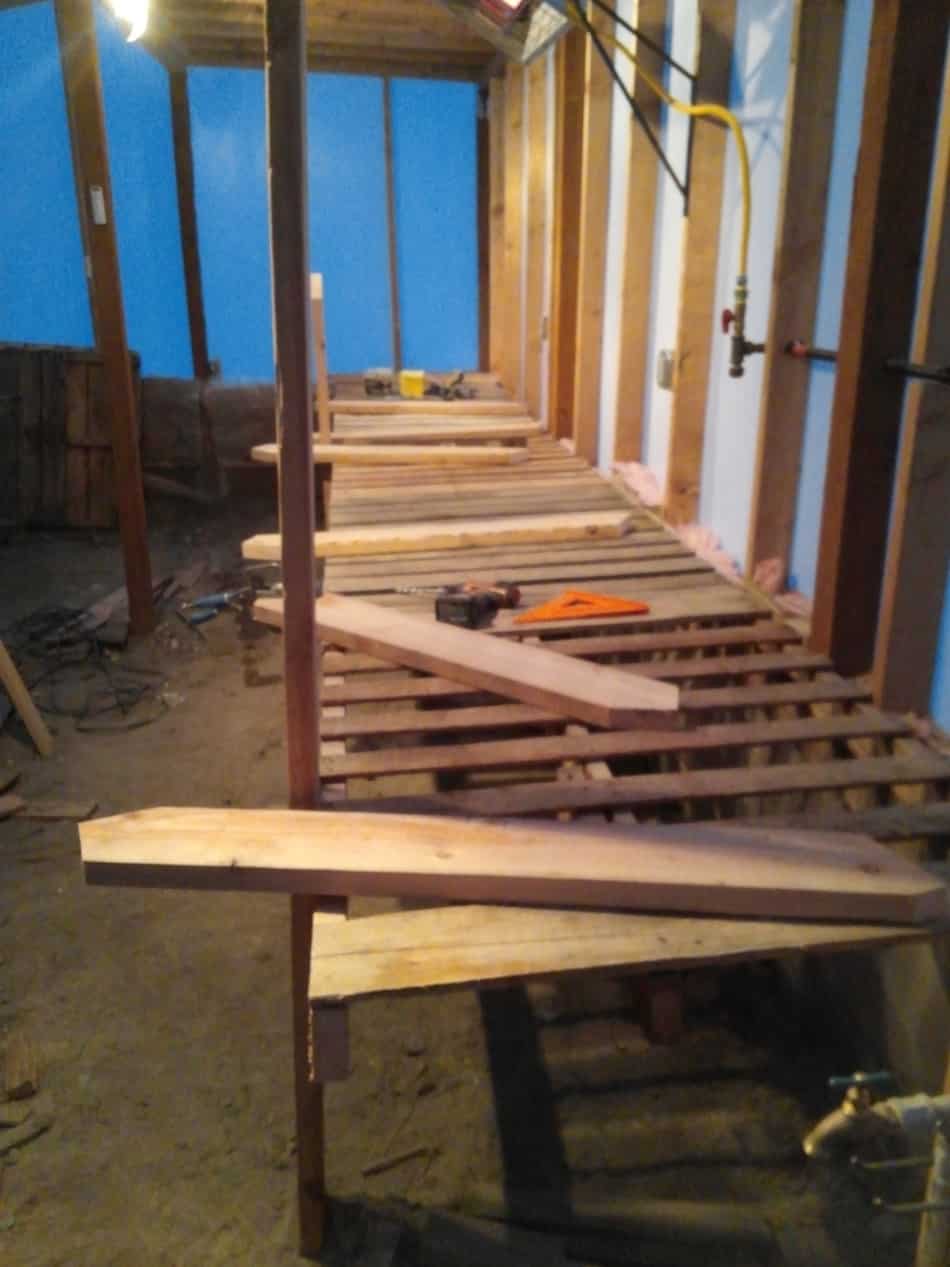
After all the pallets were hung, I added a 2×4 face and leveled the whole seedling bench with some temporary supports.
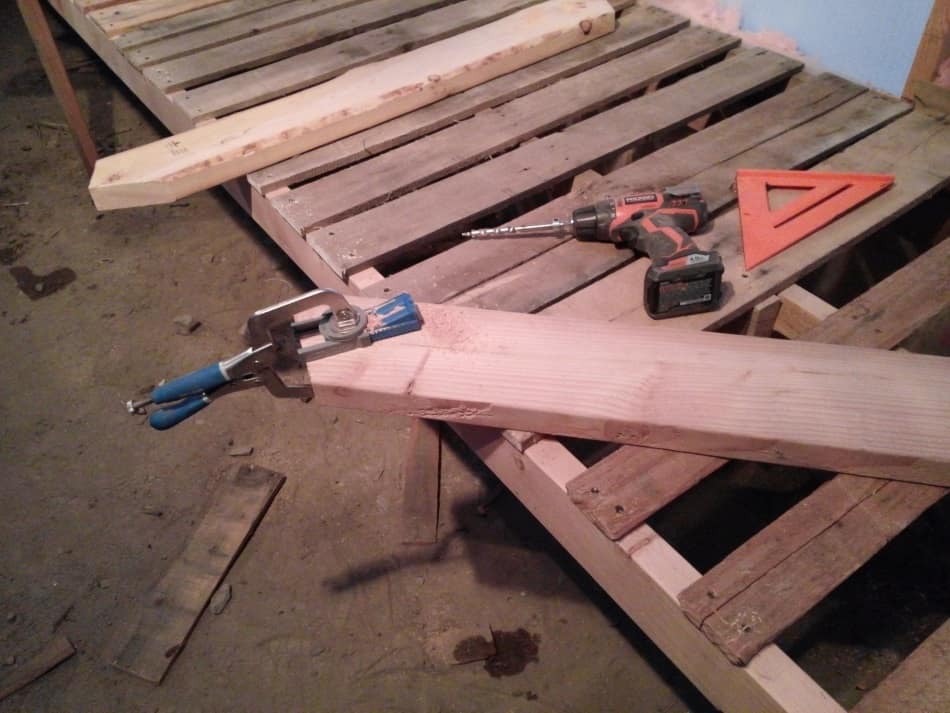
The next step was to cut out the bracing and drill some pocket screws using my awesome pocket hole jig (which I love and use for everything) in order to easily attach them to the wall.
I may have to fill in some of the gaps in a couple of the pallets as I use it, but most of the pallets I used won’t need any additional strips of wood.
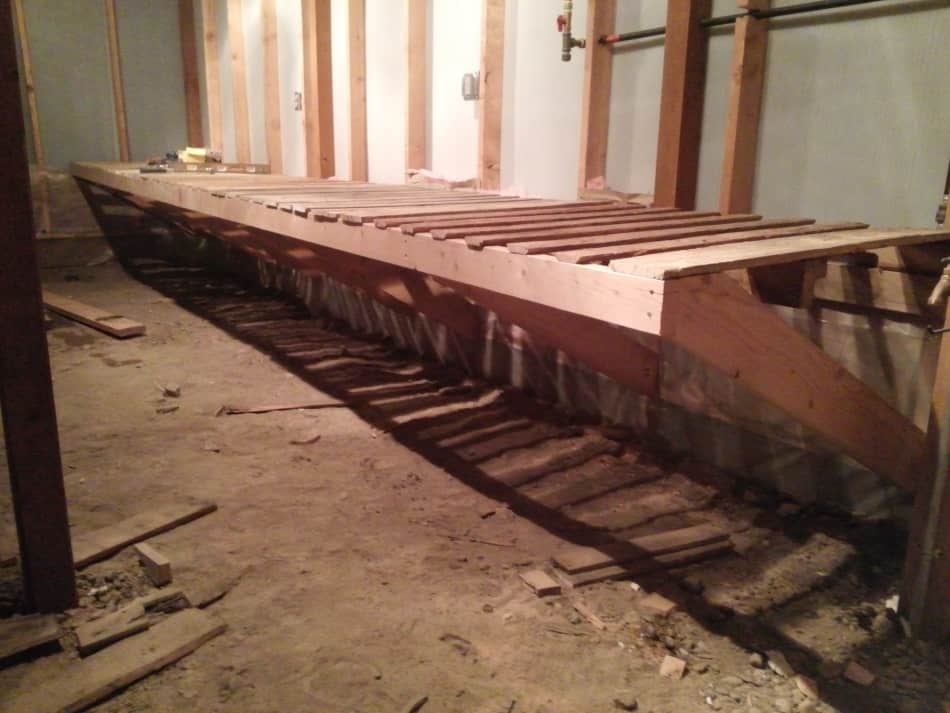
– Bracing shown on the end
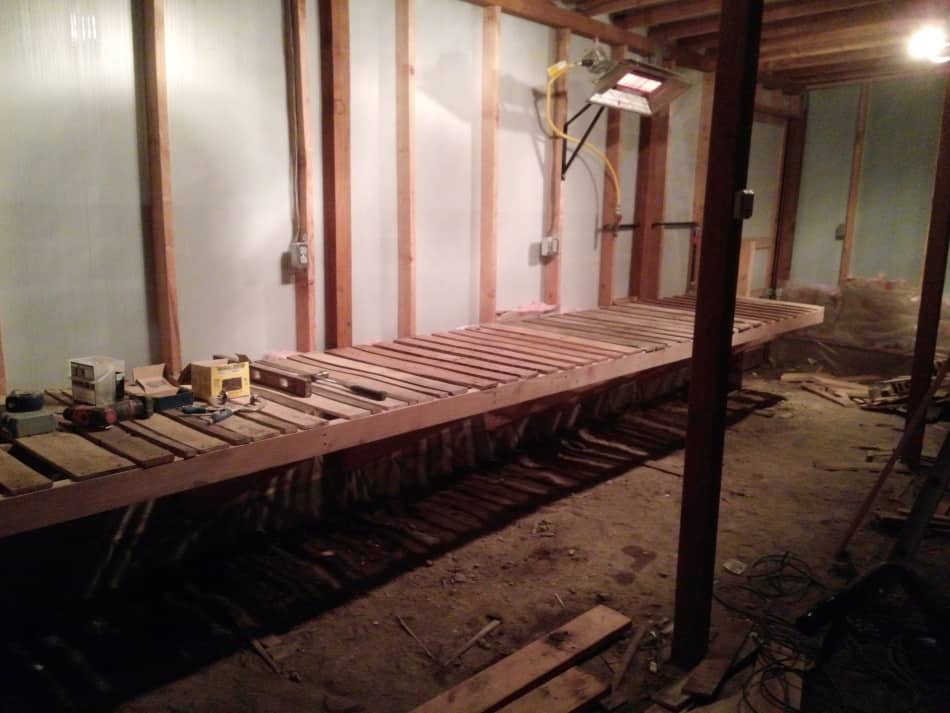
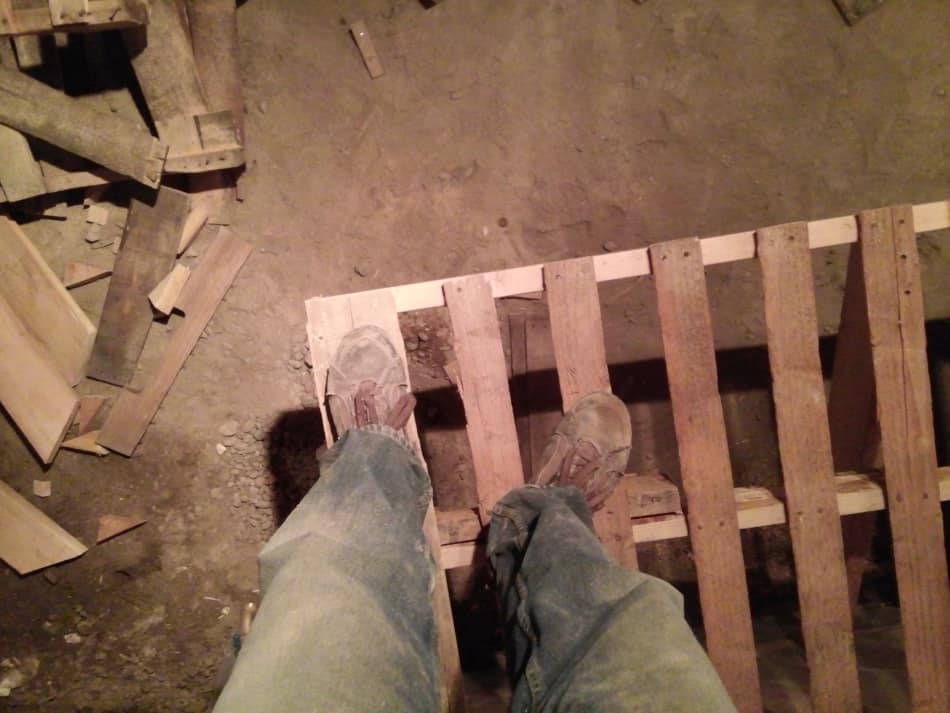
If it’s strong enough for me to stand on, I’m sure it will support the weight of a few seedling trays!
It took all day and I’m sore, but it was simple, cheap and even though it’s not furniture grade (in fact it’s very rustic) it should work great for my purposes as a seedling and potting bench.
Time to fill the greenhouse with plants!
I can almost taste the tangerines now that it’s finally up and running – I can hardly wait!