Will Your Greenhouse Blow Away?
One of our neighbors had a small pop-up greenhouse – one of those that was about the size of a large family tent. We were working in our backyard when we were hit by a surprise microburst and scenes from the Wizard of Oz popped into my mind as I watched their greenhouse lift up and fly over the fence. It wizzed right by me and across our deck just barely missing going through our sliding glass back door. They found it later that afternoon three houses down the street.
So, the question is, will your greenhouse blow away? Depending on the type of greenhouse and materials used to construct and secure it, there may be an excellent chance it will blow away in extremely windy conditions. Even if it can’t blow away, you’ll want to wind-proof sturdy greenhouses.
Any urban farmer or backyard gardener produces more, for a longer part of the year, with a greenhouse. However, most of us don’t have a ton of space, so we end up with a smaller, lightweight greenhouse in our yard. Most don’t seem that sturdy on their own, so how do we know if they will end up as a kite instead?
Several variables go into answering if your greenhouse will blow away. Let’s go through a few and cover your options to secure it firmly in place so yours doesn’t end up blowing away like our neighbors’ did.
What do I need to know about my greenhouse to tell if it will blow away?
- How is the greenhouse secured
- Local weather norms and wind speeds
- Material
- Location
Methods of securing greenhouses
Some greenhouses are so lightweight they are nicknamed “blow-aways” in the grower community. The cheapest of these are difficult to keep on the ground if you live in a strong wind-prone area. Some of these small, lightweight units are likely to last only one growing season.
If your greenhouse is unsecured or poorly secured, you will likely end up having to replace it or the cover due to wind damage regardless of where you live in the U.S. There’s a long list of possible ways to fasten down greenhouses that are not attached to a foundation to hold them in place.
We’ve searched forums, talked to other urban farmers, and gathered the best of those ideas for you.
Here’s a list of some of the materials we found used to secure greenhouses:
- Sandbags/Water buckets
- Ground anchors/Tent spikes
- Long eye bolts
- Ropes/Tie-downs/Ratchet straps
- Bricks/Cinderblocks
- Concrete pilings for anchor points
- Gravel or pea rock
- Wooden foundations/Pallets
- Existing structure to anchor the greenhouse to
- Zip ties/Wire
- Duct tape
Local weather
If you live in a place that often has high winds and a greenhouse not built on a foundation, chances are high it will blow away. Your local weather and wind speeds should be taken into account when choosing both the structure and its location.
Find out what the average wind speeds in your area are. If you live in an exceptionally windy zone of the country, you may need to find a location to put your greenhouse that shelters it as well as using other methods to secure it. Look into a sturdier model designed to last, instead of a less expensive plastic kit.
Storm winds are capable of taking down houses in many parts of the country, so understand that even the best greenhouses can succumb to gale-force winds.
Material and construction matter
Greenhouses come in many forms and have different attachments, cover types, sizes, frames, and construction techniques. Each behaves differently though most use similar methods to secure them.
Some use panels of polycarbonate, designed to allow only the types of light that your plants need and reduce sunburn. These often have metal frames, which stand up better to the wind.
While the covers of many greenhouses, lightweight framed and professional high-tunnel alike, are made of plastic materials, those plastics aren’t all equal. Greenhouses should use greenhouse-grade plastics, which we will cover more about shortly.
Plastic (Polyethylene)
Plastic greenhouses come in many varieties, thicknesses, and shapes. Though, first, “plastic” is a bit of a misnomer because most covers are polyethylene film. Greenhouse grade polyethylene comes in 6 mil thickness.
There are cheaper construction-grade versions of these film layers that come in 3mils, 4mils, and 6mils, but they aren’t as reliable or resilient. You can find polyethylene sheeting in reinforced, or single sheet varieties.
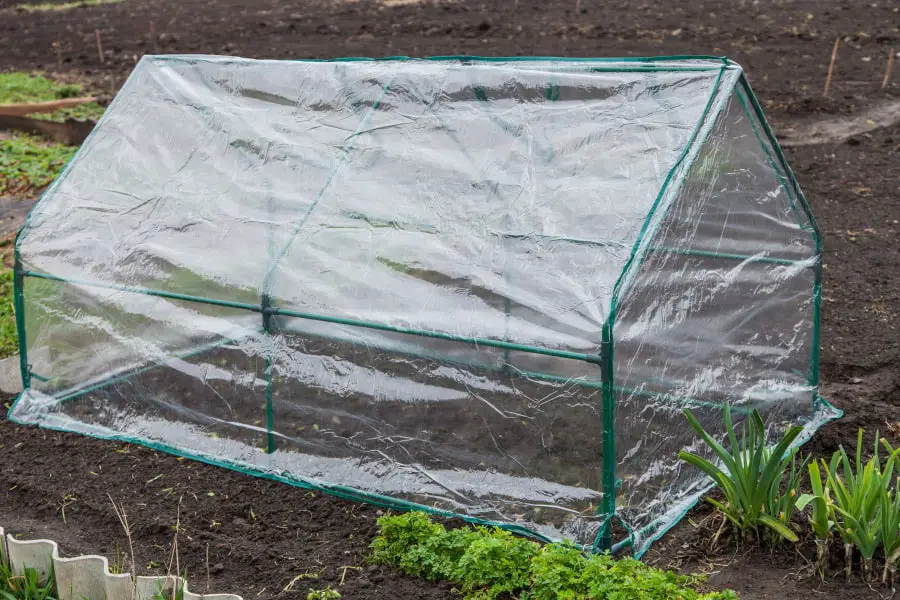
Plastic greenhouses can be anything from small, rectangular covered racks that look something like a portable closet for planters to shed-like constructions with thick, reinforced covers. There are stronger and weaker plastics, as well as construction materials used, depending on your choice of structure.
For a grower with limited space, these greenhouses offer maximum yield with a smaller footprint. They also offer a lower price point, making them popular with beginners and growers on a budget.
However, they lack a lot when it comes to being able to withstand high winds.
Wooden or metal-framed lightweight models
Building a wooden frame on a foundation and using anything from heavy plastic sheeting to recycled glass doors or polycarbonate panels can create a much sturdier greenhouse. You can also achieve that by purchasing a kit like this one on Amazon that includes a stronger frame and polycarbonate panels.
Another sturdier option is purchasing a high-tunnel type greenhouse that looks like a classic Quonset hut. The rounded sides help them to stay put in the wind. There are options (click link to see on Amazon) for all budgets.
There are even models that look like miniature barns, which add a bit of atmosphere to any urban farmer’s landscape. This model, available online from Amazon, features twin-walled polycarbonate panels, which allow for diffuse light to reach your plants on a sturdy frame, along with that cool “barn” aesthetic.
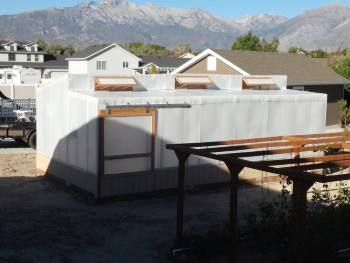
Professional/Permanent Greenhouses
Professional greenhouses in this article are substantial buildings on a foundation. These greenhouses are generally larger and more complex than those used by urban farmers and backyard gardeners. However, you can build a permanent greenhouse with a smaller footprint.
In general, these are the least likely to blow away; however, they can “blow up” if high winds are allowed to enter the greenhouse. We will cover wind-proofing greenhouses below.
Location, location, location
Where you put your greenhouse, either initially or after discovering that you have a problem, matters. A greenhouse, especially a lightweight one, is more likely to succumb to the wind if it is in an open and exposed area without windbreaks.
Placing your greenhouse somewhere with a windbreak, either a tree or hedgerow, fence, or other structure, is a good idea. Many growers find success in putting their greenhouse against an existing structure for stability. However, that’s not usually enough for the cheapest of greenhouses.
What if I have a plastic greenhouse?
Some of them simply will not stand up to windy locations. They must be in sites protected from the wind. If you have a plastic greenhouse, have no fear–there are ways to reinforce most types of plastic greenhouse.
The first thing to consider is the frame of your greenhouse–PVC pipe, wood, metal tubing, or something else. If your structure can’t stand up to the winds in your area, there is little chance your greenhouse will stay put.
Not all plastic is created equal
After that, the cover is your next concern. Depending on the thickness of your cover, and whether or not it is reinforced, you will find it stands up to winds differently. A 6 mil, greenhouse-grade plastic is the most preferable for a structure that will last more than a single season.
If your greenhouse has a thinner cover, you may want to consider replacing it with a reinforced or thicker cover.
Ways to secure your plastic or lightweight frame greenhouse
Now, on to ways to secure your investment, so your greenhouse doesn’t turn into a kite. Many creative and enterprising small-lot farmers have gone through this, so you will be able to find solutions that fit your needs and budget.
First, make sure that you have found the location that best protects the greenhouse from wind, as well as allows ample sun and easy access.
Some creative people have added heavier pieces to a lightweight frame, or ropes attached to immovable objects. We’ve also found a few that drove long hand-made wooden spikes into the ground, which they attached to the frame.
First things first
Check all of your frame connections and reinforce them if needed. Brackets would be one method to secure them, but even zip ties–or duct tape–will do in a pinch. Your goal is to snug up joints that may come apart under pressure. Once you have your frame as reinforced as possible, it’s time to make sure that it’s not going anywhere.
Staking things out
Once your frame is solid, it is time to get it secured. There are many options to do this.
- You can use water in buckets, gravel, bricks, rocks, sandbags, or even pallets as anchor weights for your greenhouse. We suggest that you place those heavy items on the bottom shelf or ground supports of your greenhouse, keeping the weight lower helps to keep your greenhouse in place.
- Attach the frame using zip ties, wire, or strong rope to a foundation of some kind. You can make a foundation out of pallets that are weighed down.
- Tie it down. Use tent stakes or ground anchors to place the frame firmly where you want it.
- Pour concrete pilings. Dig small diameter holes at least a foot or two deep and pour fast-setting concrete into them after mixing it by the bag instructions. Put a post, or metal rod, into the concrete that is raised above ground level, which you can then attach to the frame.
- Attach it to an existing structure. Do you have a building that you could attach the greenhouse too? Of course, this method depends on a number of factors–what buildings to attach to and the location of the sun. Should you decide to attach it to your house, you don’t want it on the north side. It might also be impractical–don’t make the mistake of putting something so far away from your main entrance that you forget about it.
Check your cover
If you have a greenhouse that is designed to last only a few years, chances are the weak point you have to the wind is not just the frame. Tape areas that rub up against the frame or appear to be weakening with reinforcing strapping tape–or duct tape if you must.
Now, check all of the areas that the cover is attached to the frame. They should be sturdy and well-attached. Once you have completed this, you are down to the ground, the bottom of your cover. The plastic flashing or trim around the outside of your plastic greenhouse needs to be weighed down.
Consider what kind of gravel, sand, or rock you want to use to weigh down your plastic. Maybe you can come up with a double-use, say putting down a series of moveable planters. Sandbags placed around the perimeter of your greenhouse tend to be both good weight and non-abrasive compared to rougher rock and gravel.
If your cover is well-attached to the frame that you have properly secured, your biggest problem will be the cover tearing off of your greenhouse frame in the event of a hard blow.
Examples of well-secured plastic greenhouses
Here are a few videos you can check out demonstrating how to secure your plastic greenhouse.
Here:
here:
and here:
Lightweight frame models
Similar to the cheaper, “blow away” type greenhouse, polytunnels, and many other types of greenhouse feature lightweight construction, but tougher materials. You can have anything from Quonset-hut shaped to a lean-to or shed shape. The key here is that they most likely are not built on a foundation.
These are hardier, standing up to the elements better, but must be secured also. You can use many of the methods mentioned above, as well as pouring concrete anchor points to secure them to.
Additional ways to secure lightweight frame greenhouses
Some lightweight greenhouses don’t have plastic covers. Others have taller roofs and rounded sides, making the plastic covers a bit more complex to secure.
Securing Polycarbonate Panels
Polycarbonate panels do not need securing the same way as plastic sheeting. Here’s a video that showcases the right way to install polycarbonate panels for your greenhouse, to keep it as wind-proof as you need it to be:
Setting up a foundation
When considering a foundation for your greenhouse, there are a lot of options. Below, we found a video that shows a great way to set up a lightweight framed greenhouse foundation that would be easy to use ground anchors with:
Reinforcing corners
Reinforcing corners is an excellent way to wind-proof plastic-covered greenhouses to stand up to strong winds. If you aren’t sure how to add plastic reinforcements to the corners of your greenhouse, we found this video that explains the process:
Brilliant hack for plastics on larger greenhouse frames
When securing plastic to a sturdier lightweight frame greenhouse, you may run into a problem keeping it where you want it. Here, we found a great trick using cheap PVC pipe to secure your plastic in place:
Installing ground anchors the easy way
Ground anchors are especially important but can be challenging to drive into the earth easily. We’ve found a great hack in the video below for getting stable anchors deep enough into the ground to do the trick:
Wind-proofing your greenhouse
Wind-proofing is essential for all greenhouses. Start by making sure your greenhouse is in a location that offers it some protection and is well secured. If you can’t move your greenhouse, there are still many things you can do to make it safer from storm damage.
Search the area for dangers
Police the area around your greenhouse for objects that may become missiles when the high winds hit.
Assure that no overhanging branches or nearby plants are loose or in danger of being blown into your greenhouse.
Put away any yard equipment, kid’s toys, or tools that could become flying debris.
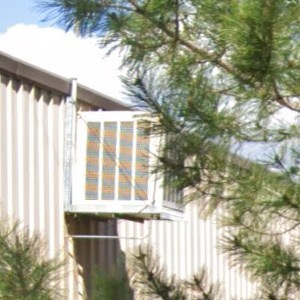
Check attachments, covers, panels, and parts
Make sure that any metal parts of your greenhouse, such as chimney sections, are adequately secured. This means using sheet metal screws and securing them to reinforced areas of your greenhouse.
Check to see that the plastic cover is attached securely and tape any holes. Assure that skirting or the bottom of your cover is well secured to the ground, preventing wind from entering.
To finish the wind-proofing, check out the steps below
Preparing your greenhouse for a storm
When wind can get into your greenhouse, it makes it all the more likely that the greenhouse will blow away or become damaged during high winds. The following steps will help to assure that wind stays out of your greenhouse, and the damage is kept at the minimum.
- Close all openings, including windows, vents, louvers, and doors.
- Make sure plastic sheeting is solidly held down and doesn’t allow air to enter.
- Disconnect the arm to any ventilation motors, close intake shutters, and tape them.
- Turn on the exhaust fan. This creates a vacuum that sucks the cover tight to the frame.
- If you have an air-inflated greenhouse, slightly increase the pressure to stop rippling.
Remember, no amount of preparation will save all buildings from every storm, not even houses or churches. Preparation makes survival more likely, so these steps are handy to keep the air pressure inside your greenhouse from causing it to lift into the air or “explode.”
Wrapping Up
A backyard greenhouse is an excellent investment for small-lot farmers, though many that are priced reasonably can be a little flimsy. There are many ways to secure them, but the bottom line is that cheaper plastic greenhouses just aren’t very sturdy. Spending a little more, and following our instructions can help you keep your greenhouse where you put it.