How To Clean a Swamp Cooler
Growing up, I remember knowing warmer weather was finally coming when the whole neighborhood would turn their swamp coolers back on. These metal boxes of magic could cool an entire two-story home with the same energy cost as a box fan! As amazing as they are at cooling homes, they can be a bit of a challenge to clean. Every year we would have to look up the same question.
How do I clean a swamp cooler? To clean a swamp cooler, you need to:
- Unplug the swamp cooler from its power and water sources.
- Drain it using a drainway or through siphoning.
- Scrub well with vinegar.
- Rinse with water.
- Replace the fiber pad.
- Test to make sure it is working as it should.
Simple enough, but extremely important that you be as thorough as you possibly can. A swamp cooler is notorious for quickly getting overtaken by mold and having a mildew smell if not cared for properly. To avoid any complications with your unit, it’s best to understand how the system works before really understanding why the cleaning process is so necessary (and tedious).
What is a Swamp Cooler?
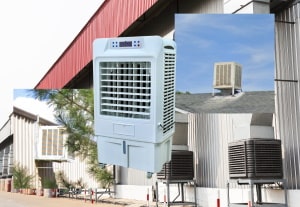
If you live on the East Coast, there’s a good chance you’ve never even heard of a swamp cooler. A swamp cooler is the common name for an “evaporative cooler.” It’s a type of cooling system that can be more cost effective than running an A/C unit, given the proper environment. They come in two different styles: portable and standing.
- Portable swamp coolers: Like the name suggests, portable swamp coolers are evaporative coolers that you can easily move around the house. These are most effective in locations where the seasons may change, or the humidity level fluctuates constantly.
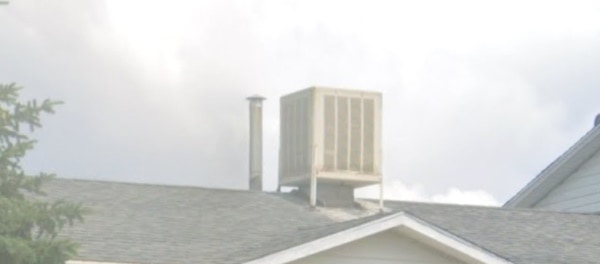
- Standing swamp coolers: These are evaporative coolers that are built outside your house. Their venting system is directly linked to the side of your home and can withstand different temperature changes to a degree (pun fully intended). These are meant to be used throughout the year and should only be installed in climates that suit the cooler’s needs.
How Does a Swamp Cooler Work?
To understand exactly how a swamp cooler works, you must first understand the relationship weather has to the cooling properties of the unit. Unlike A/C units, a swamp cooler works off of an open system. That is, it is directly impacted by the weather around it. There are three major factors that influence this effectiveness: temperature, relative humidity, and dew point.
Temperature
Temperature is the amount of heat present in a system. In this case, the system is the air surrounding the swamp cooler.
As the temperatures rise, more heat is present in the air and around the cooler. In order to reach equilibrium, the higher temperatures will start to cause water vapors to form (evaporation) in order to keep the air at a constant level to keep oxygen from escaping.
Through the process of evaporation, the air begins to cool down from releasing so much energy. After evaporation forms, the swamp cooler distributes the cooling air around your home.
Relative Humidity
Relative humidity (or RH) is the difference between the actual amount of humidity (water vapor) in the air versus the maximum amount of humidity the air can hold. This difference is expressed in a percentage.
It’s important to know the relative humidity when deciding whether or not to use your swamp cooler, because it is the main factor that will determine if your cooler will even work. If the relative humidity is high, that means the air is not going through the evaporation process as quickly or at all. If this is the case, the air won’t be cooling; thus, your swamp cooler won’t have any cool air to blow through your house.
Dew Point
Dew point is the range at which the water molecules in the air begin to condense. This means it is the point when the air can no longer take in evaporation. When the dew point is reached, your swamp cooler will stop working. This is because there is no evaporation occurring in the air; thus, there isn’t any cool air to distribute.
It is also important to be aware of the dew point when using an evaporative cooler, because when the dew point is reached your cooler will be covered in water droplets. These droplets can seriously damage the unit if not taken care of properly. The water droplets can also cause a nasty smell if the unit isn’t cleaned.
Combining all three factors together should give you an inclination as to whether or not it is worth setting your swamp cooler outside to be used. Just be sure to really look at the relative humidity as that will be your best measure of how effective your swamp cooler will be at blowing cool air around your house.
If you’re ever unsure, check the evaporative cooler’s manual. It will have a chart that lists the best environmental conditions your unit should be in. Depending on the region, you may even be able to find a local guide at your hardware store that will list what days you can use the swamp cooler, like a Farmer’s Almanac!
Why Do You Need to Clean a Swamp Cooler?
Because a swamp cooler relies solely on the processing of water vapors, it is a prime environment for mildew and mold to grow in. The unit’s inner workings are all in cool, damp, and dark conditions at all times. Add all of that onto the fact that most areas that use swamp coolers end up in winter seasons, and you’ve got the perfect equation for mold growth.
If a swamp cooler is not properly cleaned at least before winterization, the results can be catastrophic. First and foremost, your swamp cooler won’t work. There will be too much mildew build up for the pads to pump cool air through your house.
Secondly, without proper cleaning mold can grow in the unit. If you turn on the swamp cooler without knowing mold has grown inside of it, you might be spraying mold spores all throughout your home.
Lastly and probably the biggest reason you need to clean your swamp cooler is the smell. An evaporation cooler that isn’t cleaned properly, or ever, smells of wet socks. Add that nasty smell on top of a unit that’s only job is to circulate air throughout your home and you have a disaster on your hands!
Thankfully, the cleaning process isn’t too physically taxing and doesn’t require anything more than supplies you most likely already have around your house.
Products You Need
Although there are two types of swamp coolers (portable and standing), both can be cleaned using the same method and items. Listed below are all the products you should need for the deep cleaning.
- Gloves
- These aren’t necessary, but they might be good to have on, especially if you have sensitive skin.
- Whisk broom
- Do not use the same broom you use to sweep your house! The point of the whisk broom is to remove dust from the unit, not add it.
- Vacuum
- A wet/dry vacuum would be the best choice as there is a chance you will be sucking up some water.
- 1 gallon vinegar
- The most popular type is white vinegar, but apple cider will do the job just as well
- Bucket
- You’ll want at least a one gallon bucket as this is what the vinegar will be dumped into.
- Scrub brush
- If you don’t have access to a scrub brush, a gorilla pad will also work
- Garden hose
- This is under the assumption that you are cleaning a standing unit
- If you are cleaning a portable unit, you can do this process in your bathtub, depending on its size
- Lubricating oil
- Make sure you check the swamp cooler’s manual for the exact type of lubricating oil needed for your unit.
- 1 roll fiber padding
- Synthetic will work, but aspen is better. I recommend these ones.
- Scissors
- You’ll want heavy duty scissors as you’ll be cutting through the fiber padding.
Let it be noted that there are no harsh chemicals listed above. That is because you want to avoid using any chemicals when cleaning. Bleach would seem a logical product to use, but don’t forget the main function of the swamp cooler is to circulate air throughout your home.
If you use bleach in the unit, you could irritate your lungs and could possibly damage the pads or panels inside the unit.
Step by Step Guide
Now that you have all the products needed for the cleaning, it’s time for the actual process. It should take you around two hours to fully clean your unit, depending on its size. Be sure to be as thorough as you can while you clean.
- Unplug the unit- this seems a no brainer, but be sure to turn off and unplug your swamp cooler before cleaning or removing any parts.
- Turn the water off – just like the power, you want to turn the water access point off from your unit. This is more so for standing units than portable ones, but the principle still stands: turn off anything and everything from the swamp cooler.
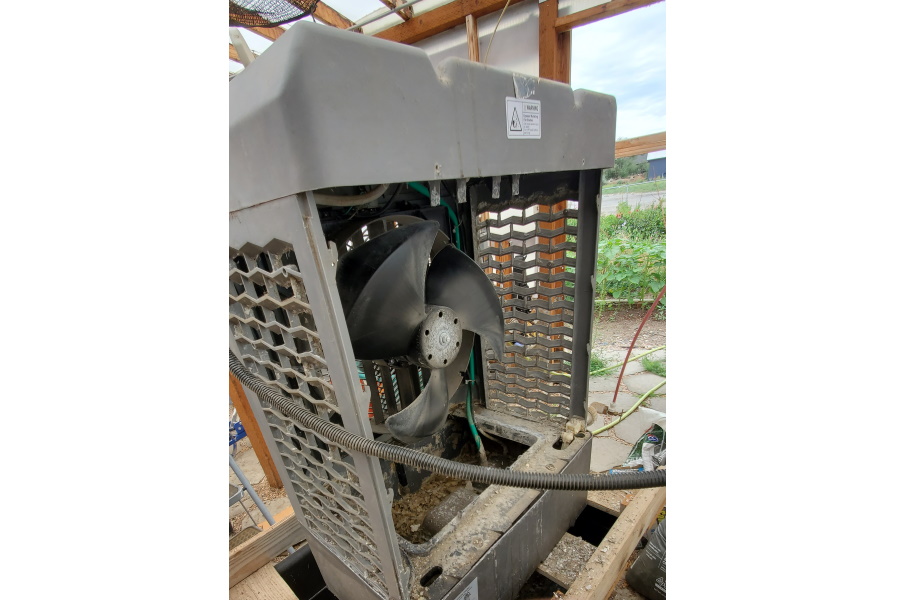
- Remove the back panel- the back panel is the panel furthest from the contact point.
- If it is a standing unit, the back panel is on the opposite side of the vent going into the house.
- If it is a portable unit, the back panel has the grill on it.
- Remove the fiber pad- the fiber pad is what the water vapor is absorbed through. At this point and time, the fiber pad is useless to the unit but do not throw it away just yet!
- Drain the water- usually next to where the back panel was, open the drainway and remove all the water from the unit.
If there isn’t a drainway, use the hose to siphon the rest of the water out.
- To siphon water out, put one end of the hose inside the unit.
- Gently suck on the other end of the hose until the water starts to travel through the hose.
- Put that end into another container (or in the grass) and let the water run out.
- Brush the inside- it may seem a bit weird, but use the broom to brush the inside of the unit. The goal is to get all the dust and debris out. To be extra sure it is all out, use the vacuum to suck the rest of the dust out of the unit. You want it really clean.
- Pour the white vinegar in- you want to pour the full 1 gallon of white (or apple cider) vinegar into the water reservoir (the place you just drained all the water from).
- Let the vinegar sit in the unit for at least one hour.
- Drain the vinegar- exactly like how you drained the water, you’ll do the same for the vinegar. Note: drain the vinegar into the bucket as you shouldn’t dispose of it down the sink.
- Scrub the water reservoir- with the brush, scrub roughly at the water reservoir. You want to make sure you get each and every corner.
- Rinse the water reservoir- it may seem redundant, but you’ll want to rinse the whole thing with cool water. This will keep your unit from having that vinegar smell linger. Note: If at any point and time you see the unit is leaking, stop what you’re doing and let the unit completely dry. Then, seal the leak with a silicone sealant.
- Maintain the motor- The motor and fan have most likely been spinning nonstop for quite some time. Because of this, they most likely need to be lubricated. A few drops will go far in this process At this time it might be a good idea to check the fan belt as well. If it is sagging more than half an inch, it is time for it to be replaced.
- Cut a new fiber pad- lay out the old fiber pad on the ground and put the new one on top of it. Using the scissors, cut out the fresh fiber pad using the old one as a pattern.
- Replace the fiber pad- wherever you pulled the old fiber pad from must be replaced. If you are unsure of where exactly it came from, the two main spots it must be attached to is the back panel and the sides.
- Turn the water on- reattach the water hose (if you removed it) and turn the water back on. Allow the unit to completely fill with clean water.
- Return the back panel- in the most snug fashion possible, reattach the back panel to the unit. Be sure it is completely in place before turning on.
- Turn the unit on- plug the swamp cooler back in and turn the machine on. Let it run for a few minutes and observe it to make sure the fan and motor are running properly and smoothly.
- If anything sounds wrong or clanking, immediately turn the unit back off, drain it, and check the motor and fan.
- If some water is not trickling out of the bottom of the unit, let it run for a little longer before shutting it off and checking the manual. Note: keep your face away from the vent when you first turn it back on. Any dust that is still in the unit will get blown out that way.
Regularly cleaning the unit, especially before winterizing, will ensure its longevity and reduce the risk of mold and mildew growth.
For seasonal care and other maintenance tips, be sure to read our “what to do if my swamp cooler isn’t blowing” article.
Swamp Cooler Deodorizer
To keep your unit smelling fresh and clean, it is important to take preventative steps. This can come in the form of making a swamp cooler deodorizer. It’s very simple and can be made right at home.
- Prep clean- if you haven’t already, go ahead and clean the unit just as instructed before. You’ll want to start with a clean base as much as possible in order to ensure the cleanest unit
- Mix vinegar and water- you can make this mixture in a spray bottle, if you have a spare one, or in a bucket. You will want to do a 1:3 ratio of vinegar to water. That is, 1/4c vinegar for every 3/4c water. Note: warm water is highly suggested over cold water to help the mixture combine faster
- Spray problem areas- anywhere that may harbor mold should be sprayed thoroughly. This would include but not limited to the: pads, panels, base, motor, and even on the outside of the unit.
- Rinse- after spraying and scrubbing, you’ll want to rinse the unit out with water. One rinsing of water will do the trick as the vinegar mixture is antiseptic (bacteria can’t grow on it). If the vinegar smell is bothering you, rinse the unit two more times with clean water.
Note: if you do rinse the unit thoroughly with water, be sure to completely dry it! Any water left to sit in the unit, especially over a long period of time, can grow mold or mildew.
It should be noted that the deodorizer is just that: a deodorizer. Do not use this mixture as a substitution for winterization cleaning. If you really want to keep your unit from smelling of mildew, clean it frequently!
Winterizing a Swamp Cooler
Winterizing is the process of preparing your swamp cooler unit for long months of no activity. This usually happens before winter time, thus the name! The process is pretty similar to the cleaning procedure and should follow after a thorough cleaning anyways.
- Unplug the unit- just like before, you want the power to be turned off and unplugged to reduce any safety hazards
- Turn off the water- this can be done by either completely unhooking the unit or turning the valve off. It depends on the build of your unit and how the swamp cooler is attached to your house.
- Drain the water- follow the same procedure as the cleaning process to remove all the water from the swamp cooler. Again, if it isn’t draining fully use a hose to siphon the water out.
- Scrub the water reservoir- is this starting to sound familiar? Same purpose as before, since the swamp cooler will most likely be sitting out for an extended period of time, you don’t want any mold, mildew, or dust that might have made its way into the unit to linger.
- Replace the fiber pad- This only needs to be done if it hasn’t been replaced in a while. The maximum length of time it should go without being replaced is three months (if constantly used).
- Use a cooler cover- these covers are designed specifically for swamp coolers to keep any snow or extra moisture out of the unit. I recommend this one. It will also reduce the risk of dust being introduced through the vents as it sits unused. For extra precaution, you can close the damper (main vent) to help keep the introduction of debris to a minimum.
By doing all of this, you should be able to get more years out of your swamp cooler’s life. It will also make the transition to the spring easier as hopefully the only thing you should have to do is hook up the water and refill the unit!
Tips to Keep the Swamp Cooler Clean
To reduce the number of times you will have to do a deep cleaning of your swamp cooler, there are a few preventative habits you can get into.
- Only use it when you need to. This will reduce the amount of times it is exposed to open air and possible mold spores.
- Use quality pads. The most recommended fiber pad material is aspen. This is because it is made from a naturally occurring material that is incredibly absorbent.
- Keep the area clean. If your swamp cooler is a standing unit (outside), try to keep any leaves, grass, or other elements away from the cooler as much as possible. For more portable units (inside), store it away in a clean environment that won’t be disturbed; the best location being the closet.
Is a Swamp Cooler Worth It?
With so much maintenance and need to watch every weather factor, the question gets thrown around. Is it worth getting a swamp cooler? The answer truly depends on your location and commitment to caring for the unit.
Climate
To start off with, if you don’t live in the right kind of climate to support an evaporative cooler, there’s no point in purchasing one, even a portable one. Anywhere with tropical weather or high humidity levels is off the table (sorry South Florida)!
The best climate to use a swamp cooler in is one where the humidity levels are low. If you live in a region where relative humidity levels stay around or below 55%, consider purchasing a unit. These regions are usually the West Coast, anywhere around the Rocky Mountains, midwestern range, and the northern border right below Canada.
Portable Units
As for the commitment to the maintenance and cleaning, one possible solution would be to purchase a portable unit instead of a standing one. The portable units are more compact and can easily fit in the closet on days where it wouldn’t be suitable to use. The smaller swamp cooler also makes cleaning a bit easier as you’re not lugging buckets of vinegar and water out to clean the pads.
Costs
It may seem like a hassle or chore, but the savings from using a swamp cooler are immensely popular. Since it draws all of its cooling properties from the air, it only requires the same energy needed for a box fan. The low energy cost doesn’t mean it won’t cool your entire home though! There’s a reason most people opt for a swamp cooler rather than an A/C unit.
All in all, it is completely up to the individual whether they would prefer an A/C unit over a swamp cooler. They can be used in tropical climates, but cleaning will be far more frequent. There also isn’t a guarantee it will last for a long time nor work at its highest capacity. In a pinch, a swamp cooler will cool down a southern home at a lower energy cost than an A/C unit.
Final Thoughts
At this point it should be clear that swamp coolers need to be cleaned thoroughly and as often as possible. They are so susceptible to being completely overtaken by mild, mildew, dust, debris and all kinds of nasty bugs and bacteria. Their design makes them perfect breeding grounds for these less than desirables.
Even though the cleaning and winterization process might be lengthy and time consuming, it is an incredibly important aspect of the swamp cooler owning experience. Thankfully, the process isn’t too high maintenance in the sense of steps involved. All you really have to do is: drain it, scrub it, and replace the fiber pad. For winterization, same deal with the added bonus of a cover.
All in all an evaporation cooler, whether it is a standing unit or portable enough for the closet, might be a good investment based off your location and cooling needs. The cleaning process for a swamp cooler shouldn’t deter you from saving serious money in your electric bill!