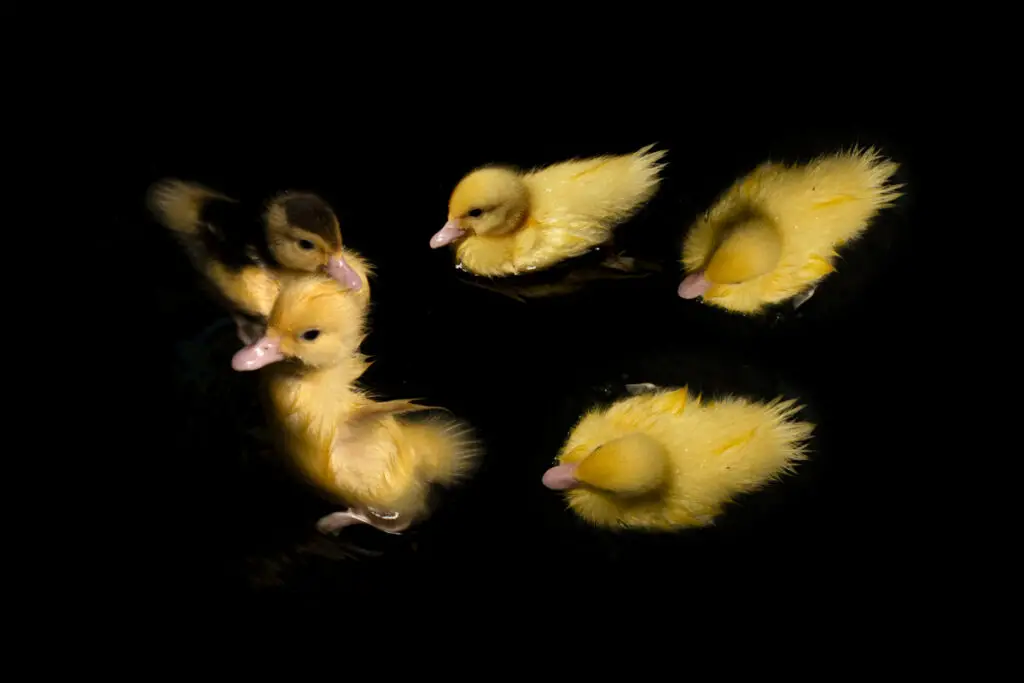
How to Care for Baby Ducks Inside: The Complete Guide
From farm to home, if you plan to care for baby ducks inside (or even if you plan to move them to an outdoor pen later), there is a lot of information to collect. Whether you are raising ducklings along with your chickens, enjoying their eggs, or adopting them as pets, you should be privy to this species’ unique needs in order to keep your ducklings strong, healthy, and thriving.
How to care for baby ducks indoors. It will encompass the animal’s needs from pre-hatching to maturity from nutrition to shelter and temperature needs. It will also be about transitioning them beyond indoor coops after reaching adulthood for the highest potential survival rate and disease mitigation.
In nature, 2 out of every 12 ducklings typically survive; however, you can mitigate many of the environmental risks by caring for them indoors. Only by understanding ducklings’ complex needs can you ensure healthy and safe baby ducks. Use this guide to understand these adorable creatures from what you’ll need before hatching, to after they’ve hatched, and how growth will look throughout their developmental process.
How to Care for Baby Ducks Inside: The Complete Guide
Raising ducks can be an incredibly enjoyable process, and who can deny a fluffy duckling? With their ability to be raised alongside chickens, it is very simple for you to incorporate ducklings into your already existent family farm.
There are more cases than you might imagine where a mama duck gets hit by a car, and a family adopts the baby ducklings as they have no one else to care for them. More often, people raise them for eggs, protein, or to be enjoyed as pets that productively eat mosquito larvae in the garden. Regardless of how ducks came to be a part of your life, there is a plethora of information to absorb.
How to Care for Baby Ducks Inside: The Complete Guide will cover:
- First Step – Before Hatching Them
- What Equipment Will You Need?
- Eggs Week-by-Week
- Setting Up Their Indoor Brooder Before Hatching
- During the Hatching Process
- After the Ducks Hatch – What They Will Need
- (Brooding Lamp, Water, Swimming Needs, Food, Niacin)
- Once Grown – Time to Move Your Duck Pen Outdoors
- How to Set Up Outdoor Shelter
- Tips to Be Aware of For Your Ducklings
- If You Are Raising Ducks for The Purpose of..
- Final Tips for Raising Ducklings
Ducklings will require a lot of care, research, and attention on your part, but if you’re willing to put in the work, they can be appreciated for years to come and offer your family eggs, protection from pests, and cuteness.
You must be willing to offer them:
- A safe place to grow and mature
- An environment free of predators and ecological hazards
- Your acceptance and acknowledgment that they will make a mess (especially when given a tub of water to play in!)
Without further ado, here’s the process from hatching to maturity:
Before Hatching Them
An ideal place to start is the hatching of your ducklings. If you’re looking to care for them indoors, you will likely be hatching them and caring for the entirety of the life cycle.
Ducks will lay between 100 and 325 eggs per year, according to Community Chicken’s piece on, ‘Duck Breeds for Eggs and Meat.’
The reason behind why ducks lay such a significant amount of eggs is due to the high mortality rate of these eggs. Due to the fact that the chances are quite low for duck eggs to survive, ducks had to evolve. They developed the trait of laying so many eggs to raise their chance of survival.
Since ducklings will grow at a rapid rate, you will want to be prepared beforehand for their hatching process and arrival.
They will mature faster than chickens, and their hasty growth-cycle is a benefit to raising them because they will be out of your house quicker.
What Equipment Will You Need?
- A brooder (we recommend this one)
- A heat lamp
- Bulb for a heat lamp at 75 watts
- Clamp for bulb
- Feeder (see our recommendation here)
- Water (see recommended here)
- Warmth and comfort additions such as blankets, hay, flake shavings, etc. Add straw and soft insulation along the ground of the brooder. Ducks can be messy, so don’t place cherished fabrics here, but hay or straw will work wonderfully.
Chicken equipment is suitable to ducklings as well.
Your brooder box can be:
- A fish’s aquarium (glass)
- A strong cardboard box
- A plastic container
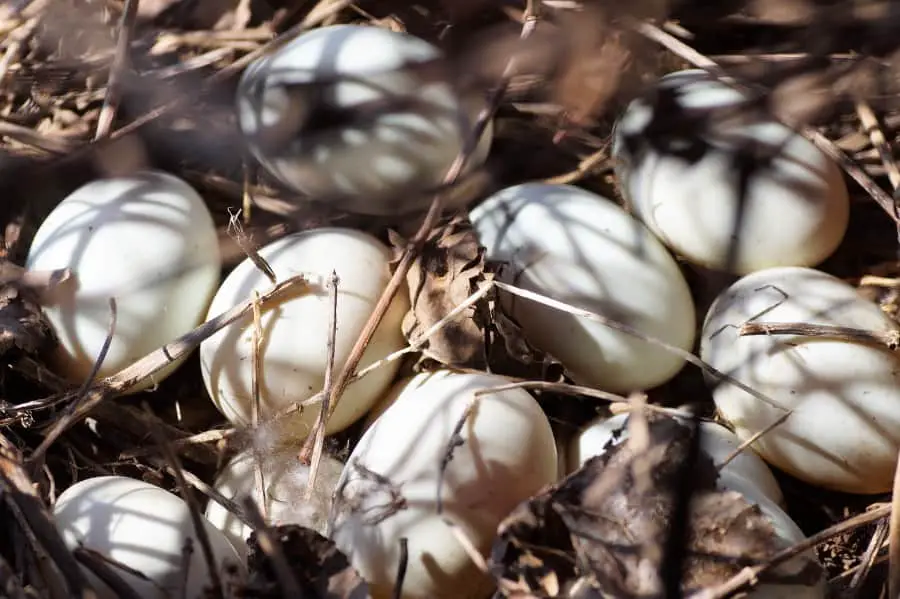
Eggs Week-by-Week
Your eggs will take around a month to hatch. Between this time, a lot can happen to these delicate eggs.
A few notes for your responsibilities during this time include:
- You will need egg storage, such as a carton, to keep them protected safely.
- Humidity will play a significant factor in your egg’s thriving in a scenario that mimics nature
- You will be turning your eggs each day. Rotating them is very important to their proper development, so mark one side of each egg to note the top. Flip that marked side to where you cannot see it sometimes, and keep the egg turning on all angles to ensure gravity doesn’t harm the baby duckling inside the egg.
The week-by-week growth cycle will essentially look like this:
- Before the egg is laid – Have your Incubator (click to see on Amazon) set-up and functioning for a full 24-hours before introducing new eggs.
- 1st Day to 7th Day (First Week) – The environment can be at room temperature while you are moving the eggs from birthing to incubator. Allow the eggs to rest on their side in the incubator for the first 12 hours before you turn them. After this, you should be rotating the eggs daily (some recommend up to three times daily). Do not turn more than this but keep an eye out for stagnant eggs that do not get turned enough, as it could be fatal.
You will want the temperature of your incubator at 99.5-degree Fahrenheit, with humidity placed at the range of 50% to 55%.
- 8th Day to 25th Day (Second to Third Week) – You should remove the eggs from the incubator daily and give them time to cool off at room temperature for about 15 minutes per day during this period. Mist the eggs with a bit of water and place them back in the incubator at a new angle. Same temperature and humidity level should be maintained within the incubator.
- 26th Day to 28th Day (Last Three Days) – You will not need to turn the eggs any longer or mist them. If there is an auto-turning setting in your incubator, switch this to off.
Same temperature, but humidity should be increased to between 70% to 75% within incubator.
Around day 28 to a month, you will see the eggs begin to hatch.
Setting Up Their Indoor Brooder Before Hatching
While they are incubating, you should have their shelter set up for their impending arrival. At any time during this month, take the steps to establish a safe place for them after they emerge from their shells.
The Shelter should be a safe place that includes:
- Comfort
- Security
- Proper ventilation and airflow
- Enough room for them to spread out their wings and not be on top of each other
A few tips to keep in mind for creating their future brooder home includes:
- Create a box/brooder that is insulated without holes in the bottom.
- It is best to avoid wire cages as they release heat, and ducklings tend to have trouble with the wire bottomed cages on their webbed feet. If using a wire cage, place some kind of carpet or towel over the bottom so they’re not falling into each crevice.
- Keep the brooder box close to the ground or on the ground to protect them from falling.
Materials for Bottom of Brooder
To list in completion, the ideal materials to place on the floor of your brooder/box that you should use are:
- Towels
- Hay/straw
- Wood shavings (thin)
- Carpet/rugs
Do not use:
- Newspapers
- Paper
- Plastic
- Any slippery material
- Wire cages without coverings that can trip them
You do not require a rooting bar as with a chicken coop.
Tips If Hatching Ducklings Indoors
- Keep a clean nest area
- Don’t wash the eggs initially as they have a protective film that should not be removed the first few days
- You will be boosting the humidity level before hatching and after hatching, but if you experience repeatedly failed hatchings, it could be due to your climate having dry conditions. In this case, your eggs need even more moisture, and you can up the humidity level to 85% to experiment with this factor.
During the Hatching Process
Allow your eggs to hatch and emerge freely. Do not touch the eggs or try to help things along, allow nature to do as it intends.
Keep the humidity around 75% to 85% in their hatching area. You can lower the temperature to around 98.5-degrees Fahrenheit in the incubator as you don’t want to overheat them while they’re working to break free of the egg.
You must have patience during this period as it may take 48 hours for a duckling to emerge from the egg’s shell fully. It will be a much longer process than chicks hatching.
It will then take around 24 hours, additionally for the ducklings to stumble around their new surroundings.
After this point, you can move the family to the brooding box.
After the Ducks Hatch – What Your Ducklings Will Need

Now the ducks should be moved into the brooder box you’ve set-up.
Do not feed your ducklings for the first 24 hours after they’ve hatched. After these 24 hours, you will need to tend to their:
- Shelter
- Temperature
- Water
- Food
Brooding Lamp and Heat Source
Their new source of heat will be a brooder light (also known as a brooding lamp).
Your brooding lamp will replace the incubator’s impact, and as you likely have gathered by now, ducks need to be kept warm.
Some tips for your brooding lamp will be:
- Start with a 100-watt bulb and decrease this as they mature and place it about a foot away from the brooder boxes’ base where the ducklings will run around.
- You will keep the temperature at 90-degrees Fahrenheit for the first week and then gradually lower the temperature one degree each day after this.
- Put the brooder heat lamp on one side of the box. This allows the chicks to move away from it if it is too hot.
- If you notice all ducklings are running away from the heat:
- it is too hot, and you need to turn it down slightly or move it further away. Do not allow the heat to scorch them or overheat them, as this will lead to dead ducklings. If it is too close, they will burn themselves.
Prop it up and away from the ducklings, and use your own hand to determine what is warm and what is hot. The difference could be fatal so hold your hand in the location of the ducks and use your rationality for what feels too hot. Walk this line very finely with gradual adjustments.
- If you notice the ducklings are all cuddled together:
- It is too cold, and you cannot allow them to freeze. Turn up the heat slightly but do everything incrementally to avoid drastic impacts. You can get more tips on keeping your ducks warm in this article.
Ducks should appear content, warm, and peaceful. If you do not see this, something is wrong.
Water
We all know ducks love water! This will likely be the most essential factor in caring for your ducks properly.
Please note – Your duck will love to play in the water, but they cannot swim in deep pools until they are eight weeks old.
Before this point, they do not have the proper ‘water-proof’ oil-coating on their feathers for floating. If you place them in deep water before this point, they will likely drown, and this is a common cause of duckling deaths in indoor growing circumstances.
That being said, ducks still require plenty of water to drink and use it to keep their nasal cavities wet. They will need food and water to be available at all times. They can choke on food from eating too quickly, so always have water to help them wash it down.
Tips for Proper Water Care
Some tips for the water aspect of caring for your ducks are:
- Realize that your ducklings want to drink water, play in it, dip their heads, clean off, etc. The water will get very dirty and will need to be rinsed out and changed daily to prevent sickness and disease.
- Create a small pool in their coop that can be enjoyed with supervision. It should be deep enough that they can dip their heads all the way in, but not deeper than this. An excellent pool for this purpose will be a paint tray because it is shallow and has a ramp for them to stand up in if the depth becomes too intense.
- Do not use cold water or hot water. Lukewarm will be best.
- You will be supervising at this point and will keep a watchful eye on all ducks, removing the small pool when playtime is over. Be certain that each duck is able to get out of the water on their own.
- Keep drinking water separate from swimming water.
- You may want this to be a separate corner from their sleeping area, which should be kept dry and clean.
- Be aware of the high risk of ducks swimming without this oil on their feathers, which can lead to them drowning or freezing.
- Do not give them cold water to swim in, and we repeat, always supervise them in very shallow water during this period. Do not leave them a water source that is unattended besides the drinking bowl (that should be too small to drown in).
- Be sure they can dip their entire beak into the water bowl for keeping the nasal cavities moist, but not their entire heads.
- Each time after swimming, dry them off with a towel and place them back in the brooder to warm up under the lamp.
After around the 8th/9th week – You can increase the depth of the pool because this oil will have developed to keep them warmly floating in the water.
Food
Do feed your ducks:
- Duck food – we recommend these crumbles.
- Fruit and vegetables that are thinly cut, mixed into duck food (small amount of this, maintaining mostly a duck-food diet).
Do not feed your ducks:
- Chicken food (chickens require different nutrients than ducklings)
- Bread (a misconception. Ducks love it, but bread is not good for their digestive systems and can cause bone growth issues, lameness for increased predator attack risk, and wing deformity).
- Proteins (bone-in or out)
- Medicated feed (can cause organ damage)
When unsure, air on the side of caution and only feed ducks duck food.
Any feed brand that is reputable and contains at least 20% protein. Do not exceed this protein limit as any range between 15-20% is sufficient protein intake for their small weight-class.
The process will be:
- To reiterate, do not feed them in the first 24 hours after hatching.
- After day 1, start to feed them crumbs and tiny portions of duck food. If swallowing is difficult, add water to soften the food. Some will add a couple of grains of sugar to draw the ducklings to the food and increase their energy.
- If they are not ready for crumbs or not taking to it, feed them a bit of the yolk from their eggs for nutrients and strength.
- After this, set up the duck feeder and fill it up in the brooder so they can have constant access to food.
Niacin
Ducks will require niacin, which will be found in their duck feed. This is crucial for ducklings to develop properly. The warning signs that your ducklings are niacin-deficient are:
- Stumbling/trouble walking
- Lethargic behavior
- Difficulty eating or focusing
- Potentially death
If using chicken feed, you will need to add the niacin, but we strongly recommend only using duck feed as the two bird-species require separate nutrients.
Nutrients will be especially vital during these early days of the ducklings’ development. Some also add brewer’s yeast, which includes Niacin and vitamin B. Others mix straight niacin into their feed.
Feed them the allotted serving size as directed by that specific product based on age. Purchase duckling food for ducklings and adult duck food for adult ducks.
Tips to Be Aware of for Your Ducklings
Some relative tips to caring for these webbed-feet babies are:
- Ducklings (and Adult Ducks) Cannot Climb – Do not build a home, swimming area, or any structure that requires them to climb. They do not have arms to pull themselves up, or legs designed for this. They will trip over their webbed feet and can injure themselves so do not try to make their home similar to your kitty’s obstacle course.
- Ducks Need Room – Do not place them in a tiny space as they are naturally inclined for cohabitation within a wide body of water. Ducks should be able to open their wings and have room to move around. If your coop is too crowded, you will see unhealthy ducklings and dire side effects. Free-ranging is a wonderful solution to the problem of limited room.
- Domestic Pets are Predators – Your cat or dog will readily eat a duckling. Do not allow them in the proximity of your incubation operation while indoors or outdoors and keep these predatory animals separate from your baby ducks.
- Ducks Have Watery Poop – Due to this, you will want to keep the bedding dry and clean. This is why daily cleaning and examination will be required. Not only are they splashing around and making a dry home – wet, but they also incorporate runny fecal matter that can lead to a true mess.
You will need to maintain ground saturation with mulch, straw, and wood shavings, with regular rakings. Keep an eye out for poop stuck to their bottom and keep them clean while indoors.
Once Grown – Time to Move Your Duck Pen Outdoors!
Most ducks will reach maturity around the 8-15-week mark (around two to three months), but you should confirm this for your specific duck breed.
At this point, the ducklings will be mature and too large for most in-home circumstances. You should move them outside because:
- They are too large for indoors
- They want to play and be in nature, sunlight, large bodies of water
- They are able to swim unsupervised at this point
The main aspects of this shift from indoors to outdoors will be:
- Proper shelter for climate, seasons, and changing weather/temperature conditions
- Protection from predators (especially necessary in the evening/night hours)
- An alteration in their food from duckling food to adult duck food
If you allow them to graze in your garden, you will see your fruits and vegetables kept free of:
- Slugs
- Mosquitos/larvae
- Snails
- Grub
So long as they have room to spread out, food, and safety at night, your ducks should thrive.
How to Set Up Outdoor Shelter
You will want to create a secure pen that does not include gaps in the wiring (anything over an inch could result in a predator reaching through and killing the ducks, often by strangulation and neck biting).
You can choose an:
- Enclosed area with fencing around it
- A shed with a latching door and proper light/ventilation
- A large dog kennel to protect them at night, allowed to run free during the day
- A coop that is low to the ground without any obstacles to climb
You will take the same steps to make it comfortable and keep the dry area separate from their swimming/water/food area, which will get quite messy.
Some tips for this outdoor transition are:
- Again, don’t select wire for the home as ducks tend to lean against it while sleeping, which a predator can reach through.
- Keep the food and water outside of the coop to keep this a dry, clean area. If you try to combine all of this or do not clean thoroughly enough, you will attract rats and pests that can inflict disease. If you are eating or distributing these duck products, this is the last thing you should risk.
- Locking them up at night will be recommended to prevent predators from impacting your flock.
- During the Winter, create a draft-free coop and be certain everything remains dry. Ducks will fair quite well in the Winter and are already insulated with their oil-coated feathers.
- We recommend a fence to allow your ducks to run around freely and be protected from getting lost, loose, or running into predators.
If You Are Raising Ducks for The Purpose of…
The most prevalent conditions under which people select to raise ducklings are:
- If You Want Indoor Ducks Permanently – Select a breed such as Call Ducks. This duck breed is very small and suited to indoor living. Most ducks should be sent outside after reaching maturity and are not intended for full-time indoor living.
- If Raising Ducks with Chickens – This is commonly done, and poultry responds well to being raised with ducklings. Do not combine their food, and you will need to research integrating ducks with chickens separately. For more about what to be aware of when feeding ducks and chickens together, read this.
- If You Want Ducks for Egg Production – These are ideal for baking with their high fat-content yolks, and the calories will be higher with duck eggs than chicken eggs. Do not wash the eggs as there is an antibacterial coating around each duck egg’s shell. This mitigates the risk for salmonella bacteria and should be kept unwashed. The inside of your egg will be clean and normal but always crack eggs in a separate container than your baking dish before mixing, in case the egg is bad.
Final Tips for Raising Ducks
Some facts that pertain to your caring for ducks are:
- Older Ducks Can be Violent – If a more mature duck is forced to share their pond with a duckling, they often attempt (and succeed) at drowning baby ducklings. Do not combine different age groups at this point and wait until every duck can fend for themselves without supervision (after week 8-10). Check out our article on why ducks fight for more info on this interesting subject.
- Ducks are Social – Do not breed only one duck because they will need a few siblings to be socialized for healthy physical development. You should aim to start with 12 eggs and hope that 50-80% survive the hatching, these are good odds (especially when considering the 1/6 chance a duck egg would have in nature).
- Always Wash your Hands – On any occasion at which you handle your ducks, throughout any stage of this process. This is to reduce the risk of disease spreading. For more information on this, visit this page on The Centers for Disease Control and Prevention: Backyard Poultry and Farm Animals.
Lastly – Keep Emotional Distance – Many ducklings die (this helpful article shares how to reduce that from happening) and to bring our point full-circle; this is why so many eggs are hatched. We would advise that you not become emotionally attached to each duck as there are plenty of risks involved, especially as they graduate to an outdoor environment.