
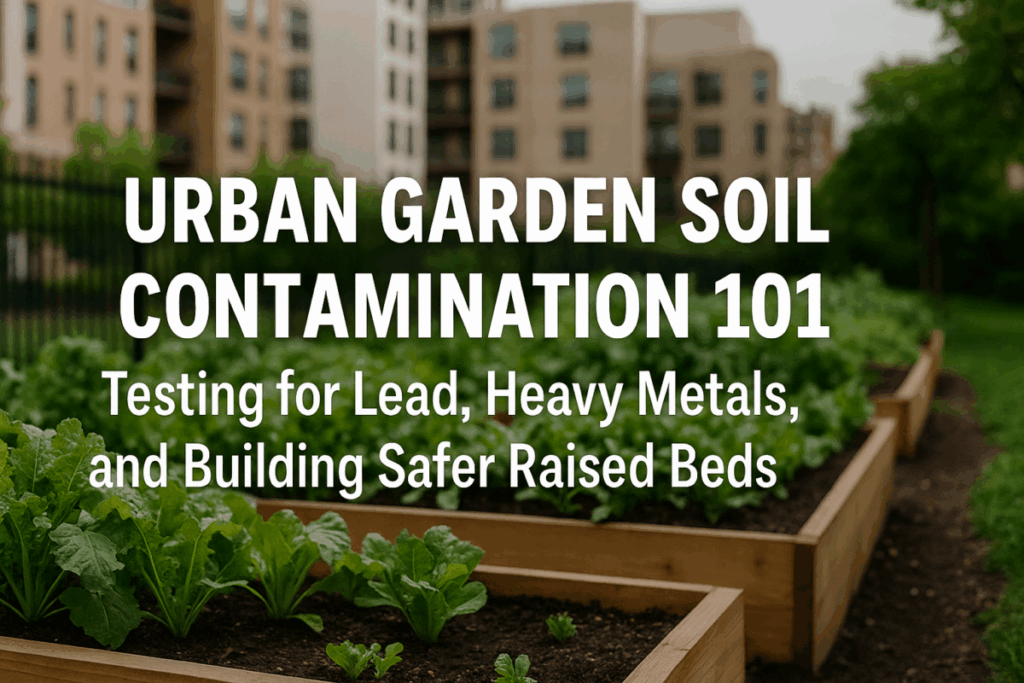
Imagine turning an empty city lot or a backyard in the heart of town into a lush vegetable garden—only to discover the soil hides a toxic legacy. This scenario is more common than you might think. Urban gardeners across North America often face urban soil contamination from past industrial activities, lead paint, traffic pollution, and other sources. The good news? With a bit of knowledge and effort, safe gardening in cities is entirely possible. In this guide, we’ll explore how to test your soil for contaminants (like lead in garden soil) and DIY methods to remediate and garden safely. We’ll mix expert tips with an approachable, can-do narrative so you feel empowered to grow healthy food even in the city.
Urban Soil Contamination: Common Pollutants and Why They Matter
Urban soils often contain remnants of pollutants from decades past. Understanding what you’re dealing with is the first step to safe urban gardening. Contaminated soil in urban gardens typically contains one or more of the following:
- Lead: The number one urban soil pollutant, largely from peeling lead-based paint on old buildings and residues from leaded gasoline used in cars decades ago. Lead persists in soil for hundreds of years, so even though leaded paint and gasoline are no longer used, their legacy remains.
- Arsenic: Often from historic use of arsenic-based pesticides (like lead arsenate in old orchards) and treated lumber. Former orchard sites and areas near old wood structures can have elevated arsenic.
- Cadmium, Chromium, and Other Heavy Metals: These can come from industrial emissions, smelters, or certain fertilizers. For example, areas downwind of old factories or near former mining/smelting sites may have these in the soil.
- Polycyclic Aromatic Hydrocarbons (PAHs) and Petroleum Byproducts: Found near high-traffic roads, old gas stations, or where trash/wood was burned. These result from incomplete combustion (think vehicle exhaust or ash) and can linger in soil.
- Other Chemicals: In some cases, urban soils might have solvents, pesticides, or PCBs from industrial land use or illegal dumping. These are less common in typical garden plots but worth being aware of.
Why does it matter? Many of these contaminants (especially lead) pose health risks. Lead is highly toxic, particularly to children—causing developmental delays and neurological damage even at low exposure levels. Unlike garden pests or nutrient deficiencies, you can’t see heavy metals or toxins in soil. Plants might grow fine, but the invisible contaminants can be ingested by anyone working or playing in the dirt, or by eating vegetables with soil dust on them.
Did you know? The U.S. Environmental Protection Agency (EPA) considers soil with lead levels above 400 ppm a potential hazard for kids and gardening. In fact, urban soil lead is so prevalent that one analysis estimated nearly a quarter of U.S. homes built before 1980 have soil exceeding this level. If you’re gardening in an older city neighborhood, there’s a decent chance your soil has elevated lead. Don’t be alarmed—be informed and ready to test and fix it.
Key takeaway: Contaminated soil is common in cities, but it doesn’t mean you can’t garden. It means you should take precautions to test and remediate soil so you and your community can garden safely. Next, we’ll dive into testing your soil—because knowledge is power when it comes to safe urban gardening.
Safe Gardening in Cities: Why Soil Testing Matters
If you’re an urban home, school, or community gardener, testing your soil is an essential first step before planting those tomatoes and carrots. City soil can vary hugely from one spot to another—even within the same yard. Without a soil test, you’re essentially gardening blind to any contamination.
When should you test? Ideally, always test new garden sites in urban areas for heavy metals like lead. But it’s especially important if:
- Your garden is near an old house or building (built before 1978) with peeling paint – likely a source of lead chips in the soil.
- You live by a busy road or highway – decades of car exhaust (from the leaded-gas era) or tire dust could have deposited pollutants.
- The site was formerly an industrial area, gas station, or landfill – potential for a variety of contaminants.
- You’re gardening near an old orchard – could have residual arsenic from past pesticide use.
- There’s an odd odor, staining, or debris in the soil – possible chemical contamination.
- Simply put, if there’s any doubt about the land use history, a test is warranted.
Even if you’ve been gardening there for years, it’s never too late to test. Urban gardener Amy Olson of Chicago learned that “lead contamination is kind of a given” in her city, so she tests her community garden’s soil every few years to stay on top of any changes. Testing provides peace of mind and guides your next steps. After all, you don’t want to discover high lead after you’ve already eaten veggies from the plot.
How contamination affects gardening: Different contaminants pose different challenges. Lead, for example, doesn’t usually hurt the plants, but it can cling to the surface of veggies or be taken up in small amounts – especially in roots and leafy greens. Children playing in the dirt can inhale or ingest dust with lead. Other toxins like PAHs can stick to soil particles on your produce. Without testing, you wouldn’t know any of this.
Bold step: Test your soil before you plant — it’s the only way to know if your urban garden soil is safe or if it needs some TLC to make it safe.
Now that we’ve convinced you why testing is crucial for safe gardening in cities, let’s get practical: how to test garden soil for lead and other contaminants on your own.
How to Test Your Garden Soil for Lead and Other Contaminants
Testing your soil is a straightforward DIY task that yields invaluable information. Here’s how you can go about it:
1. Choose your testing method. There are a couple of DIY-friendly ways to test for heavy metals in soil:
- Home test kits: These are available online or in garden centers and typically use a chemical reagent or strips to indicate lead (and sometimes other metals) in soil. They are quick and inexpensive, but keep limitations in mind. Home kits often give a color change or qualitative result (“low, medium, high”) rather than a precise measurement. They can sometimes produce false negatives/positives if not used correctly. In short, a home kit can tell you if lead is present, but it might not be very accurate in quantifying it. Use these for preliminary screening or curiosity, but don’t solely rely on them if you plan to grow food.
- Laboratory soil analysis: This is the gold standard for accuracy. You collect soil samples and mail them to a lab (many state university Cooperative Extension labs offer affordable testing for lead and other contaminants). Lab tests will report the exact levels in parts per million (ppm) of lead, arsenic, etc. The cost is usually reasonable (often $20–$50 for a basic heavy metals panel) and the results take a couple of weeks. Many Extension services specifically encourage gardeners to use lab tests for a thorough analysis. For example, University of Massachusetts and University of Delaware include lead screening in their routine garden soil tests. The report you get back will tell you if your soil levels are low, moderate, or high compared to safety benchmarks.
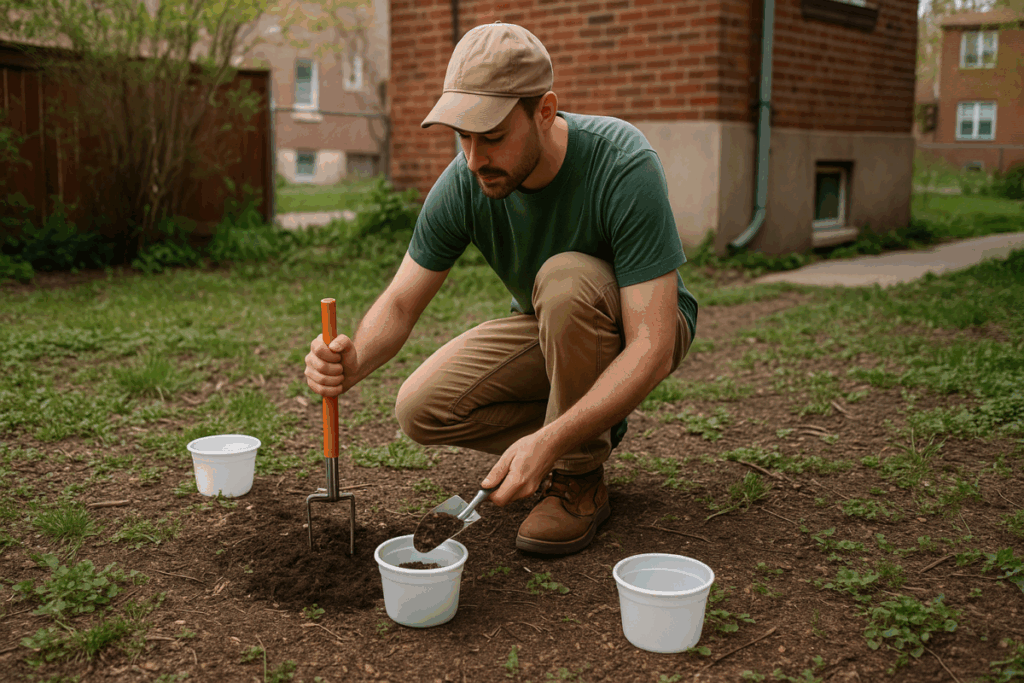
2. Collect a good soil sample. Whether you use a kit or send to a lab, sampling technique matters! Contaminants like lead can be very localized (one spot near an old shed might be high, elsewhere low). Follow these tips for sampling:
- Identify the areas where you’ll grow food or where children might play. Take samples separately from high-risk spots (e.g., near an old house foundation or beside a road) and from the garden bed area. This way you can compare.
- Each sample should be a mixture (“composite”) of 5-10 sub-samples. For example, in your vegetable bed, scoop small amounts of soil from a few locations (in the top 6 inches for gardening concerns) and combine them in a clean bucket. Mix it well and fill the test container or bag with this blended soil. This gives an average reading for that zone.
- Remove any stones, debris, or large organic matter from the sample. You just want the soil itself.
- Typically you’ll need to air-dry the soil before mailing it to a lab (moist soil can spoil the test or increase shipping weight). Follow the lab’s instructions – usually spreading soil on newspaper for a day or two to dry out.
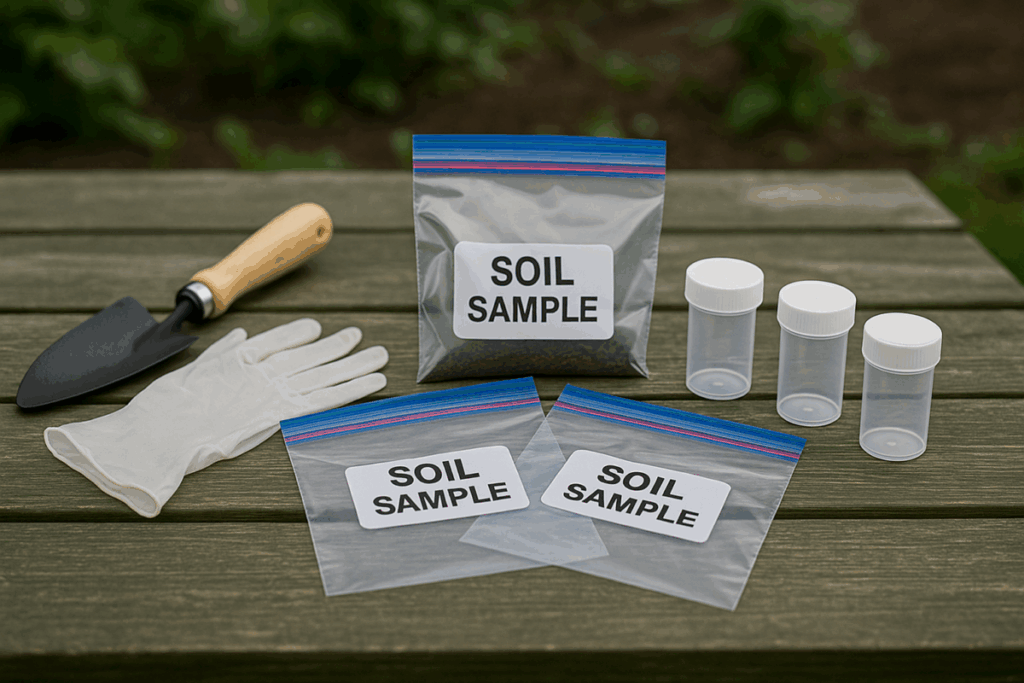
3. Send it in or test it. If using a lab, fill out the forms indicating you want heavy metals testing. Many labs have a check-box for “Garden Soil Lead Test” or “Environmental contaminants”. Ship the sample and wait for results. If using an at-home kit, follow the kit instructions closely (often involves mixing soil with a solution or using a test strip and comparing colors).
4. Interpret the results. This is critical. You’ve got numbers – now what do they mean? Here’s a quick guide for lead levels (since lead is the most common concern):
Note: It’s not just about lead. If your test reveals other contaminants (say arsenic or cadmium), ask the lab or an Extension agent how those levels compare to safe ranges. Often, similar precautions (using raised beds, adding clean soil) apply. For any result that seems high, you can also reach out to your local Cooperative Extension or health department for interpretation help. They deal with these questions regularly and can offer guidance tailored to your area.
When to call a professional: In most backyard garden cases, you won’t need an environmental consultant — DIY testing suffices. But if your initial tests show extremely high levels (for example, lead in the several thousands ppm, or presence of industrial chemicals like petroleum or solvents), or if you discover an old underground tank or chemical dump on your lot, it’s wise to consult professionals. Environmental remediation companies or your state environmental agency can conduct detailed investigations for hazardous waste. Also, if you’re planning a community garden on a formally polluted site (a brownfield), there may be government programs to assist. For typical lead-in-soil issues, though, a combination of lab testing and the DIY remediation steps below will do the job.
DIY Soil Remediation Techniques for Urban Gardens
Armed with your soil test results, you can now take action to remediate (fix) your soil or minimize exposure. “Remediation” might sound technical, but many solutions are straightforward DIY projects. The goal is to either remove the contaminants, lock them up in the soil so they can’t harm you, or avoid them by creating safe growing spaces on top. Below are effective strategies:
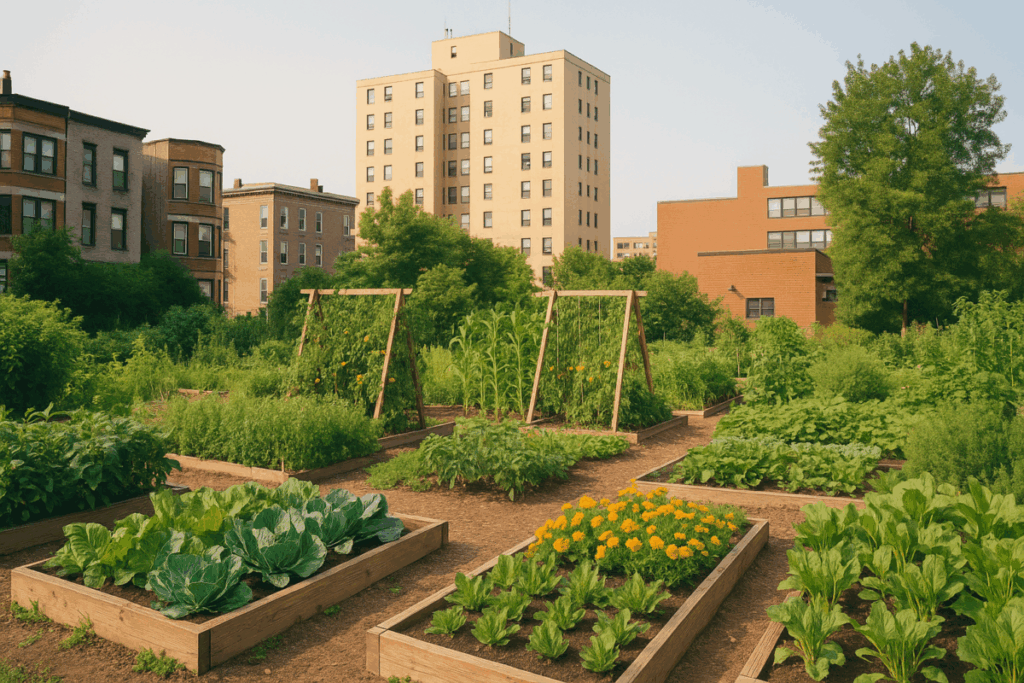
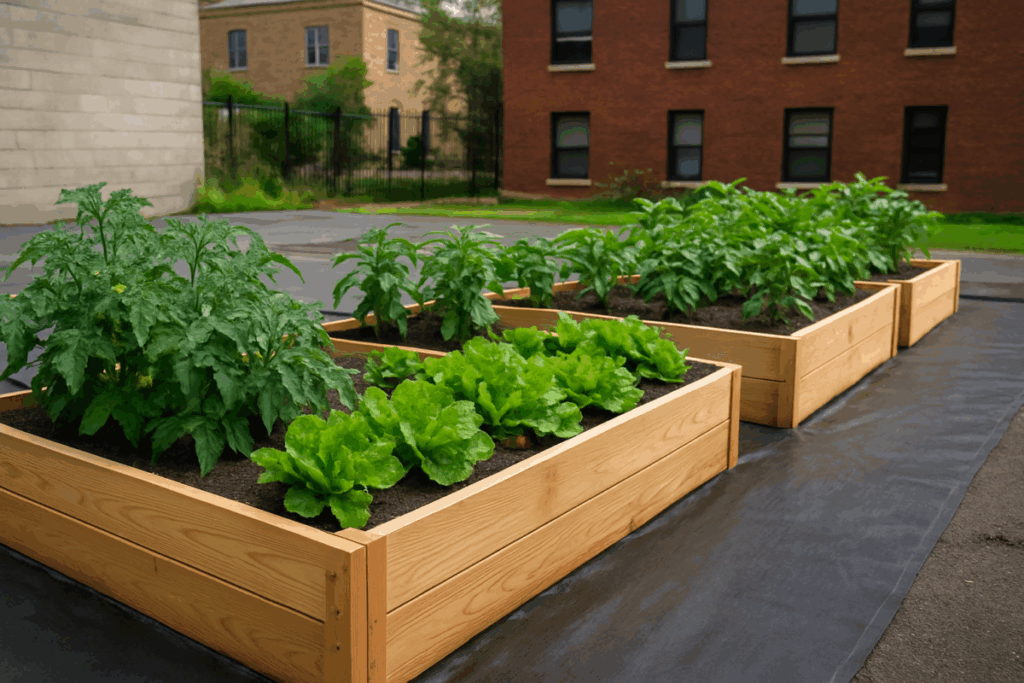
1. Raised beds and containers (avoid the bad soil): One of the simplest ways to garden safely in contaminated areas is to build raised garden beds and fill them with clean soil and compost. Essentially, you create a new soil layer above the old one. Use a physical barrier (landscape fabric, plastic, or even a layer of cardboard) at the bottom of the raised bed so plant roots don’t reach down into the contaminated ground. Make the beds at least 8–12 inches deep and fill with a mix of uncontaminated topsoil and organic matter. This method is great for vegetables and herbs. In community gardens, raised beds are commonly used when soil tests come back high for lead. Containers (pots, buckets, troughs) filled with store-bought soil mix are another quick fix. Bottom line: If your native soil is questionable, grow on top of it, not in it. Raised beds also have the perk of better soil control and often higher yields.
2. Dig out and replace soil (remove the problem): For small plots with very high contamination, a one-time soil replacement might be worth the effort. This means digging out the top layer of soil (where most contaminants reside, usually the top 6–12 inches) and disposing of it, then backfilling with clean soil and compost. Disposal can be tricky – you can’t just toss contaminated soil in the trash. Check with your city or county for hazardous waste disposal guidance (some areas treat lead soil as hazardous waste if above certain thresholds). This is labor-intensive but can significantly reduce contaminant levels in your garden. It’s often done in combination with raised beds—e.g., remove some soil, then put a raised bed and fresh soil on top. Tip: If you remove soil, also remove it from spots around the garden where people walk or kids play, or cover those areas with mulch so nobody contacts the old soil.
3. Adding organic matter (compost, manure, peat): Organic matter is a gardener’s best friend – and it helps with contamination too. Compost doesn’t magically eliminate lead or arsenic, but it binds these contaminants, making them less bioavailable (i.e., less likely to get into you or your plants). By mixing in plenty of compost or peat moss into your soil, you effectively dilute the concentration of contaminants and lock up a portion of them in the organic matrix. Many experts recommend that urban garden soil be at least 20-30% compost by volume in contaminated areas. For example, if you have a garden bed with slightly elevated lead (say 200-300 ppm), working in several inches of compost can drop the effective concentration and reduce plant uptake of lead. One study showed that adding a thick layer of compost in urban gardens significantly lowered measurable lead in the soil over time as it got diluted. Plus, compost improves plant growth, which can further reduce the dust and direct contact with soil (healthy plant cover means less bare soil exposed).
4. Adjust soil pH and nutrients: Soil chemistry can influence contaminant availability. Most heavy metals are less available to plants in moderately alkaline conditions. Aim for a soil pH of around 6.5 to 7.5 in your garden. If your soil is very acidic (pH below 6), adding lime can raise the pH and help “lock” lead into less soluble forms. Additionally, ensure your soil has plenty of phosphorus (as indicated by a soil test for nutrients). Phosphorus fertilizer or rock phosphate amendments can react with lead to form lead phosphate minerals, which are very insoluble.. The University of Maryland suggests adding phosphorus (if a soil test recommends it) to help reduce lead uptake by plants. In essence, a fertile, neutral-pH soil keeps contaminants tied up. This is an easy DIY step: add lime if needed, and use a balanced fertilizer or bone meal for phosphorus if your soil is low.
5. Mulching and covering bare soil: Bare soil is your enemy in a contaminated garden, because wind can blow contaminated dust and rain can splash it onto your veggies. Cover any exposed soil with a layer of mulch (straw, wood chips, grass clippings, etc.) or plant a cover crop/groundcover. The EPA recommends 2–4 inches of mulch over bare urban soil to hold down lead dust. Mulch not only limits your contact with the soil, but also helps retain moisture and improve soil as it breaks down. In areas you aren’t actively planting, consider sowing grass or clover to form a permanent cover. If you have kids, mulching play areas (or providing a sandbox) can prevent them from digging in contaminated dirt. The idea is to isolate the bad soil so it’s not blowing around or sticking to hands and produce.
6. Phytoremediation (using plants to extract toxins): Some plants are known to absorb heavy metals from soil. A classic example is growing sunflowers or certain types of mustard greens in lead-contaminated soil. These plants have a high tolerance and can take up lead into their roots and shoots. After the growing season, you’d uproot and dispose of those plants (since they’re now “contaminated”). Over multiple cycles, this can gradually lower the total lead in the soil. It’s an appealing, low-tech idea – in fact, sunflowers were used near Chernobyl to soak up radioactive cesium, and in urban gardens as a community science project. However, manage your expectations: phytoremediation is usually a slow process and may only make a dent in contaminant levels unless you commit to many years of repeat plantings. Still, it can be a useful supplemental approach, especially for moderate contamination. If nothing else, a crop of non-edible sunflowers can draw some lead out and they look beautiful doing it! Just remember to treat the plants as hazardous waste when removing them, and don’t eat anything (like sunflower seeds) from those remediating plants.
7. Grow wisely (crop selection): Tailor what you grow to the conditions. As the saying goes: “Avoid the roots and shoots, go for the fruits.” Fruiting vegetables (tomatoes, peppers, eggplant, squash, peas, beans, corn) tend to accumulate far less lead in their edible parts compared to leafy or root vegetables. Lead and many metals mostly stay in the roots of plants; some moves into leaves, and very little makes it to fruits. So if your soil test showed moderately high lead but you still want to use it, prioritize fruiting crops in-ground, and do your carrots, potatoes, beets, and leafy greens in raised beds or pots with clean soil. For example, a study in Chicago found tomatoes grown in soil with 1,200 ppm lead had very low lead in the fruits, though the leaves were high. Of course, you should still wash all produce (there could be dust on the skins), but choosing lower-risk crops for questionable soil is a smart strategy. Conversely, avoid “hyperaccumulator” plants in contaminated ground—those are plants known to uptake lots of metals (some mustards, for instance) unless you’re specifically planting them for phytoremediation.
**8. When to involve professionals: Most of the above steps you can do yourself. But if despite your best efforts you suspect your site is still unsafe (say you keep getting high lead readings even after remediation, or you discover an unusual pollutant), consider consulting environmental experts. For instance, if lead levels are extremely high (over 5,000 ppm), University of Maryland Extension suggests that professional soil removal and replacement should be considered. Professional remediation might include excavating and hauling off contaminated soil, or in situ treatments like soil washing (which is not really DIY). This is rarely needed for a garden-sized project unless the site was a toxic dump. City agencies or nonprofit environmental groups may help with such efforts in community sites. In short: call in pros for extreme cases; otherwise, the DIY methods above will cover most urban gardening scenarios.
By implementing some or all of the above techniques, you can dramatically reduce the risks from contaminated soil in urban gardens. Many community and school gardens in cities have successfully transformed polluted lots into productive, safe growing space using exactly these approaches. Next, we’ll look at everyday practices while gardening that will keep you and your family safe, even if your soil isn’t perfectly clean.
Safe Gardening Practices for Contaminated Soil
Remediating soil is one side of the coin; the other is personal behavior and garden management to minimize exposure. Think of these as healthy habits for any urban gardener (really, any gardener, period):
- Always wash your produce thoroughly. This is non-negotiable in urban gardening. Soil particles can cling to veggies, especially leafy greens and root crops. Wash all harvested produce under running water. For root vegetables like carrots and potatoes, scrub them and peel them before eating. For leafy greens, remove outer leaves and wash the rest. A little vinegar in the wash water can help remove extra residues. Washing produce greatly reduces ingestion of any soil contaminants that might be on the surface.
- Wear gloves and wash hands after gardening. Simple hygiene makes a big difference. By wearing gardening gloves, you avoid direct contact with soil and you’re less likely to get soil under your nails (which could accidentally end up in your mouth later). When you finish gardening or take a break to snack, wash your hands (and kids’ hands) with soap and water. This prevents ingesting any dust or soil that got on your skin.
- Leave the dirt outside. Urban soil contamination is also an indoor hazard if you track soil indoors. Adopt the habit of taking off your garden shoes at the door (keep a bin or mat for them). Wash your garden clothes separately, and rinse off tools and toys that get soil on them outside. This way you don’t bring lead dust or anything else into your home where it can accumulate.
- Keep soil moist or mulched to prevent dust. We touched on mulching in remediation, but even in planted beds, ensure you’re not letting soil get bone-dry and dusty. If you see dust, water the area lightly. Dust can carry lead and other particles that you might breathe in or that can settle on plant leaves. A damp (but not waterlogged) soil surface or a nice layer of mulch keeps dust down.
- Mind the kiddos. Children are most vulnerable to soil contaminants, both because of their physiology and because they tend to put fingers (and dirt!) in their mouths. If your soil has even moderate contamination, it’s wise to create a designated clean play area for kids – like a sandbox or a section with fresh sand/pea gravel or grass – so they aren’t digging in the veggie beds or bare dirt. Teach them to wash hands after playing outside. If lead levels are high (over a few hundred ppm), consider keeping children out of that soil entirely and focusing their gardening involvement in raised beds or container projects where you know the soil is safe.
- Grow in raised beds for vulnerable crops. We’ve mentioned it before, but it bears repeating as a practice: use raised beds or pots for your root vegetables and leafy greens if your ground soil has elevated contaminants. You can treat your raised beds as the “kitchen garden” for things like lettuce, spinach, carrots, beets, etc., while perhaps growing less risky crops (tomatoes, corn, flowers) in the native soil. This way, the portions of plants that are most likely to contact soil (roots and low leaves) are always in clean media.
- After gardening, clean up. Rinse off tools, gloves, and produce outside if possible. Some gardeners set up a simple wash station outdoors for veggies – so the soil stays outside. Even wiping down your boots and tools can prevent bits of soil from traveling.
- Stay informed. Safe urban gardening is an evolving field. City agencies and extensions often publish guidelines or even offer free soil testing and workshops. Keep an eye out for local resources. For example, some cities have “soil lead maps” or community initiatives to provide compost to gardeners. By staying engaged with your local gardening community, you’ll learn the best practices specific to your area’s conditions.
By following these practices, you’ll greatly reduce the risk that any contaminants in your soil will end up inside you or your loved ones. Urban gardening can then be just as safe as gardening anywhere else, with the added reward of knowing you overcame a challenge.
Before we wrap up with a call-to-action, let’s address a few frequently asked questions that often come up about safe urban gardening.
Frequently Asked Questions (FAQ)
How do I know if my urban soil is contaminated?
- Testing is the only sure way. Visual clues are not reliable. However, consider the history: if your garden is near old painted buildings, heavy traffic, or former industrial sites, assume there might be contamination. In cities, a soil test for lead (and other common pollutants) is recommended before planting edible gardens. When in doubt, test it out!
What’s the best way to test my garden soil for lead?
- Send it to a soil lab for analysis. While home lead test kits exist, a laboratory test will give precise results in ppm. Many university extensions offer mail-in soil testing for homeowners. Collect a composite sample from your garden, mail it in, and you’ll get a report on lead and possibly other metals. This costs a bit but is well worth the information. Use home test kits only for rough preliminary checks or curiosity.
Are DIY soil test kits accurate for detecting contaminants?
- They can detect the presence of lead, but they’re not very precise. Most DIY kits use color-changing chemicals to indicate heavy metals. They might tell you if lead is above a certain level (e.g., 300 ppm) by a color change, but they won’t give an exact number and can sometimes miss or under/overestimate levels. For nutrients (pH, N-P-K), home kits are okay; for contaminants like lead, treat them as a first-pass tool. If a kit indicates lead, follow up with a professional lab test to confirm.
Which vegetables are safe to grow in lead-contaminated soil?
- Fruiting vegetables are the safest bet. Crops like tomatoes, peppers, eggplants, squash, beans, peas, cucumbers, and corn tend to take up very little lead into the edible parts. If your soil has moderate lead, focus on these. Avoid root crops and leafy greens in that soil, as they are more likely to accumulate lead or have soil particles clinging to them. Those sensitive crops can be grown in raised beds with clean soil. Also, any fruiting trees or shrubs (berries, fruit trees) are usually fine as long as you mulch underneath so you’re not getting soil splashed on the fruit.
Can I “clean” my soil naturally (for example, with plants or additives)?
- To an extent, yes – but patience is needed. Adding lots of organic matter (compost) can dilute and bind contaminants, making the soil safer over time. Certain plants (like sunflowers or mustard) can be used in phytoremediation to slowly extract heavy metals, but this is a long process and the plants must be disposed of safely. There’s no magic herb or additive that instantly purifies heavy metals from soil. However, additives like phosphate can immobilize lead, and liming the soil can reduce availability of metals. Over years, with these methods, you can improve soil conditions. For quicker results, you’d have to remove or cover the bad soil (raised beds, new soil, etc.). Think of it as a combination of approaches: improve the soil chemistry, use some sacrificial plants if you want, and physically remove or isolate what you can.
When should I call a professional for soil contamination issues?
- If your soil test comes back with extremely high levels (for example, lead in the thousands of ppm) or contaminants like petroleum, solvents, or other industrial chemicals, it’s wise to seek professional guidance. A licensed environmental consultant can do more detailed testing and advise on remediation (they have tools like X-ray fluorescence devices and access to safe disposal methods). Also, if you plan a community garden on a known contaminated lot (a brownfield site), local environmental agencies or nonprofits might help. Generally, for a home garden with just moderately elevated lead or arsenic, you can handle it with the DIY measures discussed. But if you’re essentially dealing with a toxic waste site, professionals and possibly government clean-up programs should step in. Don’t hesitate to reach out to your local Extension, health department, or environmental agency if you’re unsure – they can tell you if your case is routine or needs extra help.
Conclusion: Empowering You to Grow Safely
Urban gardening is a rewarding way to boost local food, green your community, and reconnect with nature—even amidst concrete and skyscrapers. Soil contamination might be an unexpected hurdle, but it’s one you now have the knowledge to overcome. By testing your soil, interpreting the results, and taking DIY remediation steps (like raised beds, compost additions, and safe gardening practices), you can create a thriving garden that nourishes your family instead of posing risks. Remember, countless city gardeners before you have turned lead-laden lots into fertile, safe havens using the techniques we’ve covered – and you can do it too.
In the spirit of empowerment, here’s your call to action: Don’t wait. Take a soil sample from your urban garden plot this week and get it tested. Knowledge is power, and that soil test is the key to unlocking your garden’s potential. If the results come back clean – fantastic, you can plant with confidence. If they show contamination – no need to panic. You now have a toolkit of solutions to ensure safe urban gardening despite the legacy of the past.
So go ahead and get your hands dirty (with gloves on, of course!). Start that compost pile, build that raised bed, plant a sunflower border to pretty-up and possibly clean-up your plot. Share what you’ve learned with neighbors and fellow gardeners – together, we can make our urban soils healthier, one garden at a time. The city might have its mysteries underground, but with some effort, your garden’s future will be as bright, healthy, and fruitful as you envision. Happy gardening!