

Growing mushrooms at home might sound complicated, but it’s easier than you think — and you don’t even need a garden. Mushrooms thrive in low light, high humidity, and small spaces, making them perfect for indoor growing. Whether you live in an apartment or just want a low-maintenance crop, cultivating mushrooms at home gives you a fresh, nutrient-rich supply of gourmet mushrooms right from your countertop.
Mushrooms are more than just a tasty ingredient — they’re loaded with vitamins, antioxidants, and unique compounds that support immunity and brain health. Plus, growing your own means you’ll always have fresh oyster, shiitake, or even lion’s mane mushrooms ready for soups, stir-fries, and more.
In this guide, you’ll learn exactly how to grow mushrooms at home, from selecting the best varieties and setting up the right growing environment to troubleshooting common issues. Whether you’re starting with a DIY grow kit or experimenting with spores, you’ll have everything you need to grow mushrooms like a pro — no outdoor space required.
Why Grow Mushrooms at Home?
Growing mushrooms at home isn’t just a fun project — it’s a smart way to add nutrient-rich, gourmet ingredients to your meals while saving money. Unlike most plants, mushrooms don’t need sunlight or soil to thrive, which makes them ideal for small spaces and indoor environments. With the right setup, you can grow fresh mushrooms year-round, regardless of the weather.
Nutritionally, mushrooms are packed with benefits. They’re low in calories but high in essential nutrients like B vitamins, selenium, and antioxidants. Lion’s mane mushrooms, for example, are known for their potential to support brain function and nerve health, while shiitake mushrooms are rich in compounds that may boost immunity and heart health.
There’s also the environmental benefit. Mushrooms require very little water and grow quickly on recycled materials like coffee grounds or sawdust, making them one of the most sustainable crops you can grow at home. Plus, harvesting your own mushrooms reduces the need for plastic packaging and transportation, giving you a more eco-friendly food source right at home.
Growing mushrooms isn’t just about convenience or nutrition — it’s about connecting with your food in a deeper way. There’s something satisfying about watching delicate oyster mushrooms unfurl or cutting a fresh shiitake straight from the substrate. It’s a rewarding, low-maintenance hobby that pays off in flavor and nutrition with every harvest.
Best Mushroom Types for Indoor Growing
Not all mushrooms are suited for indoor cultivation, but several varieties thrive in controlled environments — even if you’re working with limited space. Choosing the right type of mushroom can make the difference between a successful harvest and a frustrating experiment. Here are some of the best mushrooms for home growing, including a couple that are less commonly covered but just as rewarding:
- Oyster Mushrooms (Pleurotus ostreatus) – Oyster mushrooms are a favorite among home growers for good reason. They grow quickly, tolerate a wide range of conditions, and have a mild, slightly sweet flavor that works well in everything from soups to stir-fries. They’re also visually striking, with delicate, fan-shaped caps that make them a showpiece crop.
- Shiitake Mushrooms (Lentinula edodes) – Known for their rich, savory umami flavor, shiitake mushrooms take a bit longer to grow than oysters, but the payoff is worth it. They grow best on hardwood logs or sawdust blocks and can produce multiple flushes from the same substrate. Shiitakes are also packed with health benefits, including immune-boosting and anti-inflammatory properties.
- Lion’s Mane (Hericium erinaceus) – This shaggy white mushroom looks like a cluster of icicles and has a delicate, seafood-like flavor that makes it perfect for vegetarian dishes. Lion’s mane is also valued for its potential to support cognitive health and nerve regeneration, making it both a culinary and functional food.
- Wine Cap Mushrooms (Stropharia rugosoannulata) – While wine caps are more commonly grown outdoors, they adapt surprisingly well to indoor growing under the right humidity and temperature conditions. Their earthy, nutty flavor and deep burgundy color make them a unique addition to any home setup.
- Pioppino Mushrooms (Agrocybe aegerita) – Pioppinos aren’t as widely known as oysters or shiitakes, but they’re a hidden gem for home growers. They have a slightly nutty, peppery flavor and grow well in grow bags or containers. Pioppinos prefer cooler temperatures and lower light, making them a great choice for basement or closet setups.
By choosing a mix of fast-growing mushrooms like oysters and more specialized varieties like lion’s mane or pioppino, you can create a steady rotation of fresh mushrooms at home. Each type has slightly different needs in terms of temperature, humidity, and light, but once you dial in the right setup, you’ll have a continuous supply of gourmet mushrooms within arm’s reach.
Choosing the Right Growing Method
Once you’ve picked your mushroom varieties, the next step is deciding how you want to grow them. The good news is that mushrooms are surprisingly adaptable — whether you prefer a low-effort kit or a more hands-on approach, there’s a method that fits your space and skill level. Here’s a breakdown of the most effective ways to grow mushrooms at home:
DIY Mushroom Kits
If you’re new to mushroom growing, a kit is the easiest place to start. Most kits come pre-inoculated with mushroom spores and include a substrate (usually sawdust or straw) that’s ready to produce mushrooms with minimal effort. You simply mist the kit with water daily and wait for the first flush to appear. Oyster mushrooms are particularly forgiving and often start fruiting within a week or two.
✅ Best for: Beginners, small spaces, and quick results.
✅ Advantages: Low-maintenance, predictable yields, minimal setup required.
❌ Potential downside: Less flexibility to experiment with different varieties or growing conditions.
—
Growing from Spores vs. Mycelium
If you’re looking to grow mushrooms from scratch, you’ll need to decide between starting with spores or mycelium. Spores are essentially mushroom seeds, but they require sterile conditions and more time to colonize the substrate. Mycelium, on the other hand, is the vegetative growth stage of the mushroom — think of it as the mushroom’s root system. Mycelium is easier to work with since it’s already actively growing.
✅ Spores: More variety and genetic diversity, but slower and more prone to contamination.
✅ Mycelium: Faster growth, higher success rate, but fewer opportunities for genetic variation.
—
Pre-Inoculated Logs vs. Grow Bags
For a more hands-on experience, you can work with either pre-inoculated logs or grow bags:
Pre-Inoculated Logs – Hardwood logs inoculated with shiitake or lion’s mane are a traditional growing method. They take longer to produce mushrooms (several months), but once they start fruiting, they can continue producing for years with proper care.
Grow Bags – These are filled with sterilized substrate and mycelium, offering faster results than logs. Grow bags are ideal for oyster mushrooms and pioppino mushrooms since they thrive in a confined, humid environment.
✅ Logs: Longer-term investment, but low maintenance once established.
✅ Grow Bags: Faster yields, easier to control, and perfect for small spaces.
—
Recycled Materials (For the Eco-Conscious Grower)
Mushrooms are natural decomposers, meaning they can grow on all kinds of organic waste — coffee grounds, cardboard, straw, and even sawdust. Oyster mushrooms, in particular, are well-suited for this method. Combining spent coffee grounds with sawdust in a breathable bag creates an ideal growing medium that’s both sustainable and highly productive.
✅ Best for: Reducing waste while growing food.
✅ Advantages: Low cost, environmentally friendly, and creative.
❌ Potential downside: Higher risk of contamination without proper sterilization.
—
What’s the Best Method for You?
If you’re a beginner, start with a mushroom kit to get a feel for the growing process. Once you’ve gained confidence, you can experiment with mycelium-based grow bags or even try inoculating your own logs. The key is to match the growing method to your level of experience and available space. With the right approach, you can enjoy a steady supply of fresh mushrooms — without needing a single inch of outdoor soil.
Setting Up the Ideal Growing Environment
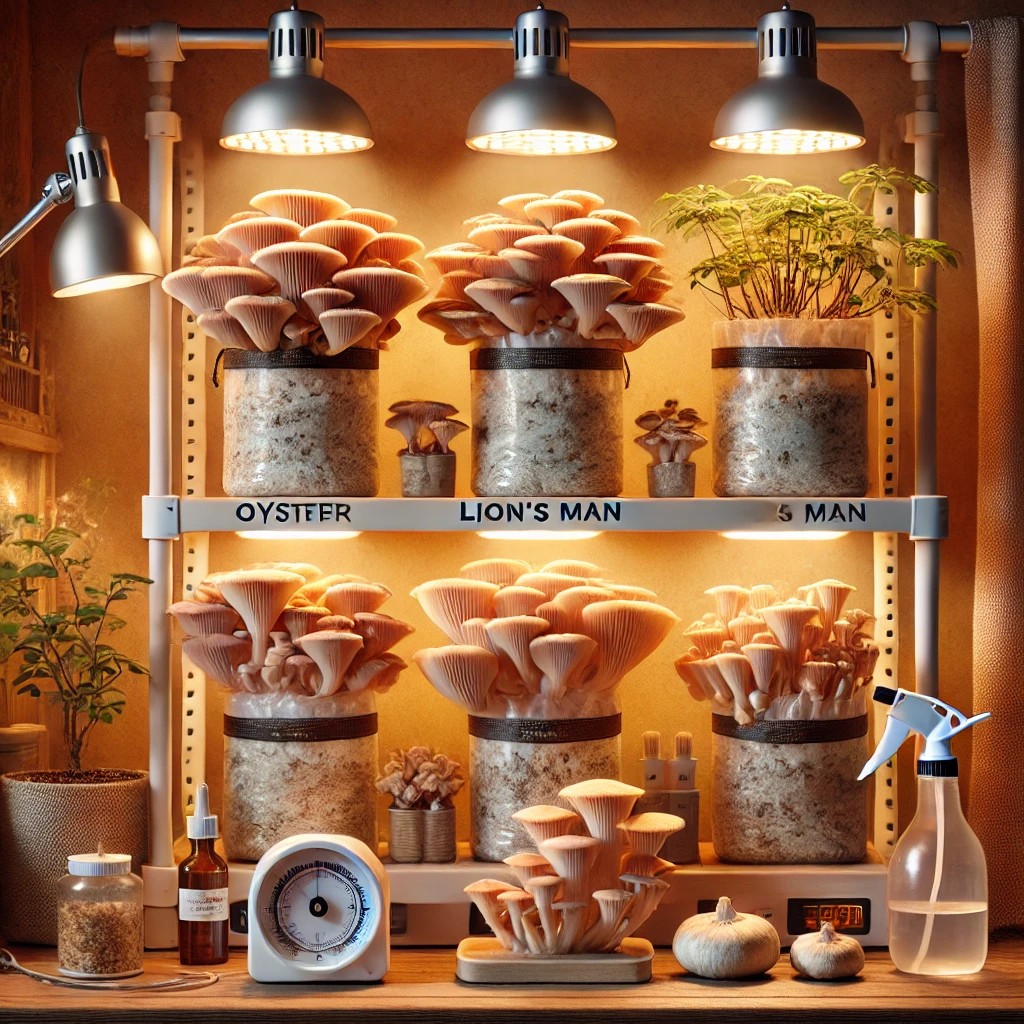
Mushrooms might not need sunlight or soil, but they are particular about their growing environment. Getting the right balance of light, humidity, and temperature is key to encouraging healthy growth and maximizing your harvest. The good news? Creating the perfect conditions for mushrooms at home is easier than you think — and you don’t need a greenhouse or fancy equipment to do it.
—
Lighting
Unlike most plants, mushrooms don’t need direct sunlight to grow — in fact, too much light can dry them out or stunt growth. However, they do need some light to trigger fruiting and ensure proper development.
Best Light Sources: Indirect natural light, like a windowsill with filtered sunlight, works well. If natural light is limited, low-wattage LED grow lights (set to a 12-hour cycle) provide consistent, gentle illumination.
Avoid Direct Sunlight: Direct sun can dry out the substrate and raise the temperature beyond what mushrooms prefer.
Color Temperature: Mushrooms respond best to cool white light (around 6,500K), which mimics natural daylight without the heat.
✅ Pro Tip: If you’re growing mushrooms in a dark closet or basement, place a small LED light nearby — just enough to read a book by — and you’ll give the mushrooms the signal they need to start fruiting.
—
Humidity Control
Mushrooms are about 90% water, so maintaining high humidity is essential for healthy growth and preventing drying or cracking. The ideal humidity level for most mushroom types falls between 80% and 90%. Here’s how to keep things moist without overdoing it:
Misting: A simple spray bottle is often enough to maintain humidity. Mist the surface of the growing substrate and the surrounding air 1–2 times a day.
Humidity Tent: Placing a clear plastic bag or humidity dome over your growing area helps trap moisture and create a microclimate. Make sure to poke a few holes for airflow to prevent mold.
DIY Humidifier: For larger setups, placing a tray of water near your mushrooms or using a small room humidifier can keep humidity levels stable.
✅ Signs of Too Little Humidity: Mushrooms may appear dry, cracked, or fail to develop properly.
✅ Signs of Too Much Humidity: Slimy caps, discoloration, or mold growth are signs that you need to increase airflow or reduce misting.
—
Temperature
Different mushroom varieties have specific temperature preferences, but most thrive in a range of 55°F to 75°F (13°C to 24°C). Maintaining consistent temperature helps promote steady growth and prevents stress on the mycelium.
Oyster Mushrooms: Ideal at 60°F–75°F (16°C–24°C) — room temperature is usually perfect.
Shiitake Mushrooms: Prefer cooler conditions, around 55°F–65°F (13°C–18°C).
Lion’s Mane: Thrives between 60°F–70°F (16°C–21°C), but can tolerate slightly cooler conditions.
✅ Temperature Tip: If your home is too warm, keep mushrooms near a cool basement floor or use a small fan to circulate air. If it’s too cold, a heating mat set to a low temperature can help maintain consistency.
—
Airflow and Ventilation
Mushrooms “breathe” by taking in oxygen and releasing carbon dioxide, so proper airflow is essential for healthy fruiting. Poor ventilation can lead to weak stems, small caps, and increased risk of contamination.
Open a window or use a small fan on a low setting to improve air circulation.
Avoid growing mushrooms in sealed containers without airflow — trapped CO₂ will stunt growth.
If using a humidity tent or dome, open it briefly each day to refresh the air.
✅ Pro Tip: Oyster mushrooms in particular are sensitive to CO₂ levels. If you notice your oyster mushrooms developing long stems and small caps, it’s a sign they need better airflow.
—
Creating the Perfect Setup
For a simple yet effective setup, place your mushroom grow bag or log on a tray near a window with indirect light. Mist daily, monitor the humidity levels, and adjust airflow as needed. With the right balance of light, moisture, and fresh air, you’ll see mushrooms starting to pin (the first stage of fruiting) within days — and from there, a full flush of mushrooms is just around the corner.
Troubleshooting Common Issues
Even with the right setup, growing mushrooms isn’t always a smooth process. Mushrooms are sensitive to changes in humidity, temperature, and air quality — and when something’s off, they’ll let you know. The key to a successful harvest is recognizing early warning signs and knowing how to fix them before they derail your crop. Here’s how to troubleshoot the most common mushroom-growing issues:
1. Mold Growth
Mold is one of the most common problems mushroom growers face, especially in high-humidity environments. It usually appears as fuzzy white, green, or black patches on the substrate or mushroom stems.
Causes:
- Excess moisture and poor airflow
- Contaminated substrate or grow bag
- Lack of proper sterilization
Solutions:
✅ Increase ventilation by opening a window or using a small fan.
✅ If mold appears on the substrate, carefully remove the affected area and reduce misting.
✅ If mold spreads to the mushrooms, discard the entire batch — mold spores can spread quickly and compromise future growth.
✅ Sterilize growing equipment and surfaces with a diluted bleach solution before starting a new batch.
2. Slow or No Growth
If your mushrooms aren’t sprouting, the problem usually comes down to environmental factors.
Causes:
- Low temperature or humidity
- Insufficient light exposure
- CO₂ buildup due to poor ventilation
Solutions:
✅ Adjust room temperature to match the preferred range for your mushroom variety.
✅ Increase humidity by misting more frequently or adding a humidity dome.
✅ Improve airflow with a small fan or by opening a window.
✅ Ensure the grow area receives at least 6–8 hours of low, indirect light daily.
3. Mushrooms Turning Slimy or Discolored
Healthy mushrooms should have firm caps and dry stems. If they start to feel slimy or develop yellow or dark spots, it’s a sign that moisture levels are too high or air circulation is poor.
Causes:
- Over-misting or stagnant water in the growing area
- High humidity without proper airflow
- Contamination from bacteria or mold
Solutions:
✅ Stop misting for 24–48 hours to let the substrate dry out slightly.
✅ Increase ventilation and reduce humidity levels by adjusting your humidifier or opening the grow tent.
✅ Remove any slimy or discolored mushrooms to prevent further spread of contamination.
4. Long Stems and Small Caps
If your oyster mushrooms or other varieties are growing with long, thin stems and small caps, it’s a sign that they’re lacking fresh air. This happens when CO₂ levels are too high.
Causes:
- Poor ventilation
- High humidity trapping CO₂ around the mushrooms
Solutions:
✅ Improve airflow by opening a window or placing a fan on a low setting nearby.
✅ Reduce humidity slightly to allow for better air exchange.
✅ Make sure grow bags or containers have small holes to allow CO₂ to escape.
5. Off Smells
Fresh mushrooms should have a mild, earthy scent. If you notice a sour, ammonia-like, or rotten smell, it’s a sign that the substrate is contaminated or the mushrooms are starting to rot.
Causes:
- Bacterial contamination
- Excess moisture and poor drainage
- Spoiled or improperly sterilized substrate
Solutions:
✅ Discard any mushrooms with an off smell — eating contaminated mushrooms can be dangerous.
✅ Check the substrate for standing water or excess moisture and adjust misting frequency.
✅ Start with a fresh, sterilized growing medium for the next batch.
6. Caps Splitting or Cracking
If your mushrooms are growing but the caps are splitting or cracking, they’re likely experiencing moisture or temperature fluctuations.
Causes:
- Low humidity levels
- Inconsistent misting or watering
- Sudden changes in temperature
Solutions:
✅ Keep humidity levels consistent by misting regularly or using a humidifier.
✅ Avoid placing mushrooms near heat sources or cold drafts.
✅ Maintain stable room temperature within the recommended range for your mushroom variety.
Troubleshooting Like a Pro
Successful mushroom growing is all about observation and adjustment. If you notice changes in growth patterns or mushroom health, small tweaks to humidity, temperature, or airflow usually solve the problem. Keep a log of your growing conditions and results — this helps you fine-tune your setup over time and create a perfect environment for future harvests.
Harvesting and Storing Your Mushrooms
After weeks of careful tending, the moment you’ve been waiting for has finally arrived — it’s time to harvest your mushrooms. Timing is everything when it comes to harvesting; picking them at the right stage ensures the best flavor, texture, and nutritional value. Harvesting too early or too late can affect the taste and shelf life, so knowing the signs of readiness is key. Here’s how to get the most out of your mushroom crop:
—
When to Harvest
Mushrooms grow rapidly once they begin to fruit, so it’s important to monitor them closely as they approach maturity. Each variety has slightly different signs that it’s ready to harvest:
Oyster Mushrooms: Harvest when the caps are still slightly curled under but before they begin to flatten out completely. If the edges start to flip upward, you’ve waited too long — the flavor will become tougher and more bitter.
Shiitake Mushrooms: Pick them when the caps have fully opened but before the edges curl upward. The caps should feel firm but not hard.
Lion’s Mane: Harvest when the spines (the shaggy parts) are well-developed but still soft to the touch. Overgrown lion’s mane can become bitter and tough.
Pioppino Mushrooms: Pick them when the caps are still rounded and before they fully flatten. Overgrown pioppinos lose their delicate, nutty flavor.
Wine Cap Mushrooms: Best harvested when the cap is still convex and the gills are just beginning to darken. Waiting too long results in a loss of texture and flavor.
✅ Pro Tip: Mushrooms can double in size overnight, so check them daily once they start pinning (the early growth stage). Harvesting at the right time encourages future flushes and better overall yield.
—
How to Harvest Properly
Mushrooms are delicate, so handling them with care prevents bruising and ensures better regrowth for future flushes.
Twist and Pull: For most mushrooms (like oysters and lion’s mane), a gentle twist at the base of the stem is enough to remove them without damaging the mycelium beneath.
Cut with a Sharp Knife: For shiitake and pioppino mushrooms, use a clean knife or scissors to cut the stem at the base. This reduces the chance of damaging the mycelium and encourages a quicker second flush.
Clean the Substrate: After harvesting, remove any remaining stem pieces or debris from the substrate to prevent mold or bacterial growth.
✅ Pro Tip: Don’t harvest all at once. Picking mushrooms in stages as they mature allows you to extend the harvesting window and get more from each flush.
—
How to Store Fresh Mushrooms
Freshly harvested mushrooms are highly perishable, but proper storage can extend their shelf life without losing flavor or texture.
Refrigeration: Store fresh mushrooms in a paper bag or breathable container in the refrigerator. Plastic traps moisture and leads to sliminess, so avoid airtight containers. Most varieties will stay fresh for 5–7 days this way.
Drying: For long-term storage, drying mushrooms is highly effective. Slice them thinly and dry them in a food dehydrator or an oven set to low heat (around 120°F to 150°F). Once fully dried, store them in an airtight glass jar in a cool, dark place.
Freezing: Clean and slice mushrooms, then blanch them in boiling water for 1–2 minutes. Let them cool, then store them in freezer-safe bags. Frozen mushrooms can last up to 6 months without significant flavor loss.
Preserving in Oil: Lightly sauté mushrooms in olive oil, let them cool, and store them in a glass jar covered with oil. Keep them refrigerated and use within 1–2 weeks.
✅ Best Storage Tip: If you have an abundant harvest, drying is the most space-efficient method for preserving mushrooms. Dried mushrooms rehydrate quickly in soups, sauces, and stir-fries, retaining their flavor and texture.
—
Encouraging Future Flushes
One of the biggest advantages of growing mushrooms at home is the potential for multiple flushes from the same substrate. After the first harvest, you can often get 2–3 more flushes with proper care.
Resting Period: After harvesting, let the substrate “rest” for a week or two. Keep humidity levels stable and mist lightly every few days.
Soaking: For certain varieties (like shiitake), soaking the substrate in cold water for 12–24 hours can help stimulate a new flush.
Clean Up: Remove any dead stems or debris from the substrate to prevent mold and contamination.
✅ Pro Tip: Some mushrooms (like oyster and shiitake) can produce smaller but still flavorful flushes for months after the initial harvest. Proper substrate care and consistent humidity are key to maximizing your yield over time.
—
Mastering the Harvest
Harvesting mushrooms isn’t just about timing — it’s about understanding the natural cycle of your crop. The more closely you observe growth patterns and environmental conditions, the better you’ll get at predicting when and how to harvest for maximum flavor and yield. With the right harvesting and storage techniques, you can enjoy fresh, homegrown mushrooms in your kitchen all year long.
Creative Ways to Use Your Homegrown Mushrooms
Now that you’ve successfully grown and harvested your mushrooms, it’s time to put them to good use. The beauty of homegrown mushrooms is their versatility — they add depth, texture, and umami to a wide range of dishes. Whether you’re a seasoned chef or just looking to elevate your weeknight meals, fresh mushrooms can transform even the simplest recipe into something extraordinary. Here are some creative and delicious ways to showcase your homegrown harvest:
—
1. Sautéed Mushrooms with Garlic and Herbs
Sometimes the simplest preparation is the best way to highlight the natural flavor of mushrooms.
How to Make It:
Heat a tablespoon of olive oil and a pat of butter in a pan over medium heat.
Add sliced oyster or shiitake mushrooms and cook until golden brown (about 4–5 minutes).
Toss in minced garlic, a pinch of salt, and fresh thyme or rosemary.
Finish with a splash of white wine or lemon juice to deglaze the pan.
✅ Best mushrooms: Oyster, shiitake, pioppino
✅ Pro Tip: Don’t overcrowd the pan — giving the mushrooms space to breathe helps them brown properly instead of steaming.
—
2. Lion’s Mane “Crab” Cakes
Lion’s mane mushrooms have a meaty, seafood-like texture that makes them perfect for plant-based crab cakes.
How to Make It:
Shred lion’s mane mushrooms by hand into small pieces.
Mix with breadcrumbs, vegan mayo, Dijon mustard, Old Bay seasoning, and chopped parsley.
Form into small patties and pan-fry in olive oil until golden brown on both sides.
Serve with tartar sauce or a squeeze of lemon.
✅ Best mushrooms: Lion’s mane
✅ Pro Tip: Press out excess moisture from the mushrooms before mixing to keep the cakes from falling apart.
—
3. Shiitake Miso Soup
Shiitake mushrooms have a deep, earthy flavor that enhances the umami in miso soup.
How to Make It:
Simmer vegetable or dashi broth with kombu (seaweed) and sliced shiitake mushrooms.
Add miso paste, silken tofu, and chopped scallions.
Let simmer gently (don’t boil miso) and serve hot.
✅ Best mushrooms: Shiitake
✅ Pro Tip: Dried shiitake mushrooms also work well — just rehydrate them in hot water before adding to the soup.
—
4. Pioppino Mushroom Risotto
Pioppino mushrooms have a delicate, nutty flavor that pairs beautifully with creamy risotto.
How to Make It:
Sauté chopped onions and garlic in olive oil.
Add arborio rice and toast for 1–2 minutes.
Gradually add warm vegetable broth, stirring constantly.
When the rice is nearly cooked, fold in sautéed pioppino mushrooms and a handful of grated Parmesan cheese.
Finish with a drizzle of truffle oil.
✅ Best mushrooms: Pioppino
✅ Pro Tip: For a richer flavor, deglaze the pan with white wine before adding the broth.
—
5. Oyster Mushroom “Pulled Pork” Sandwiches
Oyster mushrooms have a naturally chewy texture that mimics shredded meat when cooked.
How to Make It:
Shred oyster mushrooms into strips.
Sauté in olive oil with smoked paprika, garlic powder, and a touch of maple syrup.
Add barbecue sauce and simmer until the sauce thickens.
Pile onto a toasted bun with coleslaw and pickles.
✅ Best mushrooms: Oyster
✅ Pro Tip: For extra texture, roast the shredded mushrooms in the oven at 400°F (200°C) for 10 minutes before adding to the sauce.
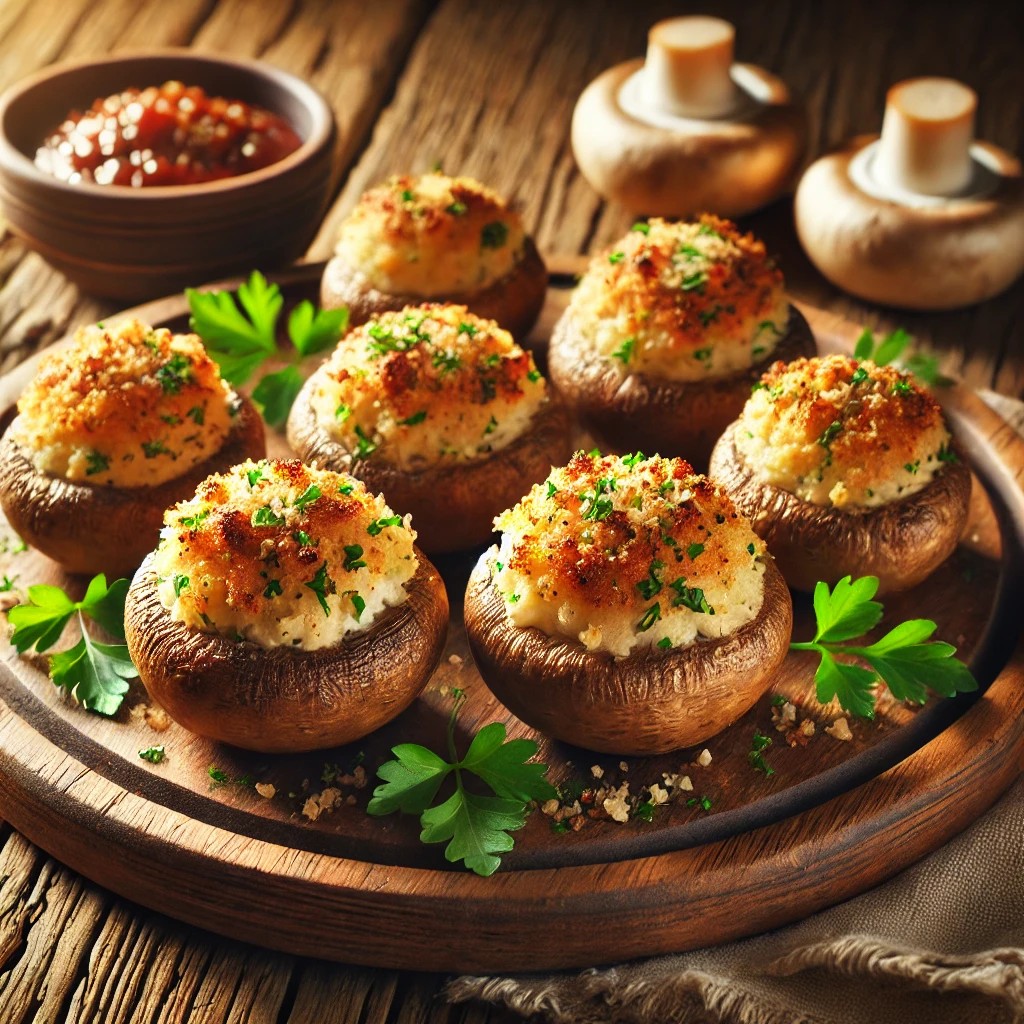
6. Stuffed Mushrooms
Large mushroom caps (like portobellos or king oysters) are ideal for stuffing with a flavorful filling.
How to Make It:
Remove the stems and fill the caps with a mixture of breadcrumbs, garlic, cream cheese, and chopped spinach.
Top with Parmesan and bake at 375°F (190°C) for 15–20 minutes.
Garnish with fresh herbs.
✅ Best mushrooms: Portobello, king oyster
✅ Pro Tip: For a vegan version, swap cream cheese for cashew cream and use nutritional yeast instead of Parmesan.
—
7. Mushroom Jerky
Homemade mushroom jerky is a savory, chewy snack that’s surprisingly easy to make.
How to Make It:
Slice shiitake or oyster mushrooms into thin strips.
Marinate in a mixture of soy sauce, maple syrup, smoked paprika, and garlic powder.
Bake at 200°F (95°C) for 2–3 hours until chewy.
Store in an airtight container for up to a week.
✅ Best mushrooms: Shiitake, oyster
✅ Pro Tip: For a spicier kick, add a dash of hot sauce or cayenne to the marinade.
—
8. Wine Cap Mushroom Stroganoff
Wine cap mushrooms have a rich, earthy flavor that makes them perfect for a creamy stroganoff sauce.
How to Make It:
Sauté sliced wine cap mushrooms and onions in butter.
Add white wine and let reduce slightly.
Stir in sour cream, Dijon mustard, and vegetable broth.
Toss with cooked egg noodles and finish with fresh parsley.
✅ Best mushrooms: Wine cap
✅ Pro Tip: For a vegetarian version, swap sour cream with cashew cream or plant-based yogurt.
—
Bringing Homegrown Flavor to the Table
The best part of growing mushrooms at home is the freedom to experiment in the kitchen. Unlike store-bought mushrooms, which can lose flavor and texture in transit, homegrown mushrooms deliver peak freshness and taste. Try them raw in salads, sautéed in pasta, or blended into sauces — the possibilities are endless. Once you experience the depth of flavor from mushrooms you’ve nurtured yourself, you’ll never look at store-bought mushrooms the same way again.
Scaling Up Your Mushroom Growing Operation
Once you’ve mastered growing mushrooms at home, you might find yourself wanting to take things to the next level. Scaling up your mushroom operation can mean anything from increasing your personal harvest to turning mushroom cultivation into a profitable side business. The good news is that mushrooms are one of the most scalable crops you can grow — they require minimal space, can be grown vertically, and have a fast turnaround time. Whether you’re looking to expand for personal use or considering selling your harvest, here’s how to grow bigger, better, and more efficiently.
—
1. Choosing the Right Mushroom Varieties for Scaling
When scaling up, it’s important to focus on mushroom varieties that are high-yield, low-maintenance, and have consistent market demand.
✅ Oyster Mushrooms – Fast-growing, high-yield, and one of the easiest varieties to scale. They’re also highly versatile for cooking, which makes them popular with chefs and home cooks alike.
✅ Shiitake Mushrooms – While they grow slower than oysters, shiitakes have a longer shelf life and a higher market value. Their earthy, umami flavor makes them a staple in gourmet cooking.
✅ Lion’s Mane Mushrooms – Increasingly popular for their health benefits and seafood-like flavor, lion’s mane has growing demand in both culinary and wellness markets.
✅ Pioppino Mushrooms – These are more delicate but command a premium price at farmers’ markets and specialty stores due to their rich, nutty flavor.
✅ Wine Cap Mushrooms – Known for their ease of outdoor cultivation, wine caps are ideal if you have access to outdoor beds or raised garden boxes.
✅ Pro Tip: Start by expanding the varieties you’ve already had success with — you’ll have a better understanding of their growing conditions and harvest cycles.
—
2. Increasing Yield with Better Growing Conditions
When scaling up, consistency is key. Small fluctuations in humidity or airflow that might not matter in a small batch can significantly impact larger-scale production.
Use Tiered Shelving: Maximize vertical space by using stackable shelves. This allows you to grow more mushrooms without increasing your footprint.
Automate Humidity and Temperature: Invest in a digital humidity and temperature controller to maintain stable growing conditions. Consistency leads to larger, healthier flushes.
Improve Airflow: Installing small fans or a HEPA-filtered air exchange system ensures even air circulation, reducing the risk of mold and CO₂ buildup.
Optimize Light Exposure: Set up LED grow lights with a timer to provide consistent, indirect light for 12 hours a day — this mimics natural light cycles and encourages more uniform growth.
✅ Pro Tip: Oyster mushrooms in particular respond well to increased airflow and humidity consistency — improving these two factors alone can increase your yield by 20–30%.
—
3. Expanding Substrate Capacity
More mushrooms mean more substrate. Scaling up your substrate production ensures you have a steady supply to match your increased growing space.
Use Larger Grow Bags: Switch from small grow bags to larger ones to increase the volume of mushrooms produced per bag.
Create a Sterilization Setup: For high-volume growing, using a pressure cooker or large steam sterilizer allows you to process more substrate at once.
Experiment with Substrate Mixes: While straw and hardwood sawdust are common choices, adding materials like soybean hulls or coffee grounds can increase the nutrient content and boost yields.
Recycle and Reuse: After harvesting, spent substrate can often be composted or reused for additional flushes — especially with oyster mushrooms and wine caps.
✅ Pro Tip: Mixing soybean hulls with hardwood sawdust creates a nutrient-rich substrate that shiitake and oyster mushrooms thrive on.
—
4. Managing a Continuous Growing Cycle
Instead of growing mushrooms in one large batch, stagger your growing cycles to create a continuous supply of fresh mushrooms.
Cycle Planning: Start new batches every 1–2 weeks to create a steady flow of mushrooms rather than a single large harvest.
Rotating Varieties: Grow faster-fruiting mushrooms (like oysters) alongside slower varieties (like shiitake) to maintain a balanced production schedule.
Harvest and Regrow: After harvesting, allow the substrate to rest and rehydrate before initiating a second flush. Many mushroom types can produce 2–3 flushes from a single substrate block.
✅ Pro Tip: Keeping detailed records of growing conditions, harvest dates, and yield amounts helps you fine-tune your cycles for maximum output.
—
5. Selling and Marketing Your Mushrooms
If you’re growing more mushrooms than you can eat, it might be time to turn your harvest into a side business. Specialty mushrooms command premium prices at farmers’ markets, restaurants, and direct-to-consumer sales channels.
Farmers’ Markets:
Offer tasting samples to engage potential customers — sautéed oyster mushrooms with garlic and herbs can quickly turn curious visitors into paying customers.
Bundle different mushroom types into mixed packs to increase sales and provide variety.
Direct to Restaurants:
High-end restaurants and farm-to-table chefs are always looking for fresh, local mushrooms. Focus on gourmet varieties like lion’s mane and pioppino, which are harder to source commercially.
Deliver mushrooms within 24 hours of harvesting to ensure peak freshness and flavor.
Subscription Boxes and CSAs (Community Supported Agriculture):
Offer a weekly or bi-weekly mushroom box featuring a mix of fresh and dried mushrooms.
Include recipe cards and cooking tips to add value and increase customer retention.
Online Sales:
Dehydrated mushrooms ship well and have a long shelf life, making them ideal for online sales.
Mushroom grow kits are another high-demand product — customers love the experience of growing their own mushrooms at home.
✅ Pro Tip: Oyster mushrooms are the most profitable for small-scale growers due to their quick turnaround and high yield per square foot.
—
6. Scaling Without Losing Quality
The biggest challenge when scaling up is maintaining the same quality that made your initial small batches successful. Consistency in environmental control, substrate preparation, and harvesting is key to maintaining flavor, texture, and appearance as you grow.
Monitor humidity and temperature daily.
Use sterilized tools and clean growing spaces to avoid contamination.
Stick to proven growing methods and introduce changes gradually to avoid disrupting production.
Invest in better equipment as you scale — a small misting system might work for a few bags, but larger-scale operations may require automated humidity control.
✅ Pro Tip: As you scale, focus on efficiency rather than speed — consistent, high-quality mushrooms will create a more reliable customer base and better long-term profits.
—
Turning Your Passion into a Thriving Operation
Scaling up your mushroom-growing operation takes planning and patience, but the payoff is worth it. Mushrooms are one of the most profitable crops per square foot, and their growing popularity in culinary and wellness markets means demand is unlikely to slow down. Whether you’re supplying local chefs, selling at farmers’ markets, or just increasing your personal harvest, scaling up allows you to take advantage of the fast-growing (literally) mushroom market while turning your hobby into a sustainable source of income.
Best Mushroom Grow Kits for Beginners
1. North Spore Mushroom Grow Kits
Product Types: Oyster, Lion’s Mane, Shiitake, and Pioppino grow kits
High-quality kits designed for beginners and experienced growers alike.
North Spore’s simple “mist and grow” process is great for beginners looking for an easy, foolproof setup.
—
2. Back to the Roots Organic Mushroom Growing Kit
Product Types: Organic oyster and shiitake grow kits
With over 10,000 positive reviews, this best seller with organic certification and eco-friendly packaging fits the bill for the health-conscious and environmentally aware.
—
3. Midwest Grow Kits Mushroom Starter Kit
Product Types: All-in-one mushroom grow kits (includes substrate, spores, and growing chambers)
Ideal for customers looking for a complete solution. Midwest Grow Kits offers detailed instructions, making it easy for first-timers to succeed.
For serious mushroom growers, these “all-in-one” convenience kits are ideal for people who want a hands-off, fail-proof growing experience.
—
4. Root Mushroom Farm Mini Mushroom Growing Kit
Product Types: Oyster and shiitake mushroom kits
These affordable and compact kits are great for budget-conscious beginners and those with limited space.
Easy to grow mushrooms on a countertop or windowsill — perfect for apartment dwellers, people new to growing mushrooms, or a a great gift option.
—
5. Spores 101 and Mushroom Spores Direct
Product Types: High-quality spore syringes for varieties like oyster, lion’s mane, shiitake, and exotic mushrooms.
Advanced growers will prefer these cost-effective kits for greater control over growing conditions and variety choices.
—
6. Gallboys Mushroom Grow Bags and Substrate Kits
Product Types: Pre-sterilized grow bags and substrate kits
Save time and increase growing success with these convenient pre-sterilized bags – ideal for those looking to customize their growing setup with specific spore varieties and DIY enthusiasts looking for greater control over the growing process.
Conclusion: Cultivate Your Own Mushroom Success
Growing mushrooms at home is more than just a fun hobby — it’s a gateway to fresh, flavorful food, greater self-sufficiency, and even a potential side income. From the moment you set up your first grow kit to the thrill of harvesting your own lion’s mane or oyster mushrooms, the process is both rewarding and surprisingly straightforward. By understanding the ideal growing conditions, selecting the right mushroom varieties, and fine-tuning your methods for humidity, light, and airflow, you can create a thriving mini-farm right in your own home — no backyard required.
The beauty of mushroom cultivation lies in its versatility. Whether you’re experimenting with gourmet recipes, drying mushrooms for long-term storage, or scaling up to sell at a local farmers’ market, the possibilities are endless. And as you gain confidence, you can explore more advanced growing techniques and higher-value mushrooms to expand both your harvest and your culinary repertoire.
So, why not give it a try? Start with an easy grow kit or a simple substrate mix, and let curiosity guide you. Before long, you’ll have a steady supply of fresh mushrooms at your fingertips — and a newfound appreciation for the fascinating world of fungi.