Do Seed Trays Need Drainage Holes And Saucers?
Seed trays are a great way to get an early start on your garden. Sprouting your seeds indoors is also a way to bring spring a little bit closer in those last weeks of winter. There are a variety of types of seed trays available. Which type you use depends on what type of seedling that you are attempting to grow.
Any type of seed tray that you use must have sufficient drainage holes and saucers. The holes keep water from getting trapped for a long period of time. The saucer underneath prevents dirty water from dripping where it shouldn’t and will also retain some of the moisture in the tray. This, in turn, allows the soil to remain moist.
Not all seed trays come with drainage holes, but most come with saucers. You can buy plastic trays from a nursery or even recycle some plastic or polystyrene packaging. Regardless of the method that you use, drainage is essential. Fortunately, you can add a little DIY to your trays to make them work correctly for you.
How to Make Your Seed Trays Drain Correctly
It’s simple, really. If there are no holes, make plenty of them on the bottom that is similar in size to that of a hole punch. Depending on the sturdiness and/or brittleness of the material, you can drive a nail into the bottom with a hammer. Or you may use a drill to pop some holes in there.
Sitting the tray on a ‘saucer’ is going to keep the area surrounding the tray clean but will allow the soil to ‘drink’ in the excess water, meaning less plant maintenance.
Varieties of Different Planting Containers
Seed trays are the most common planting method, but they are merely one of many ways people use to start their seedlings. These days many people are into recycling and have become very creative with the containers that they use, e.g., pudding cups, cardboard cones, anything that will hold moisture and produce a healthy plant. Here are a few of the more conventional options.
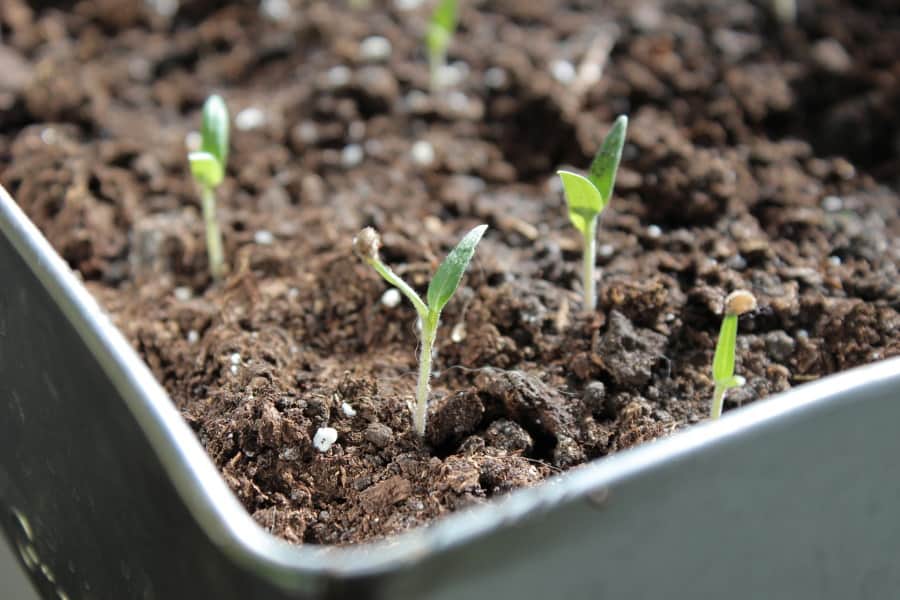
Seedling Starting Trays/Flats/Cells
A common seedling tray will offer cells or compartments set aside to be fitted with the soil and individual seedling. This unique system allows for a lot of plants to be grown into a small space.
Each of the flats bears drainage holes underneath and is accompanied by a tray. The tray is there to offer structure as a means of maintaining excess water and to keep things clean.
Planting from seedlings in trays such as this is popular and inexpensive to implement. There is only a minute amount of potting media required for each plant. It’s ideal if you have a garden, e.g., flowers or vegetables, or if you own a nursery or greenhouse and grow on a large scale.
We have an article on making your own seed starting flats with leftover scraps of palet lumber – including our seed starting soil recipe – here.
For a home environment, smaller level seedling starting methods may be a better choice.
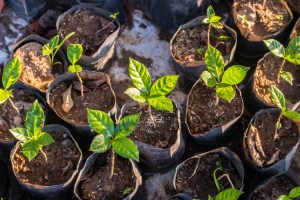
Individual Pots
Seedling trays are simply one method of taking a plant from seed to maturity. They’re common starters for those who grow regularly and on a larger scale. Another method for those who grow on a smaller basis is to use seedling pots.
Growing a seedling in its own individual pot is a simple, reliable way to start a plant. Opting for this technique allows the ability to custom choose which pot size and shape will best meet your specific needs.
As the plants grow, they can be spaced out to allow for better airflow. Irrigation is simple from the bottom, or they can be situated on a watering mat. These pots can be washed and recycled. The only downside is having a larger quantity of plants could become a chore to try to manage where the tray is more contained.
Salvage Pots
Typically, when you buy a new herb or a small seedling, they will come in their own tiny potting container with holes in the bottom for drainage. There are many people who toss them away. You should definitely hold onto these little gems.
Over time, you would be surprised at the variety of different sizes and shapes that accumulate and how handy they become. Any type of plastic lid would suffice as a saucer to take up the excess water and retain moisture for the soil.
How To Start Seedlings
Starting seedlings is an ideal way to begin gardening early in the season. If you have the right light and simple tools, its fairly easy to go from seedling to maturity.
Each plant is going to present its own unique needs. If you’re a beginner, it’s best to start with only a few variations.
It is noted that marigolds and tomatoes are considered to be easy, as are zinnia, basil, nasturtium, and coleus. If you like petunias, you may want to wait until you’re a bit more advanced as they are deemed to be a fussier type of seed.
- Know Your Timing. Having the seedlings prepared to go out when the weather becomes favorable is the ultimate goal. The first step is to read the packet which will tell you when to plant inside. There are certain varieties of seeds that are best suited to begin outdoors as they germinate too quickly to start inside. These packets will indicate ‘direct sow.’
- Choose Your Container. Seeds can be started in virtually any type of container that you choose, so long as the depth is 2-3” and there are drainage holes in the bottom. Some people like to use recyclables such as milk cartons, yogurt containers, or even paper cups. A majority of people commonly use trays that are made specifically for starting seeds.
- Trays are easy to fill, and consistent moisture is ensured with the simple watering system that is employed, not to mention the ease of portability.
- Prepare the Soil. The potting soil that you choose should be specific for growing seedlings. It should not be soil from the garden or recycled potting soil from houseplants. Begin with a sterile, fresh blend that will give you a disease-free, healthy seedling.
- Before putting the soil into each compartment, moisten the planting mix but not to the point that it is sopping wet. It should be crumbly but not gloppy. The compartments need to be packed firmly with any gaps eliminated.
- Most of these mixes are null of fertilizer, meaning the seedlings will need liquid fertilizer within a few weeks of germination throughout to transplant.
- Begin the planting process. The seed packet will provide the depth that the seed needs to be planted. Smaller seeds can generally be sprinkled directly on the surface, with the larger ones being buried.
- Use a mist sprayer, or a small watering can moisten the freshly planted seeds.
- Use a plastic dome or plastic wrap to cover the tray in an effort to speed up germination. This will keep the seedlings moist.
- At first sight of green, take the cover off.
- Water and Nourish. During the growth period, it’s important to mist the soil to keep it moist, but you don’t want it soggy. It’s ok to let it dry somewhat in between the water cycles.
- There should be air movement using a fan as disease prevention in the room with the seedlings. Read the directions for the liquid fertilizer and feed the seedlings as instructed.
- Light the Way. Seedlings require a great deal of light. If you choose to grow in a window, use one that offers a south-facing exposure. Rotation is important to prevent the plants from leaning towards the light. Without sufficient light, you will have leggy, weak plants.
- Grow lights need to be adjusted to where they are a few inches above the seedlings and need to be timed for 15 hours each day as seedling also require darkness in order to rest. As they grow, raise the height of the lights.
- Move Outside. Moving the seedlings outdoors is a gradual process which is called ‘hardening off.’ A week before they go in the garden, they should be put in a protected place outside that is partly shaded and away from any wind for a few hours. They should be brought in at night.
- Over the course of the week or ten days, expose them to more sun and wind and finally overnight. They are now ready to be placed in the garden.
Most seed-starting frustration doesn’t come from doing one thing “wrong.” It comes from changing too many variables at once. Consistency — in containers, watering habits, and timing — almost always matters more than chasing the perfect setup.
If seed starting has felt harder than it should, simplifying the process can help. I’ve found that relying on a small group of dependable tools removes a lot of unnecessary decisions and makes the learning curve gentler. I keep those listed here as a quiet reference.