Can You Grow Coffee in Greenhouses?
There’s nothing like a fresh cup of coffee in the morning. Have you ever dreamed of growing and making your own coffee right out of your greenhouse? While Americans are some of the world’s biggest coffee drinkers, almost all commercial coffee beans are grown and harvested overseas. Is it possible to grow your own in the states?
Can coffee grow in a greenhouse? Yes. Coffee plants are tropical and typically grow in warm, humid places, like the Caribbean or southeast Asia. The key is to mimic these conditions as closely as you can. A greenhouse helps with this immensely.
The process of growing coffee beans is definitely a gardening challenge. You’ll need to keep a tropical plant alive in a less than ideal climate for three or four years before you see your first coffee beans. However, when you get there, you’ll be rewarded with the freshest coffee you’ve ever had in your life.
Challenges in Growing Coffee
There are certainly easier crops to grow than coffee. Coffee plants require just the right conditions to thrive. While some varieties are hardier than others, it’s still important to ensure that you can provide an environment where your plant will thrive.
Coffee plants grow naturally in hot, humid climates, at high elevations. However, if you can adequately mimic these conditions, coffee plants are known to have been successfully grown as far north as Minnesota or Vermont. Let’s run through some things to take into consideration at the outset.
Humidity
Coffee plants originate from tropical areas with lots of moisture and humidity. If you want your coffee plant to grow and produce, you’ll need to get some moisture in the air. If you live in a humid area, great. You may not need to worry about this as much. Coffee plants grow best in seventy to eighty percent humidity but can tolerate as low as sixty percent.
If you spot the leaves of your plant starting to brown and fall off, this is almost certainly a humidity problem. One of the biggest advantages to growing inside a greenhouse is that you have the option to control the humidity. Investing in a humidifier, especially a system that will allow you to set a specific humidity level, can make a huge difference in the success of your plant.
Sun
Sunlight is an essential element for any plant. Coffee plants developed to grow on a rainforest floor. They aren’t built for direct sunlight. If you place your plant in the path of direct sunlight, it’s likely to end up with sunburnt leaves and may eventually wilt and die if the exposure is extreme enough.
Ensuring that you’ve got the right materials in your greenhouse can avoid any problems with sun entirely. You’ll want to avoid glass as this allow light to pass straight through. Materials that have a milky white appearance such as polycarbonate. Polyethylene or fiberglass will diffuse the light, providing the plants inside with essential nutrients but avoiding the harming aspects of sun exposure. In this way, your greenhouse can serve a similar function for your coffee plants as a rainforest canopy.
Temperature
Coffee plants hail from warmer climates so they prefer to be kept warmer than room temperature. You should aim for 70–80 degrees. Too cold and their growth will be stunted, too hot, and they can wilt or burn. They can endure some temperature swings but keep them in their ideal range as much as possible and don’t ever let them freeze.
If you’re planning on growing them outside during the warmer months, be sure to bring them in well before the first frost.
Size
A lot of people don’t realize that coffee plants are trees and can grow as tall as 10 feet. However, if you prune properly, you can encourage the plant to grow into a full and vigorous bush. For indoor growing, you’re going to want to aim for three to four feet tall. The key is to trim and prune the tree as it begins growing in earnest.
How to Grow Coffee in Greenhouses
Now let’s keep in mind that it’s going to be at least three years from planting until you collect and taste those first coffee beans. This is a multi-stage process. You’ll need to undertake each process properly and have lots of patience. However, once you’ve arrived, you’ll have an attractive greenhouse plant and steady supply of delicious, home-roasted coffee beans.
Planting
First step is to get seeds in the ground. If you’re willing to spend a little more, it’s also possible to buy or order seedlings. If you got this route, just skip ahead a few steps.
- Get the right bean – If you think you can grab a bean out of your coffee maker and toss it in the ground, you’re going to be disappointed. Those beans have been roasted and are effectively dead. You need a fresh, living, green bean. Check your local roaster or an online retailer.
- Soak the seeds – Coffee seeds have a limited germination window. This means that you want to plant the seeds as soon as you get them. Cover the seeds entirely in water and leave them to soak for 24 hours. This is going to kickstart the germination process, making the seeds much more likely to take root.
- Sow the seeds – You want to plant your coffee beans in pH-neutral soil. This means that regular potting mix should work great. Push the seeds about an inch and a half into the soil and then cover with loose potting mix.
- Water – Immediately after planting, give the soil a nice soak. Try to use a shower or mist attachment to avoid the seeds getting churned around in the soil. You’re going to want to keep the soil damp but well-drained and avoid drowning the seeds. If you can see standing water, you’re overdoing it.
- Fertilize – For the first few months, as the plant builds out its roots system, it’s going to be quite hungry for nutrients. Provide a fertilizer treatment immediately after planting and then at least monthly afterwards. Coffee is not real picky on fertilizer type – , so you can just use a diluted version of your favorite orchid/plant fertilizer.
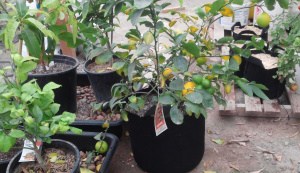
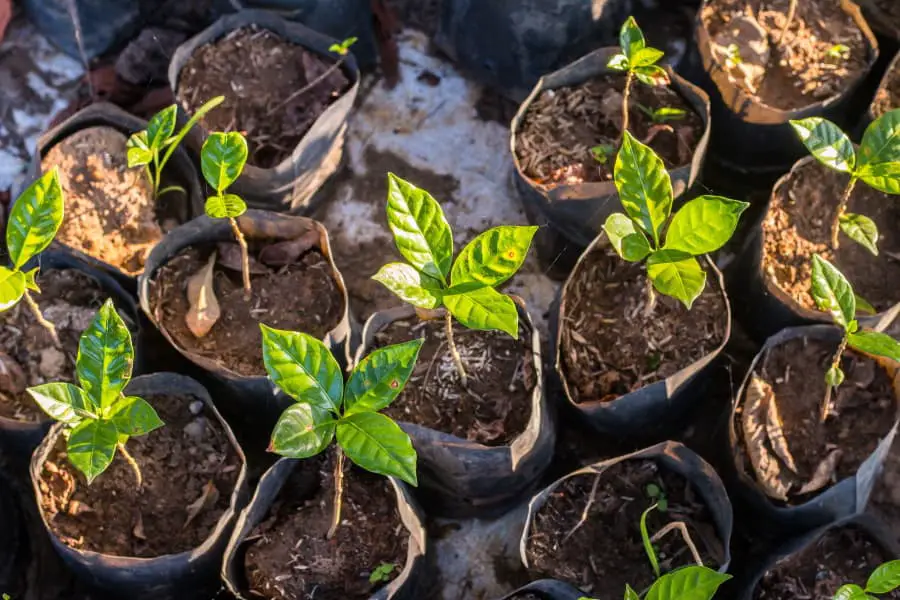
- Wait for sprouts – Now you’ll have to be patient. It will take 2–6 months for sprouts to appear after planting. Keep the soil damp and fertilized the entire time. If you’re planting in a pot, then you’ll want to repot once you see sprouts.
- Prune – Once the plant reaches 2–3 feet, you’ll want to start pruning to encourage more of a bush structure. Snip off the tips of the branches as this encourages lateral branching, which will push the plant out instead of up.
Maintaining
Now that you’ve got the coffee tree planted, you need to keep it alive and in good health for at least three years before you ever see any coffee beans. The question is, how do you best do this? Here are a few tips to keep in mind as you care for your tree.
- Water with warm water – Remember, you’re trying to mimic the conditions of the rainforest. Cold water can shock the plant. Give it what it’s used to, and you’ll be rewarded.
- Repot as needed – If you’re growing your coffee plants in pots, you’ll need to repot regularly over the first year or two as the plants get bigger in size. Allowing the plant to continue to grow in a pot that’s too small can cause the roots to swirl, growth to stunt, or the premature death of your coffee tree.
- Pruning – We mentioned in the last section that you’ll want to keep the branches of the pant well-pruned to keep it more bush-like. You’ll also want to chop the tree all the way back to a stump ever few years. It can be borderline traumatic to cut down a plant that you’ve worked so hard to grow and foster, but it will snap back to size and this will keep it producing for you.
- Watch for flowers – White flowers are the sign that coffee beans are on the way. The flowering phase lasts about a month and will fill your greenhouse with an incredible, sweet aroma. Each of these flowers will become a coffee cherry, five to seven months later.
Harvesting and Processing
Once you see the first fruits begin to ripen, it’s time to start making your first cup of joe. Don’t get too excited just yet. There’s still quite a bit of processing to go through before the beans are ready to brew. Allowing for drying, you likely won’t get that cup for a few days yet.
Picking
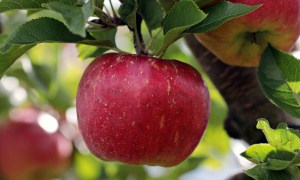
Coffee fruit grows green and turns a deep red as it ripens. The small, fully ripened fruits strongly resemble cherries and are sometimes called “coffee cherries.” The fruit grows in bunches on the tree at about eye level if you’ve been properly pruning. You’ll want a picker’s basket or a simple bucket to harvest and gather the fruits of your long labor.
While it can be tempting to simply pull everything off the branch at once, you want to be careful to get only fully ripened fruits. Fruit that is still green on the vine will have an unpleasant sour flavor. Even just a few mixed into your batch can significantly affect the flavor. Even being careful to avoid unripened fruits, it should only take you about 15–20 minutes to gather enough for a pot of coffee.
Milling
By now, I’m sure you’ve noticed that what you’ve gathered in no way resembles a coffee bean or a bean of any sort. You’ll need to get to the seed by stripping away the flesh of the fruit around it. While it’s possible to do this with a knife, it’ll take forever. If you’re planning on harvesting with any regularity, you’re going to want to invest in a coffee mill.
A coffee mill is a simple contraption that uses a crank, a rotating feeder, and a peeling drum to remove the fruit from the seeds. Place your harvest into the mill and crank the wheel until you’ve milled all the fruit. You should be left with some white or pale brown seeds.
Drying
The seeds will still be fairly soft and squishy after being removed from the fruit. To get them into a state where you can further work them. The best way to dry the seeds is to leave them out in the sun for several days. Spread the seeds evenly on a baking sheet and leave them exposed to direct sun for three to four days. Once finished, the beans will be completely dry and hard.
If you’re impatient, it may be possible to dry the seeds in the oven. If you attempt this method, be careful not to overbake the beans and check on them regularly.
Parchment Removal
After drying, you’ll notice that the bean is covered in a white, papery coating. This is known as the “parchment,” and you don’t want to eat or drink it, so it needs to be removed. An easy way to remove the parchment is to place the beans in a food processor and give it a quick pulse or two.
Watch what you’re doing. You’re not trying to grind the beans just yet. You want to more or less preserve the structural integrity of the beans themselves. Your goal should just be to knock away that outer layer.
With the parchment stripped away, you can use a hair dryer to blow off the thin, papery parchment bits, while leaving the beans in a tray or bowl.
What you’ll be left with after removing the parchment is known as the “green bean.” In spite of the name, the green bean is more of a dark brown in color. You’ll also notice a waxy layer coating the green bean. This waxy layer is known as the “silver skin,” and it will peel away during the roasting process.
Roasting
Now that you’ve stripped the seed down to the green bean. It’s time to roast the coffee beans. This is where you’ll get to add some incredible flavor to the beans, and you’ll start to finally smell fresh coffee filling your kitchen.
Heat a pan to the point where a droplet of water will dance on the surface. Place the beans in the pan without any oil or water. You want to keep the beans moving at all times. You want a nice, even roast without any burnt spots. Use a spoon to mix the beans around and shake the pan to spread them out.
After just a few minutes, you should see the beans starting to turn a darker brown and the silver skin chaffing off as it heats. After awhile longer, you’ll start to hear the “first crack.” The beans will begin to make popping and snapping sounds, similar to popping popcorn. Eventually, the beans will reach a deep brown color and should resemble something you’d recognize as a coffee bean.
Pour the roasted beans into a colander. Shaking the coffee beans around in the colander should allow any excess silver skin to fall away through the holes. Leaves the beans in the colander to cool before grinding.
Grinding
Place the roasted seeds back into the food processor or into a coffee grinder, if you’ve got one. Grind the beans until you’ve got a fine powder.
Brewing
From here, it’s going to feel pretty familiar. Boil some water and pour the hot water into coffee powder. You may want to use a filter to remove any large chunks. This way, you can enjoy a smooth cup of coffee. Remove the filter and take your first sip of a homegrown beverage years in the making. It won’t be your last cup; you’ll be heading back to harvest again in no time.
Types of Coffee Bean
There are dozens of coffee bean varieties out there. However, when it comes to consumption, two varieties stand out far and above the rest. These are Arabica and Robusta. Odds are that every cup of coffee you’ve ever had in your life has been one of these. What are the differences, and which should you be growing?
Arabica
Arabica beans are sweeter, softer, and more acidic. Arabica beans are generally considered higher quality. They cost more and are used in finer coffee beverages. Part of the reason why they’re more expensive is that they’re more difficult to grow. An Arabica coffee plant will require you to adhere more strictly to the temperature and humidity guidelines we discussed earlier in the article.
Robusta
Robusta has a harsher, earthier flavor. They contain much more caffeine than Arabicas and are used in cheaper coffee mixes. Robusta plants are significantly more robust and easier to grow at lower altitudes and colder climates. Robusta plants also produce more than Arabica plants.
So go for it and in a few years you’ll be relishing in the satisfaction of having grown and brewed your very own coffee!