
Why You Don’t Need a Hole in the Ground to Store Your Harvest
Ever tried to dig a root cellar in your backyard, only to hit bedrock, water, or a lease agreement that says “no way”? Yeah, same here. Not everyone’s living on five acres with perfect drainage and a shovel that never hits something unexpected.
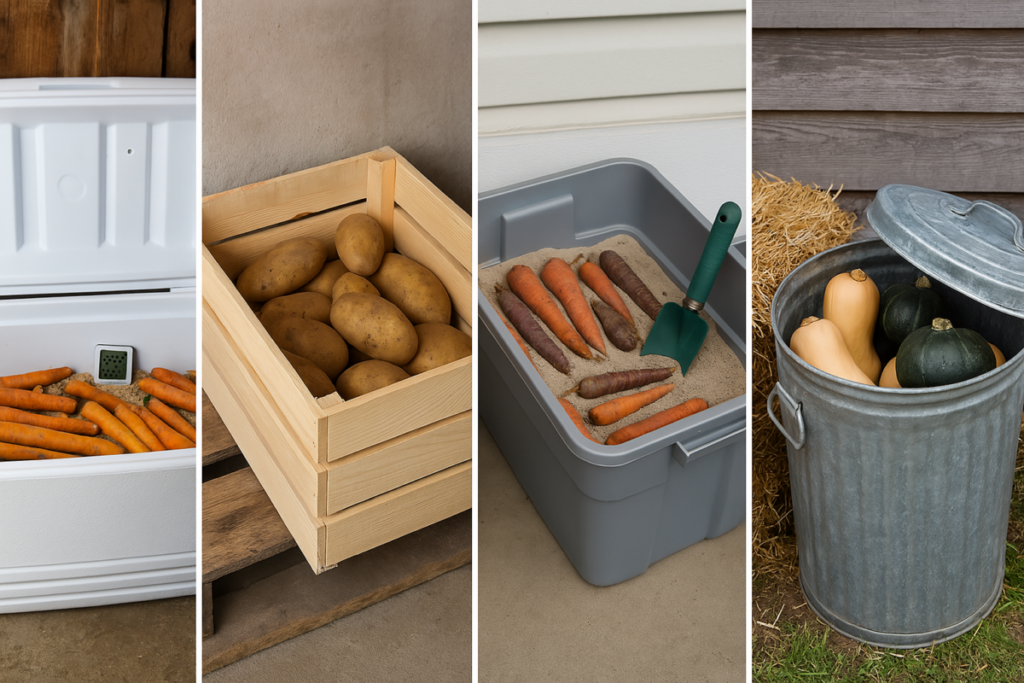
But here’s the good news: you don’t need a traditional root cellar to keep your vegetables fresh all winter. There are some surprisingly simple and affordable ways to store your harvest—from unplugged chest freezers to straw bale cubes—and you can do it without digging a single hole. Whether you’re in a rental, dealing with high water tables, or just trying to keep things low-maintenance, there’s a no-dig solution that can still give you that old-school food security feel. Why You Don’t Need a Hole in the Ground to Store Your Harvest
Ever tried to dig a root cellar in your backyard, only to hit bedrock, water, or a lease agreement that says “no way”? Yeah, same here. Not everyone’s living on five acres with perfect drainage and a shovel that never hits something unexpected.
But here’s the good news: you don’t need a traditional root cellar to keep your vegetables fresh all winter.There are some surprisingly simple and affordable ways to store your harvest—from unplugged chest freezers to straw bale cubes—and you can do it without digging a single hole. Whether you’re in a rental, dealing with high water tables, or just trying to keep things low-maintenance, there’s a no-dig solution that can still give you that old-school food security feel.
These DIY root cellar alternatives are perfect for:
- Urban homesteaders with limited space
- Gardeners in wet or rocky soil zones
- Folks wanting to extend produce shelf-life naturally
- Anyone who’d rather not pick up a shovel unless they have to
And don’t worry—we’re keeping this low on fancy tools and high on practicality. Every method we’ll go over can be done with stuff you probably already have, or can grab at your local hardware store. Most can be built in a weekend, and a few in an afternoon. Before we dig into (well, not literally) the options, it helps to know what makes for good root storage in the first place—cool, dark, and just the right amount of damp. Let’s break that down first, and then we’ll get to the fun stuff.
What Makes Good Root Storage (Even Without a Cellar)
You don’t need a bunker or a hill to stash your veggies—you just need the right conditions. Whether it’s a bucket in the garage or a cooler in the shed, the key is to mimic what a traditional root cellar does: keep your produce cool, dark, humid, and stable.
Let’s break down what that really means.
The Big Three: Temp, Humidity, and Darkness
Bonus Tip: A little airflow goes a long way. You don’t want things to get stale—or worse, moldy.
Not All Veggies Like the Same Setup
Some produce needs more moisture, while others like it drier. Here’s a quick table to help guide your setup based on what you’re storing.
If you’re not sure how to keep track of all this, I recommend getting a digital thermometer and hygrometer combo like the ThermoPro TP50 (aff link). It’s simple, accurate, and super handy when you’re monitoring DIY storage spaces.
Where to Set Up Your Storage Area
You don’t have to go far. Try checking:
- An unheated basement corner
- The back of a shaded shed
- A covered back porch or crawlspace
- Even an insulated garage cabinet
- Or anywhere temps stay cool and don’t freeze solid
Some folks even use buried coolers or old unplugged fridges (we’ll get to those in a sec). The goal is to find or build a microclimate that checks those three boxes: cool, dark, and humid.And if your space gets too dry? No big deal. A simple tray of water or a damp towel can nudge humidity in the right direction. You can also throw in a couple humidity packs like these Boveda 69% RH packs (aff link) to help keep the balance steady.
10 DIY Root Cellar Alternatives That Don’t Require Digging
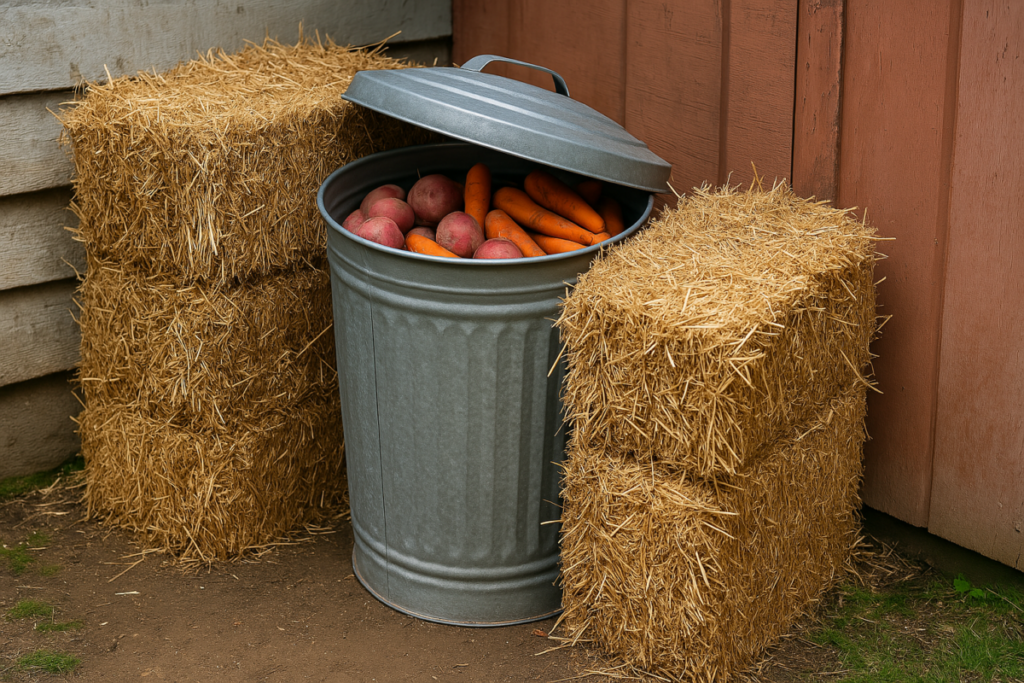
#1. The Trash Can Root Cellar (Above Ground Hack)
This one’s a classic. A heavy-duty trash can with a tight lid makes a surprisingly good mini-cellar, especially when you don’t want to dig.
How it works:
- Use a galvanized or thick plastic can (avoid flimsy ones that crack in the cold).
- Fill the bottom with a few inches of sand or straw.
- Load in your root veggies in breathable bags or layers.
- Tuck the can into a shady spot outdoors and insulate it with straw bales, leaves, or even snow.
- If it’s exposed to rain or snow, cover it with a tarp.
Pro Tip: Elevate the base slightly with bricks or wood planks to improve drainage and prevent freezing to the ground.
Best for: carrots, beets, potatoes, turnips
Ideal spot: north side of your shed or house
Recommended gear:
- Rubbermaid Brute 32-Gallon Trash Can – sturdy, weather-resistant (aff link)
- Straw bales for insulation – available at garden centers or Tractor Supply
#2. The Basement or Crawl Space Pantry Hack
If you’ve got a cool corner in your basement or even a semi-insulated crawl space, you can turn it into a root storage zone with just a few tweaks.
Steps:
- Choose a north-facing wall or interior spot that stays cool year-round.
- Add a shelving unit or stackable crates for produce.
- Line the area with thick cardboard or rigid foam insulation panels.
- Use an indoor hygrometer (aff link) to track moisture. Add a tray of water if it’s too dry.
- Keep it dark—throw a blanket over any open bins or glass doors to block light.
Works well for: potatoes, squash, garlic, onions
Caution: Make sure there’s good air movement and no standing moisture to avoid mold.
Quick Tip: Toss in a few cedar blocks or natural pest repellents (aff link) to keep mice or bugs out—especially if you’re near a crawl space.
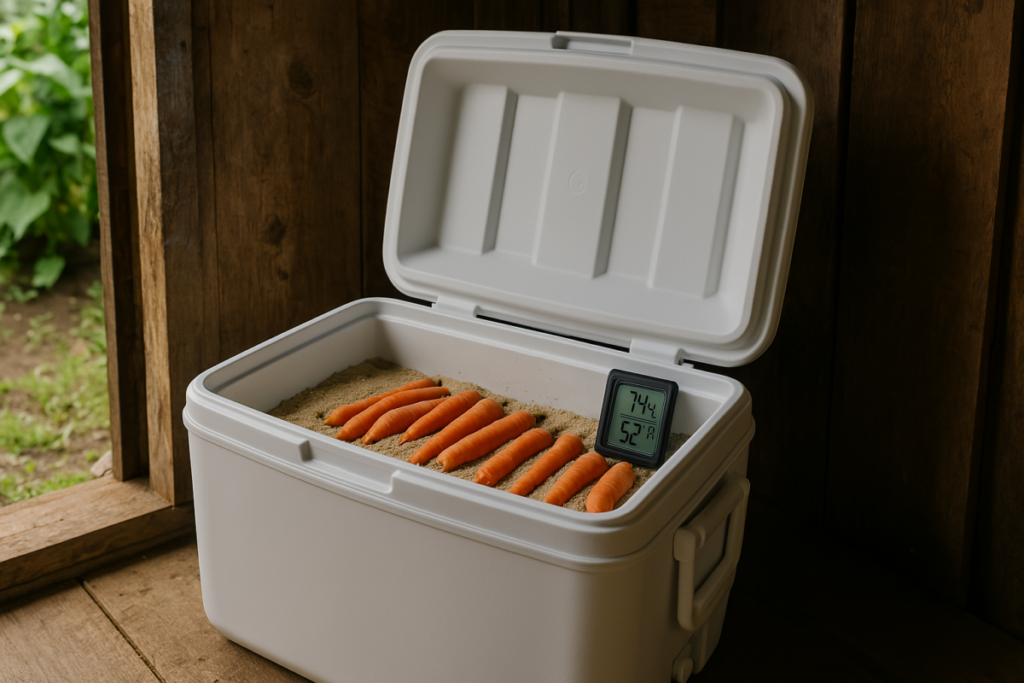
#3. Insulated Coolers in a Shed or Garage
This is one of the easiest and cheapest options—especially if you’ve already got an old cooler or two in the garage. Big coolers are well-insulated and protect against temperature swings.
How to use it:
- Clean the inside thoroughly and add a few inches of sand, sawdust, or damp straw.
- Layer in your veggies, then close the lid tight.
- Store the cooler in a spot that stays under 50°F but above freezing.
- If needed, cover the cooler with blankets or hay for extra insulation.
Best for: carrots, parsnips, beets, radishes
Bonus: You can easily move them around or bring them indoors during cold snaps.
Recommended cooler:
- Coleman 100-Quart Xtreme 5-Day Cooler – huge capacity, solid insulation (aff link)
#4. The Unplugged Chest Freezer Method
Have an old chest freezer that doesn’t run anymore? Don’t toss it—turn it into a rodent-proof, weather-ready root cellar.
These are built for insulation, and the seal on the lid keeps humidity stable. Plus, they’re roomy, stackable, and airtight.
Here’s how to set it up:
- Unplug and clean it thoroughly.
- Drill a couple of small air holes in the back or side (use a screen to keep pests out).
- Layer the inside with damp sawdust, straw, or storage sand.
- Add your produce in breathable bags, baskets, or loosely packed bins.
- Set a mini hygrometer inside to monitor moisture.
Best for: carrots, potatoes, apples, turnips
Keep it in: a shaded porch, garage, shed, or even outdoors if covered
Bonus: If you’re placing it outside, wrap it in a tarp or old blanket to help stabilize temperature and block snow or rain.
Recommended tools:
- Old/freebie chest freezer – check Facebook Marketplace or Craigslist
- Wire mesh vent covers – for rodent-proof air holes (aff link)
#5. Indoor Sand-Filled Storage Boxes
Think of this as a modern twist on the old root cellar bins—but without the hole in the ground.
You can store root crops for months in sand or sawdust inside plastic totes or wooden crates, and keep them tucked away in a cool closet, mudroom, or garage.
How to do it:
- Choose a lidded bin or sturdy wood crate.
- Fill the bottom with a few inches of damp sand (not wet—just enough to clump).
- Nest your root veggies in layers, making sure they’re not touching.
- Cover each layer completely with more sand or sawdust.
- Store in a cool, dark place between 35–50°F.
Great for: carrots, parsnips, beets, radishes
Avoid storing: potatoes (they’ll rot in high humidity)
Recommended materials:
- Sterilite 30-Gallon Latching Storage Tote – roomy and airtight (aff link)
- Washed Play Sand – cheap and easy to find
#6. The Garage Corner Root Storage Closet
If your garage stays cool (but not freezing), it’s prime real estate for a makeshift root pantry. A simple shelving unit or closet conversion can do the trick.
Here’s how to build one:
- Use a tall metal or wooden shelving unit.
- Insulate the back and sides with foam board or cardboard.
- Line shelves with baskets, paper bags, or crates.
- Add a small vent or prop open the door slightly for airflow.
- Toss in a digital thermometer/hygrometer and rotate veggies regularly.
Store separately: onions and potatoes (they’ll spoil each other)
Pro tip: Want to go next-level? Add a basic closet door, some magnetic weather stripping, and blackout curtains to keep it dark and stable.
Recommended gear:
- 4-Shelf Storage Rack by Honey-Can-Do – fits tight garage corners (aff link)
- Eva-Dry Wireless Mini Dehumidifier – for climate control (aff link)
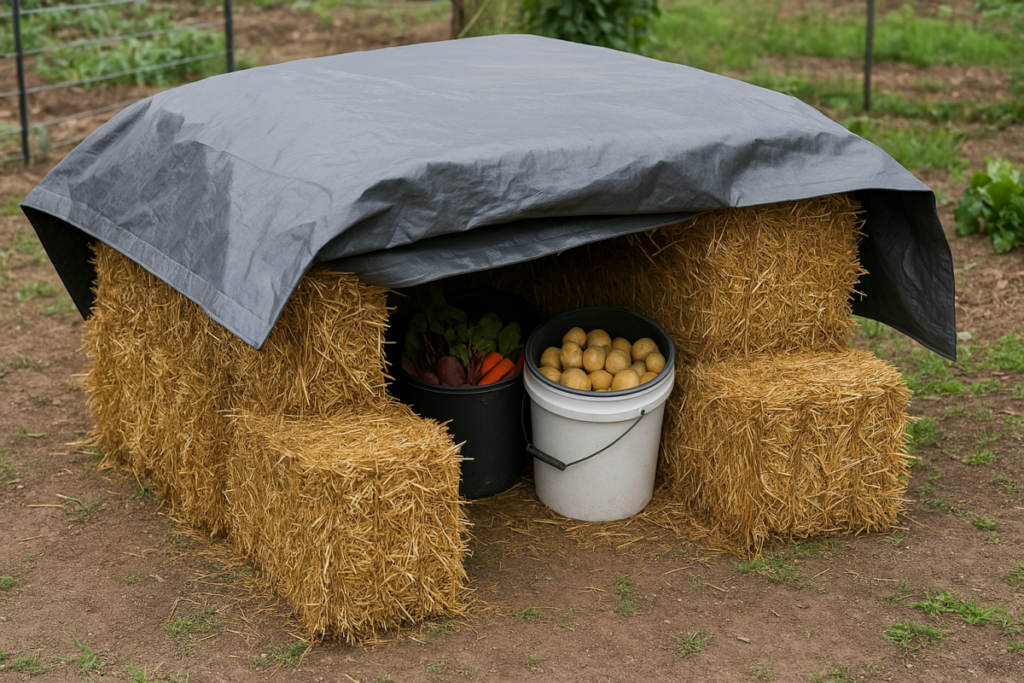
#7. Straw Bale Surface Pit (No-Dig Field Option)
Don’t want anything fancy? Try this super old-school, highly effective straw bale method. No digging. No tools. Just straw, a tarp, and a little know-how.
How it works:
- Place a few straw bales on the ground in a square (leave the center open).
- Fill the center with produce—use 5-gallon buckets or breathable sacks.
- Cover the top with more straw, then secure a tarp over the whole thing.
- Anchor with rocks or bricks to hold it down.
Great for: potatoes, apples, beets, squash
Best for: rural or semi-rural backyards with some yard space
Important: Elevate buckets on boards or bricks if your ground gets soggy.
Recommended supplies:
- Straw Bales (check Tractor Supply or local farms)
- Heavy Duty All-Weather Tarp – UV resistant and durable (aff link)
#8. Food Storage Trench (No-Dig Imitation)
Okay, this one sounds like digging—but you’re not really going underground. Think of it more like a disguised stash on the surface.
How it’s done:
- Use a row of 5-gallon food-safe buckets with lids.
- Fill them with veggies, layering in straw or sand for moisture control.
- Lay the buckets on the ground in a shallow indentation (not a deep trench).
- Cover with thick straw, old blankets, and a waterproof tarp.
- Weight everything down with boards, bricks, or logs.
This setup blends into the landscape and keeps temps surprisingly stable, especially with good snow insulation up top.
Best for: root vegetables, cabbage, hardy apples
Not ideal for: rodents—make sure those lids seal tight!
Recommended gear:
- Food-Grade 5-Gallon Buckets with Gamma Seal Lids – airtight, stackable (aff link)
- Outdoor-grade tarp – same one used in #7
#9. Earthbag or Cob Storage Box
This one’s for the DIY lovers out there. Building a small, above-ground box from earthbags or cob creates a naturally insulated “mini-cellar.” No electricity, no plastic, no problem.
Here’s the basic idea:
- Create a box or small room using earthbags (or cob if you’re experienced).
- Leave ventilation at the top and bottom for airflow.
- Add shelves or stacked crates inside.
- Roof it with corrugated metal or wood, and seal any gaps to keep it weatherproof.
- Works best in a shaded area with good drainage.
Bonus: It blends right into a permaculture-style garden and looks rustic in the best way.
Great for: any long-storage veggie that likes steady, earthy conditions
Takes more effort, but lasts years with no maintenance.
Useful resources:
- Learn about cob building here
- Polypropylene Earthbags – long-lasting and weather-resistant (aff link)
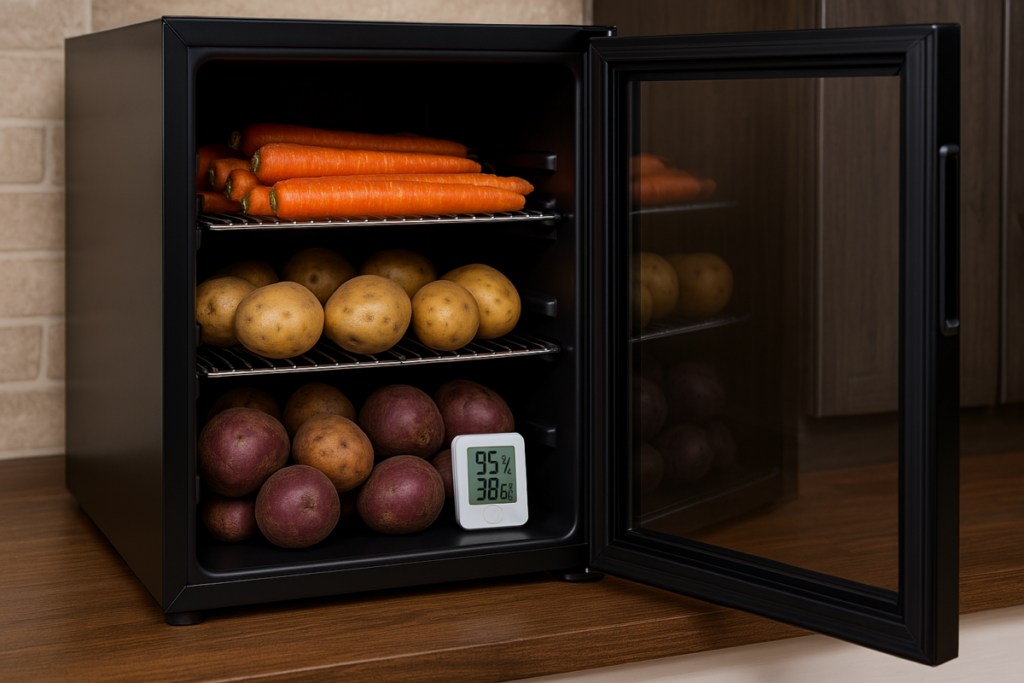
#10. Modified Wine or Beverage Fridge
This is a great option for renters, apartment homesteaders, or folks with no outdoor space. Small wine coolers or beverage fridges let you control temperature just enough to mimic a root cellar on a shelf.
Setup is simple:
- Set the fridge to 40–50°F
- Use breathable bins or mesh drawers
- Add a small water tray or sponge for humidity
- Keep it in a cool room (like a basement or back closet) to reduce energy use
No need for digging, dirt, or insulation—just plug and go.
Best for: garlic, apples, carrots, radishes, onions
Avoid: high-moisture crops that need 90%+ humidity
Recommended appliance:
- Wine Enthusiast 12-Bottle Touchscreen Cooler – compact, quiet, and temp-stable (aff link)
Optional add-ons:
- Small humidity trays
- Stackable fridge bins for produce separation
Bonus Tips for Root Storage Success
No matter which root cellar alternative you choose, there are a few simple tricks that’ll make your storage last longer, stay safer, and save you from a mushy surprise come January.
1. Monitor Temps & Humidity Regularly
Even if your setup feels cool and damp, don’t just guess—track it. A simple digital thermometer-hygrometer combo (aff link) lets you know what’s really going on inside your bin, box, or shed.
Ideal range:
- Temp: 32–50°F
- Humidity: 85–95% for most root crops
- For drier storage like squash and onions, stick closer to 60–70% humidity.
2. Watch for Mold, Rot, and Pests
Check your stash every few weeks. If anything feels squishy, smells off, or starts sprouting, pull it and compost it before it spoils the rest.
And keep an eye out for signs of critters—especially in garages, sheds, and straw setups.
Pest prevention tips:
- Use wire mesh screens on any vents
- Store food in sealed breathable bags or plastic bins with snap lids
- Toss in a few natural cedar blocks (aff link) to deter bugs
3. Separate Produce Properly
Not all veggies play nice together. Some give off ethylene gas (like apples) that speed up ripening—and rotting—for everything else.
Keep these apart:
- Apples + potatoes
- Onions + anything
- Garlic + damp crops (like carrots or beets)
4. Rotate Often—Use Oldest First
Use the FIFO method (First In, First Out). That means the first veggies you stored should be the first ones you eat.
Label bins with the date you packed them and check for signs of aging regularly.
5. Don’t Overpack the Space
It’s tempting to fill every square inch, but airflow is your friend. Give your veggies a little breathing room—literally—and they’ll last longer.
Final Thoughts: No Cellar? No Problem.
You don’t need to own land or dig a pit to store your harvest like the old-timers did. With a few clever workarounds, some basic supplies, and a little observation, you can keep your food fresh for months—no backhoe required.
Whether you’re tucking beets into a bin of sand in the basement, hiding potatoes in a straw-packed trash can outside, or stashing apples in a wine cooler, the key is the same: cool, dark, and a touch of humidity.
And here’s the thing—it doesn’t have to be perfect. Start small. Try one method this season. Tweak it. Learn what works best in your space and climate. The more you experiment, the better you’ll get.
This is how real homesteading happens—not in one big Pinterest-perfect build, but one smart hack at a time. So go ahead. Pick one method and give it a shot. Your carrots will thank you come February.
Frequently Asked Questions About Root Cellar Alternatives
What can I use instead of a root cellar?
If you don’t have a root cellar, you can use a variety of simple alternatives like:
- Unplugged chest freezers
- Insulated coolers stored in sheds
- Sand-filled bins in a basement
- Trash cans insulated with straw
- Wine or beverage fridges set to root-friendly temperatures
The key is to recreate the ideal root storage conditions: cool (32–50°F), dark, and humid.
How can I store vegetables without digging a hole?
You can store vegetables above ground using bins, totes, and insulated containers. Place them in unheated garages, shady porches, or even a closet with good airflow. No digging required—just control the temperature and humidity, and keep the space dark.
Using 5-gallon buckets with lids, or building a straw bale enclosure on the surface are two easy ways to avoid digging altogether.
What is the cheapest alternative to a root cellar?
One of the cheapest root cellar alternatives is a plastic tote filled with damp sand, stored in a cool basement or crawl space. Pair it with a low-cost thermometer/hygrometer (aff link) to keep an eye on the environment, and you’re good to go for under $30.
Another low-cost favorite: a straw-insulated trash can placed outside near a shady wall.
Can I store vegetables in my garage over winter?
Yes—as long as your garage stays between 32–50°F and doesn’t freeze solid, it’s a great place to store root veggies like potatoes, carrots, and squash. Just use insulated containers like coolers, sealed bins, or an old freezer to buffer against temperature swings.
Be sure to monitor humidity and protect from pests with tight-sealing lids and rodent-proof barriers.
Which vegetables store best without refrigeration or a cellar?
These vegetables hold up best in DIY storage setups:
- Carrots (in sand or sawdust)
- Beets and parsnips (in crates or bins)
- Potatoes (in breathable bags or bins)
- Winter squash (in a dry, cool space)
- Cabbage (wrapped in newspaper or hanging)
All of them can last 2 to 6 months or more if stored properly, without needing a fridge or traditional root cellar.